
 This is a short post but an important one... announcing a new feature on the Kyle William website: the VIDEO channel! Videos will be added over time, focusing on knitting techniques, hints & tips, and should be helpful when attempting a new technique or taking the first steps to learn how to knit. Techniques featured in this series are based on the right-handed English (or throwing) style knitting, where for the most part the working yarn is held in the right hand.
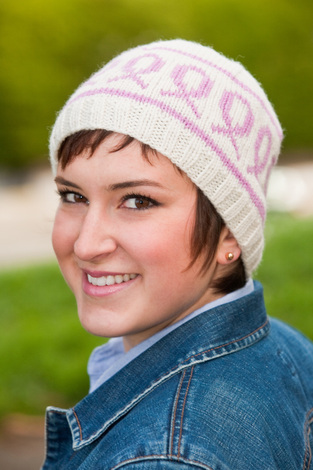
Click the VIDEO link at the top of the site to be directed to the page showing the various videos. Have a particular technique you'd like demonstrated? Send an EMAIL. Like what you see? click the "like" facebook button or share this post on twitter with your friends. Thanks! 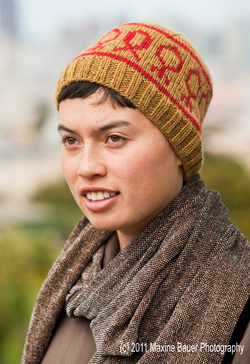 I knit for many reasons. I knit because it's creative, relaxing, fun, inspiring... I have discovered through my knitting that it is also a great way to start conversations. When I knit in public, people seem curious about what I'm making; they ask about the techniques, the patterns, the yarn... This is part of the reasoning behind my series of patterns that are designed to raise awareness of different issues. This pattern, CURE, features a "virus" motif, one red ribbon, and was created to encourage HIV/AIDS awareness. Beyond the knitter gaining access to the included information sheets about the virus, transmission, testing and various online resources, I hope this information is shared with others while the project is being knit, or perhaps the fact sheets are included with the hat as a gift to someone. Being able to share facts and resources is one of the greatest gifts we can offer our communities! In addition to these wonderful benefits, 100% of the net proceeds from the sale of this pattern are donated to Project Open Hand; a non-profit organization offering “meals with love” to people living with HIV/AIDS and other serious illnesses and to seniors in San Francisco and Alameda Counties since 1985. Learn more at www.openhand.org.  Following this pattern, it’s easy to create a custom hat supporting HIV/AIDS awareness! Knit one for yourself, make another for a friend or charity! Share the knowledge you gain with those you love to help raise awareness about the virus and how it is transmitted, and feel good about your purchase; knowing that you're helping Project Open Hand do the wonderful work they've been doing for over 25 years! 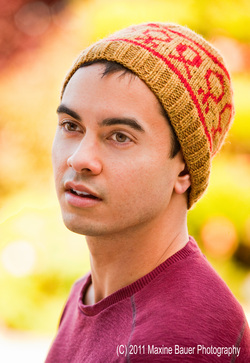 If you're interested in knitting the hat, click the "buy now" button below and complete your purchase for an instant download. Another way to show support? Click the buttons at the bottom of this post to share this post with your friends on facebook or twitter. Encourage your knitting group to each purchase a copy of the pattern and do a knit-a-long. Thank you for your support!!  100% of net proceeds from CAUSE hat pattern donated to Living Beyond Breast Cancer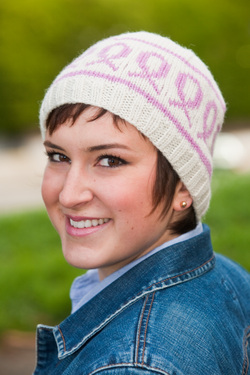 As an additional note, the other pattern designed to raise awareness, CAUSE, benefits Living Beyond Breast Cancer. 100% of the net proceeds from the sale of this pattern go to an amazing nonprofit in PA. Founded in 1991, Living Beyond Breast Cancer offers specialized programs and services for the newly diagnosed, young women, women with advanced breast cancer, women at high risk for developing the disease, African-American and Latina women as well as programs for caregivers and healthcare professionals to help them better meet the needs of women affected by breast cancer. Learn more at www.LBBC.org. To purchase this pattern, click the "buy now" button. Thanks for helping to spread awareness of these important issues while helping me to raise money for these worthwhile organizations.  What fun this project is! With a few simple household ingredients, you can dye yarn a beautiful color! The first time I heard of this technique was scribbled in the margines of an old natural dyeing book another artist had left in one of my classrooms. Intrigued, I jotted down the notes and went hunting and gathering in my neighborhood for the required materials. Download a complete tutorial on the process by clicking the link at the bottom of this post. You'll notice that it doesn't take much to do this experiment! It also doesn't require fancy yarn... any 100% wool yarn should work quite well. The first part of the project is to gather the materials necessary to make the solution. 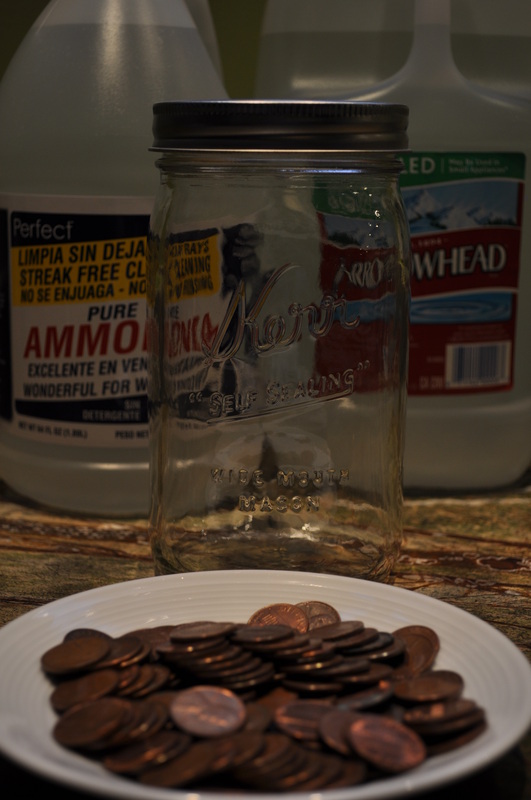 Why pre-1981 copper pennies? It has to do with the copper content. According to Wickipedia, (which is always accurate, right??) the copper content of pennies before 1981 is around 5%, and from the varous websites I researched for the recipe, they all specify pre-1982 or pre-1981 pennies. Years Material 1793–1857 100% copper 1857–1864 88% copper, 12% nickel (also known as NS-12) 1864–1942 bronze (95% copper, 5% tin and zinc) 1946–1962 bronze (95% copper, 5% tin and zinc) 1943 zinc-coated steel (also known as steel penny) 1944–1946 brass (95% copper, 5% zinc) 1962–1981 brass (95% copper, 5% zinc) 1974 Experimental aluminum variety (test strikes only, not circulated) 1982–present* 97.5% zinc core, 2.5% copper plating Where do you get 100 pre-1981 pennies? The bank, of course! (First I went through my change piles and sorted the pennies... I found almost enough for the experiment there.) I visited the teller at my local bank and got $4 worth of rolled pennies. in the first 2 rolls I found a total of 11 pre-1981 pennies which was enough to complete my first experiment, and after opening the other 2 rolls (and finding a few additional ones lying around) I have 51 more pennies saved up for the next time I want to try this!  Of course, after all the preparation, I got a bit ahead of myself in the experiment and used tap water instead of the distilled water that my recipe calls for. Tap water includes iron which might change the way the solution develops. The metals and minerals in tap water affects dyeing, so if an attempt at controlling the color is desired, then distilled water is the way to go. I'm going to proceed anyway with this version (I could pour out the liquid and re-start it since it was such an immediate realization) to see how it looks. I'll then repeat the experiment with distilled water to see how that compares. 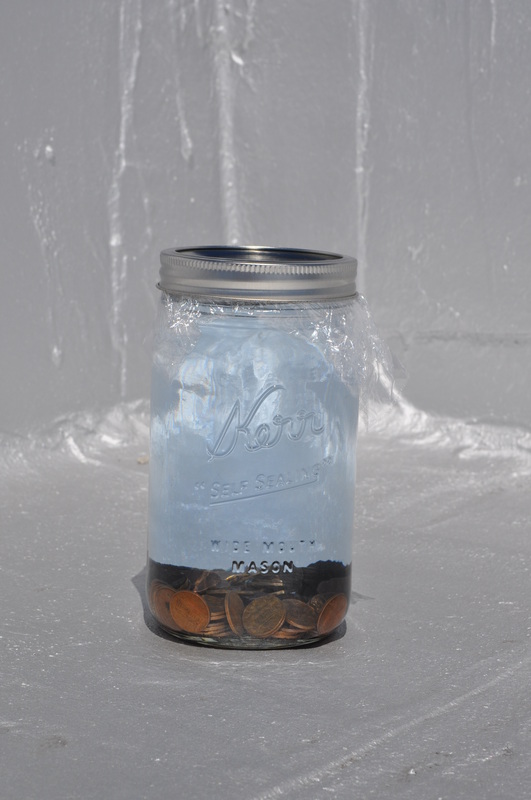 I put the sealed jar on the roof of my building with a note, letting the other tenants know what wacky experiment I was doing, and then followed it up with a quick email to let them all know, just to be sure everyone is aware. It was mixed around 11:30am on Monday, May 9, 2011. The liquid almost immediately started to change color. Even on the silver paint of my rooftop it is noticeable! 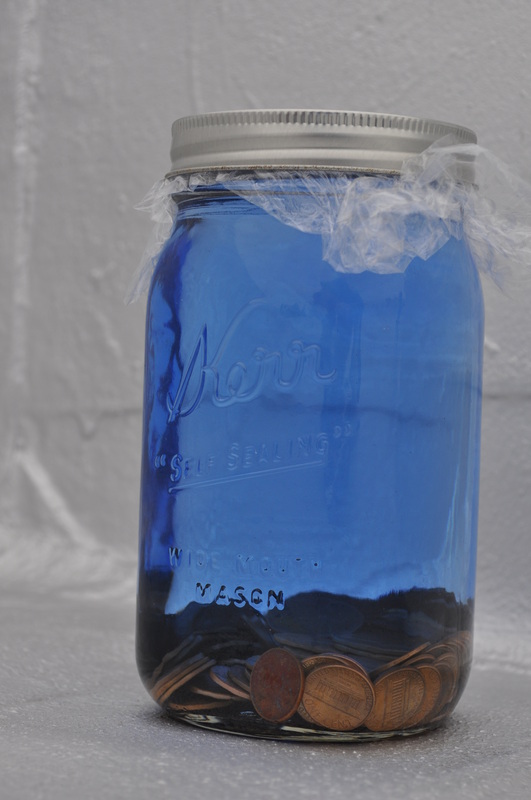 The above photo was taken after 48 hours, and the liquid is even more blue. (The sky was very cloudy when I took this photo; the blue is actually more brilliant than it looks). I am checking the liquid daily to see how it looks, and I shake up the jar each time to mix around the pennies. 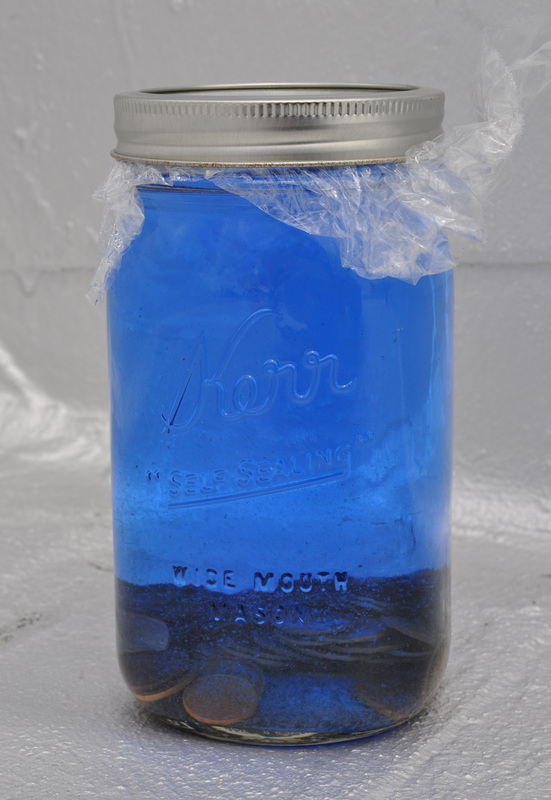 ...and here it is one week later - in brighter light... it doesn't seem that much more intense when I compare the photos. (It actually seems lighter/brighter). That being said, my guess is the solution is probably not harmed by leaving the copper in for longer than recommended. The next step is to soak your wool. I used Patons Classic Wool (100% wool) in the color "Aran" for this experiment. It comes in skeins that weigh approximately 3.5 ounces. I wound 2.25 ounces onto my niddy noddy, and loosely tied the skein using scrap bits of yarn in a "figure 8" through the yarn to keep it secure in 4 different places. Here's my skein of yarn bundled up for a "before" photo: 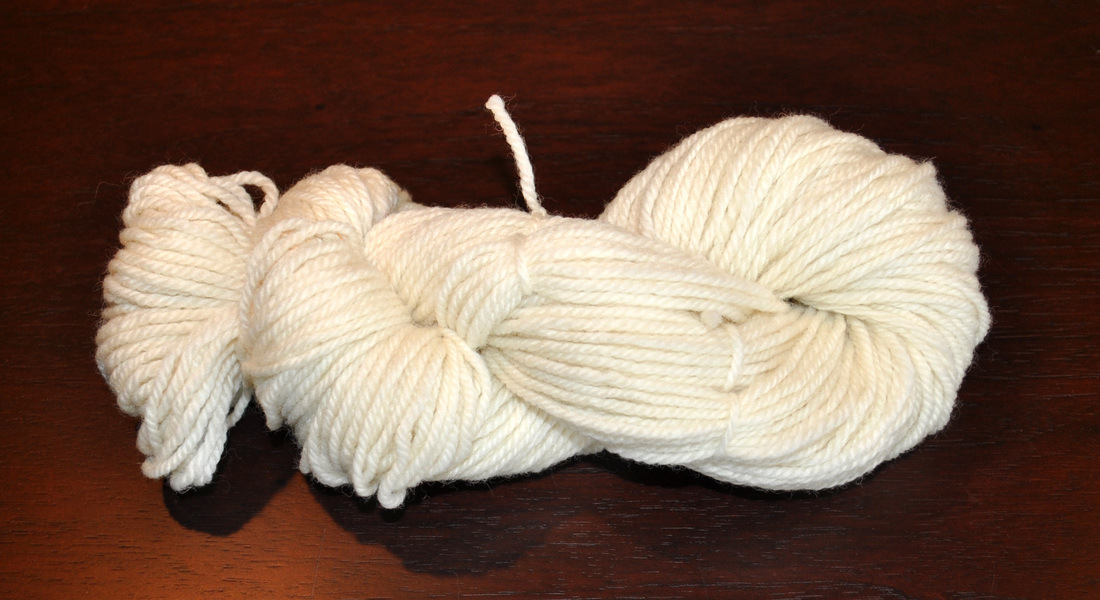 Then, fill a large bowl or pan with cool water. Open up the skein and submerse the yarn so that it's all able to soak up water: 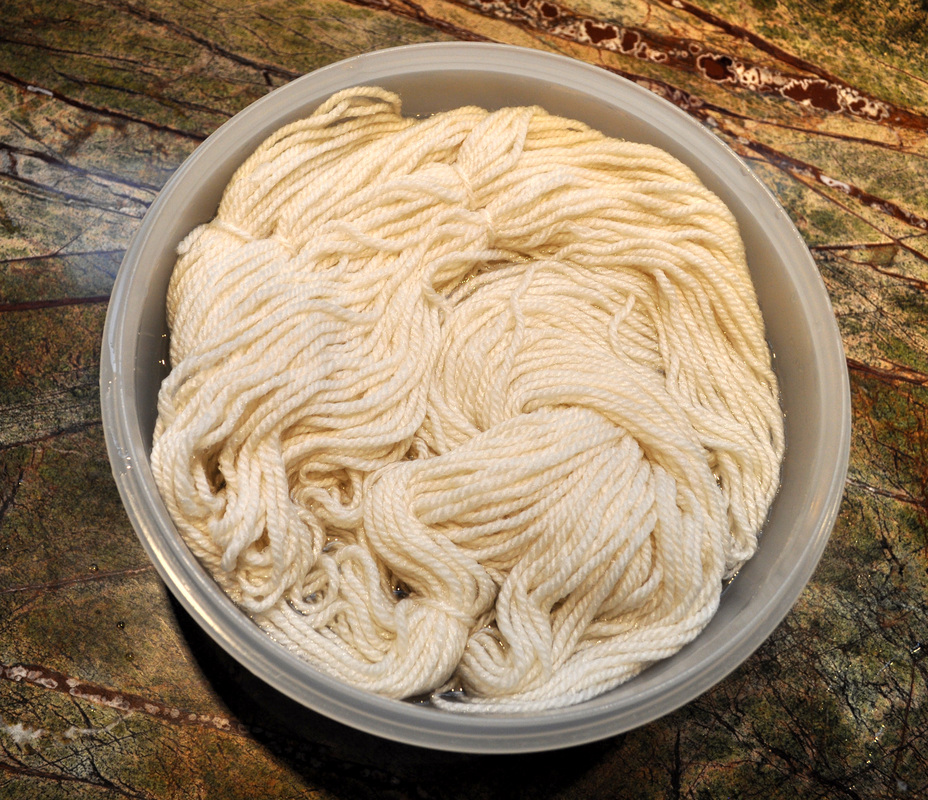 Some of the yarn sits on the top of the water and is exposed to the air... it's not getting wet! In order to fix this, I put a plate on top of the yarn and allowed the water to submerge the plate: 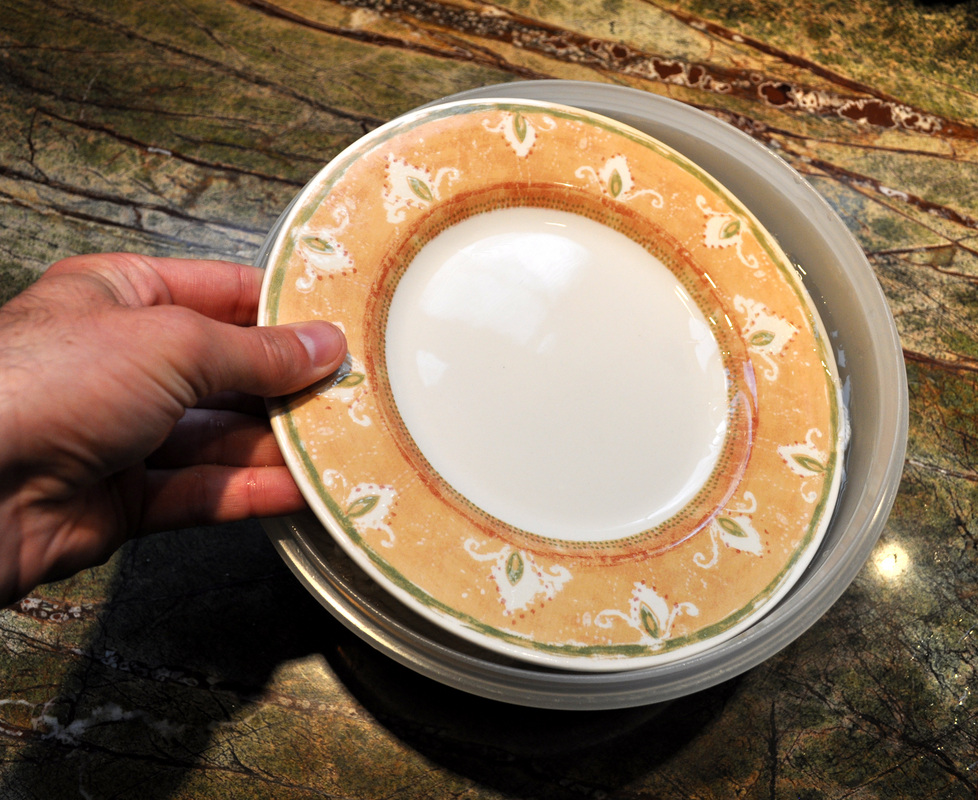 Let the yarn soak for about an hour in the water so that it is fully wet. Next, take the pennies out of your blue solution, being careful not to breathe in the vapors. Rinse the pennies in water. I don't know for sure if you would want to re-use the pennies for dyeing again or not (anyone have thoughts?)... The next steps require a few additional items: rubber gloves, a strainer of some sort to easily drain the liquid and keep the pennies in the jar, and a container of some sort in which to soak the yarn. Hooray for the dollar store; $3.00 plus tax for these additional items! Note: even though we are using simple household ingredients, I really suggest not using food preparation items that might come into contact with the blue ammonia solution. It's best to have dedicated supplies and materials for your dyeing and experimenting. When in doubt, don't use something that you use for food preparation. 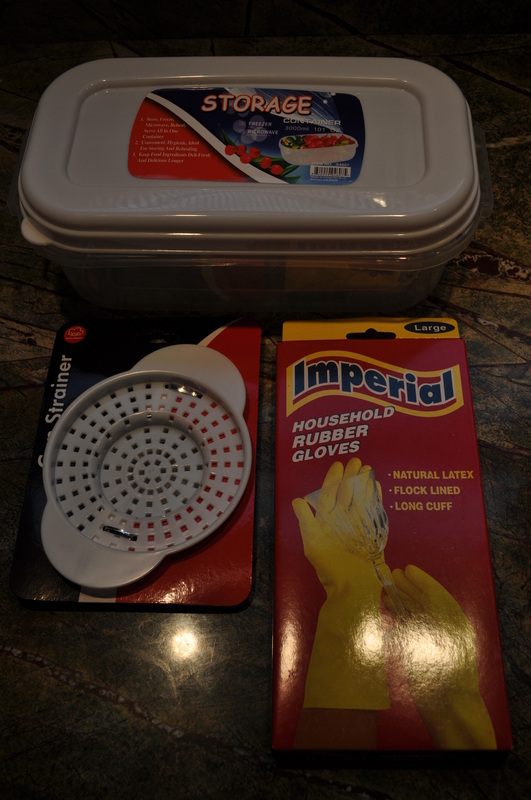 Carefully wring out the yarn from the bowl of water, and put the wetted yarn into the blue solution. BE CAREFUL not to get the solution on you. (If you do get it on your skin, wash immediately with soap and water.) When I did this, the yarn turned a strange beige-gray color. I put the plastic wrap on top of the yarn to try to be sure that the liquid was in contact with all of the yarn. After 30-45 minutes, there was no more blue in the solution. 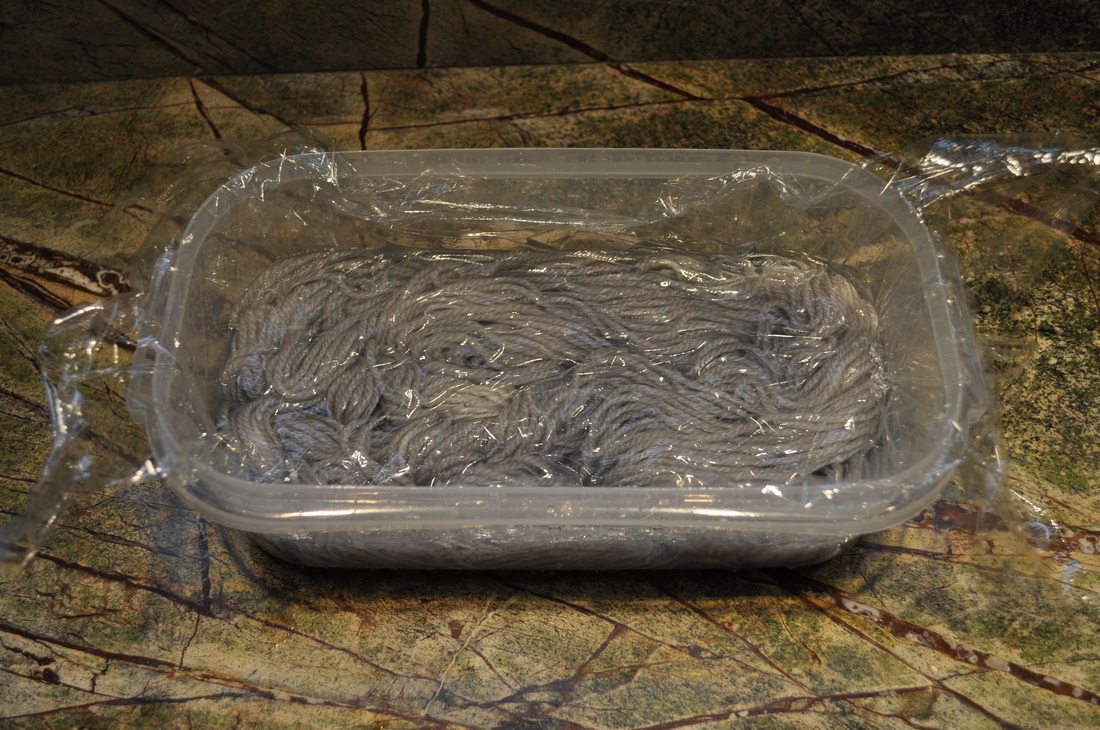 Once this happens, remove the yarn and rinse in a soution of vinegar to set the color. Note that this color is considered fugitive, meaning the color might/will fade over time. Be aware of this when you do the technique, knowing that if you combine it with other colors that this one may fade. 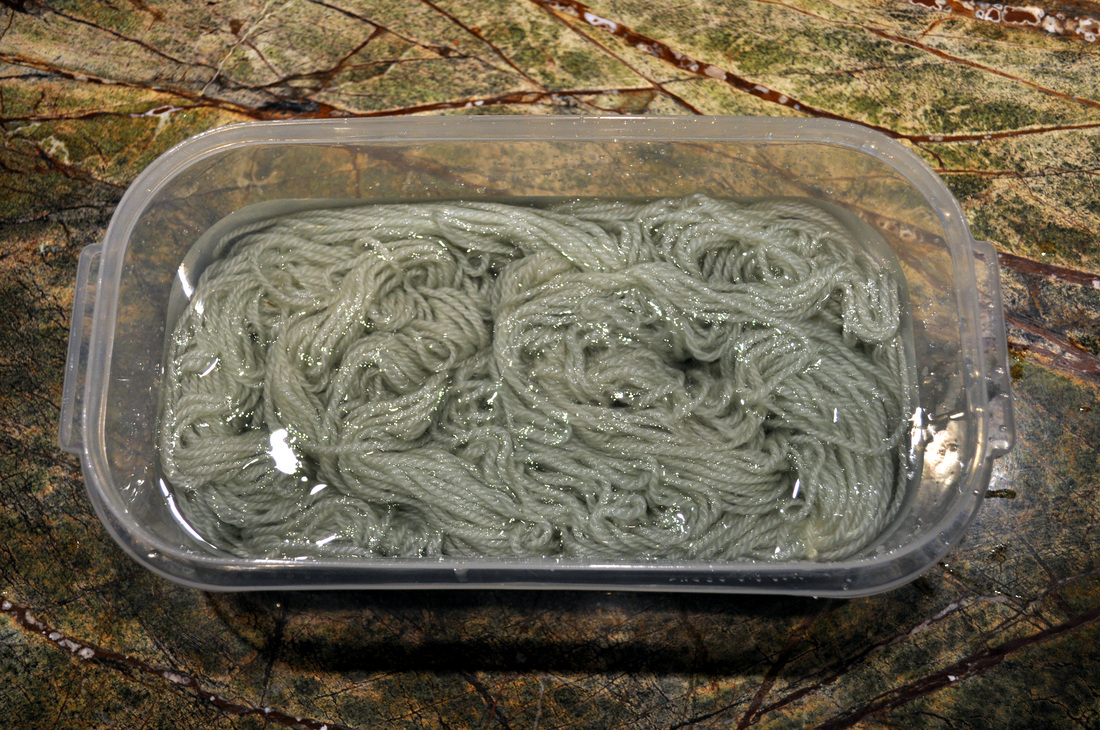 The photo above was taken after the yarn had been rinsed and vinegar was added to the rinse bath. There's a distinct but subtle change of color when the yarn is put in this "afterbath" - it got lighter and more green. The photo below shows an attempt at illustrating this difference. Click on the photo to enlarge. 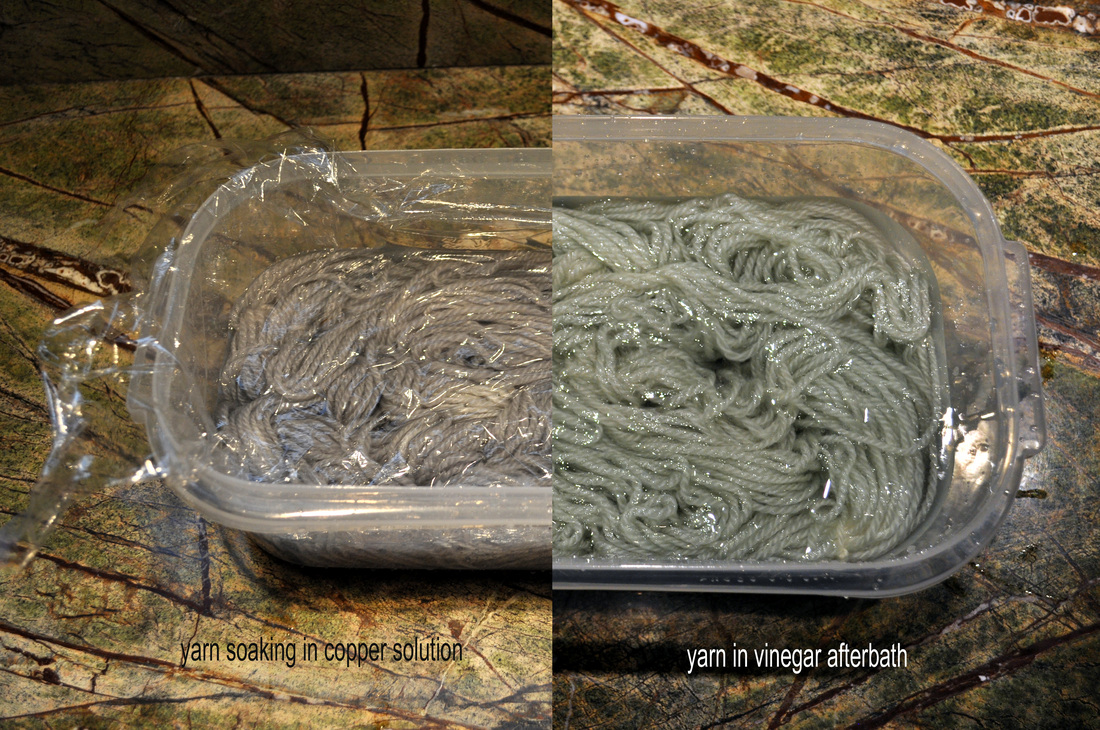 At this point, there's not much more to do. Rinse the yarn well, remove the excess water, and hang it to dry. In the end, I ended up with a green/gray yarn that I'm pleased with. Note that this dye is fugitive, meaning the color will fade over time, much like many other dyes. It's worth noting, however, and keeping in mind when pairing with other yarns. 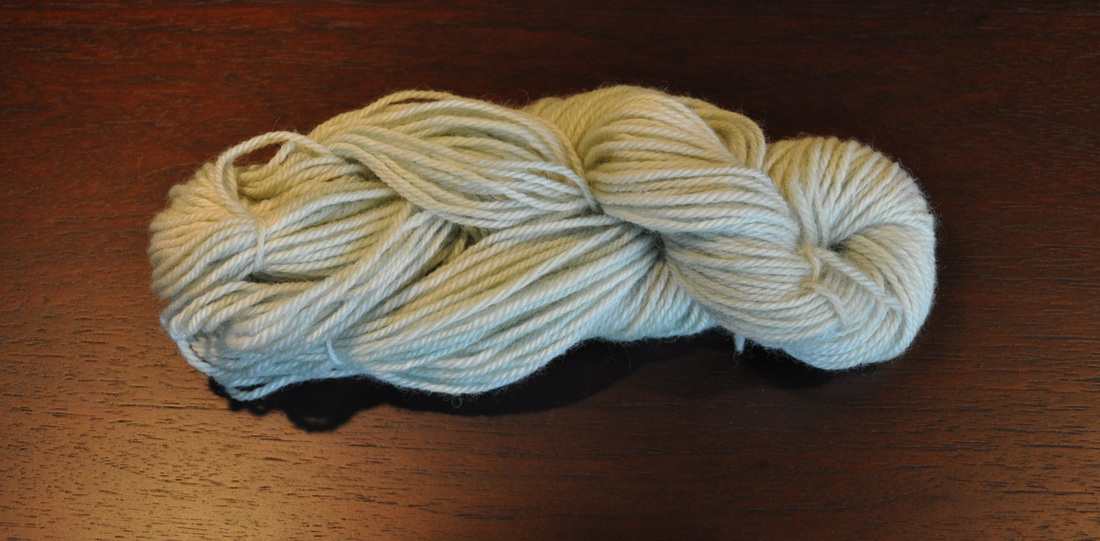 One more photo to compare the colors. If you do try out this fun technique, be sure to send me a note to let me know how it goes! Ready to try? Click the link below to download the tutorial for copper yarn dyeing! 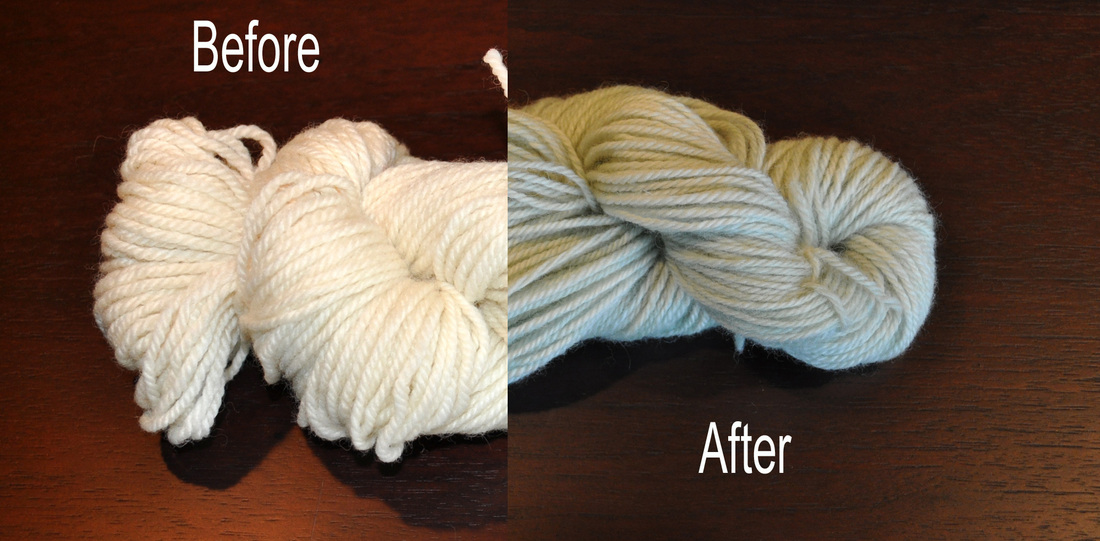
Like what you're reading? Click the "like" button for twitter or facebook below to share this post with your friends!
Last Friday, we did some natural dyeing using yellow onion skins and madder root. The processes were all similar, and while I didn't take as many images as I'd like, I thought it might be fun to share some photos of parts of the process. There are a few things I want to note, most importantly, DO NOT use your cooking or canning pots to dye fiber! It is probably not safe and might make you sick! Visit a thrift store or buy inexpensive pots to do this. Consult a book on dyeing for more information, and by all means, don't take my measurements/calculations to be "correct"... it's all an experiment, and, in my opinion, as long as the yarn turns out pretty, it's successful!  The first step is to prepare the fibers. We used only wool in our process. The yarn needs to be tied into a skein, which can be done on a warping board (as above) or between two chairs or two hands of a patient person. The yarn needs to be secured in 3 places by tying a yarn around the fibers. Look at a commercial skein of yarn that hasn't been opened and chances are you'll see how this string is to be knotted. It helps to keep the yarn from tangling on itself. Do not knot the string tight or you'll create a "stripe"! 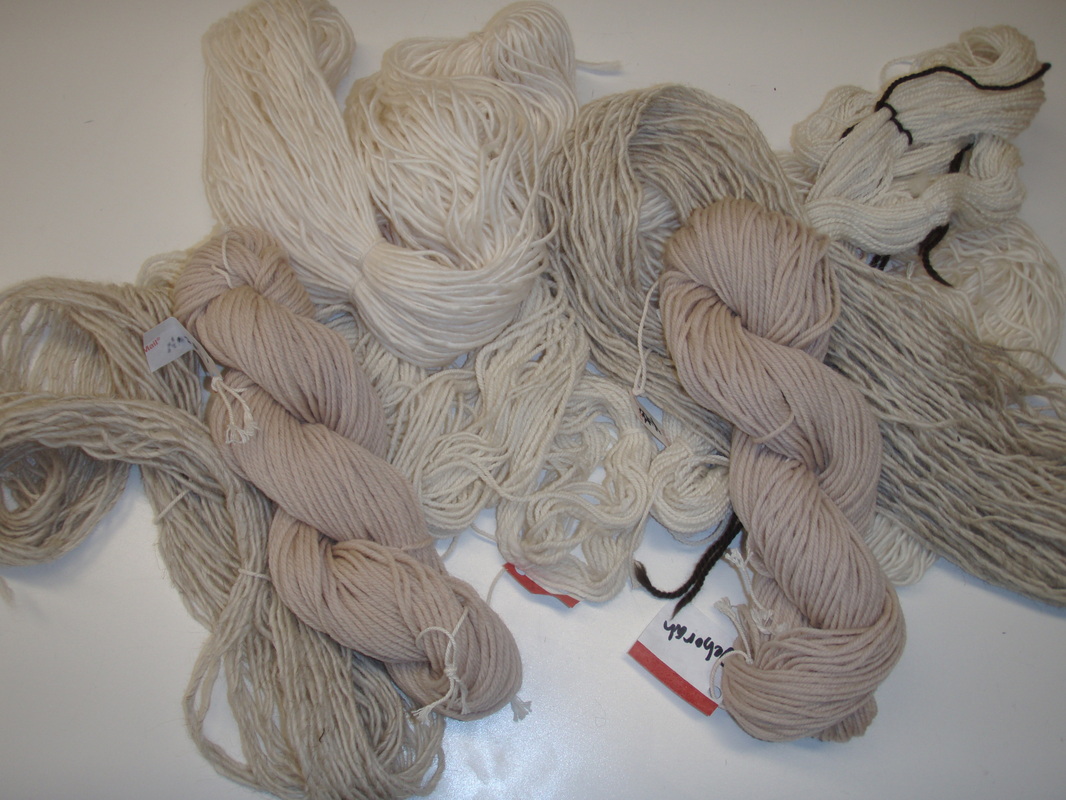 If you want to label your yarns, get a tyvek envelope (the FedEx or UPS or Priority mail envelopes that feel like a mix between plastic and paper) and cut it into little squares. This is a great opportunity to reuse! Cut a small hole in the tag or use a hole punch, then string it through one of the strings you knot around the skein. Use a Sharpie marker and make a note about the yarn - your name, the fiber type; how you intend to mordant or dye the yarn - whatever you think is important. If you are dyeing a bunch of different ways or different yarns, these notes are helpful. Also, the tag can stay with the skein after you're done... and it'll remind you what you did so you can explain it to anyone interested! Any animal based (protein) fiber should accept the natural dye easily. Plant fibers are less successful. If the fiber is synthetic (nylon, acrylic,) you'd want to use acid dyes. Also, you can overdye yarns... if you don't like the color of a yarn, try overdyeing it! If the fiber starts off a bit darker, then the color will be darker when dyed. Onion SkinsThe skin of the yellow (or red) onion dyes fiber beautifully. I went to the local chain supermarket and asked the produce clerk if I could clean out the onion bin. After quickly explaining what I was doing, he was more than happy to have my do this; it made his produce look better, his job easier, and the skins that would otherwise have been garbage are put to use. NOTE: He did mention that in a month or two that the onions will begin to arrive with less of a skin, so for those interested in dyeing using onion skins, I suggest gathering materials sooner rather than later, or you might be waiting until the Autumn. Having never dyed with onion skins before, I did a search online and found some sources that hinted at soaking the skins for 24 hours prior to using them. I took 2 plastic jars and filled them with skins (which I first weighed so that we had an idea of the weight of the skins we used), then poured boiling water on them and let them soak for a few hours the morning of the class. I figured it can't hurt, and while it wasn't the way our instructor generally did the dyeing, we used the liquid and skins.  We put the dry skins and the ones that were soaked in sacks after weighing the materials (we had 5.6oz of onion skins). Putting the skins in some sort of mesh sack helps keep the dyestuff from tangling in the fibers. Old stockings work really well for this, and these mesh bags worked well for onion skins. In our case, we had about 9oz of yarn which we soaked in cold water for about half an hour. Then, we put the wet fibers in a pot of hot water with about 2oz of mordant (we used Alum) and let it soak in the hot water (which was cooking on a little hotplate) for about an hour. We don't want the water to boil, but the hot water and mordant helps to make the fibers recieve the dye better. There's LOTS to know about natural dyeing, and a wonderful resource is the local library. Check out some books and give it a try! 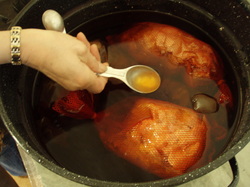 The liquid from the soaked onion skins went in the hot pot of water and the mesh sacks went in as well. Immediately, the color of the water was golden! After they were in the pot for a while, we added the mordanted yarn 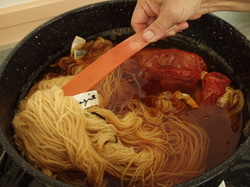 We let the yarn simmer for about an hour, keeping an eye on it to be sure it doesn't boil, and stirring the pot to keep the fibers mixed around the skins. After we were happy with the color, we poured the mixture in the sink (which you shouldn't do with acid dyes!) and squeezed out the yarn. At that point, it needs to be rinsed (I like to rinse it till the water is clear, then put some vinegar in the water to set the color), and hung to dry. 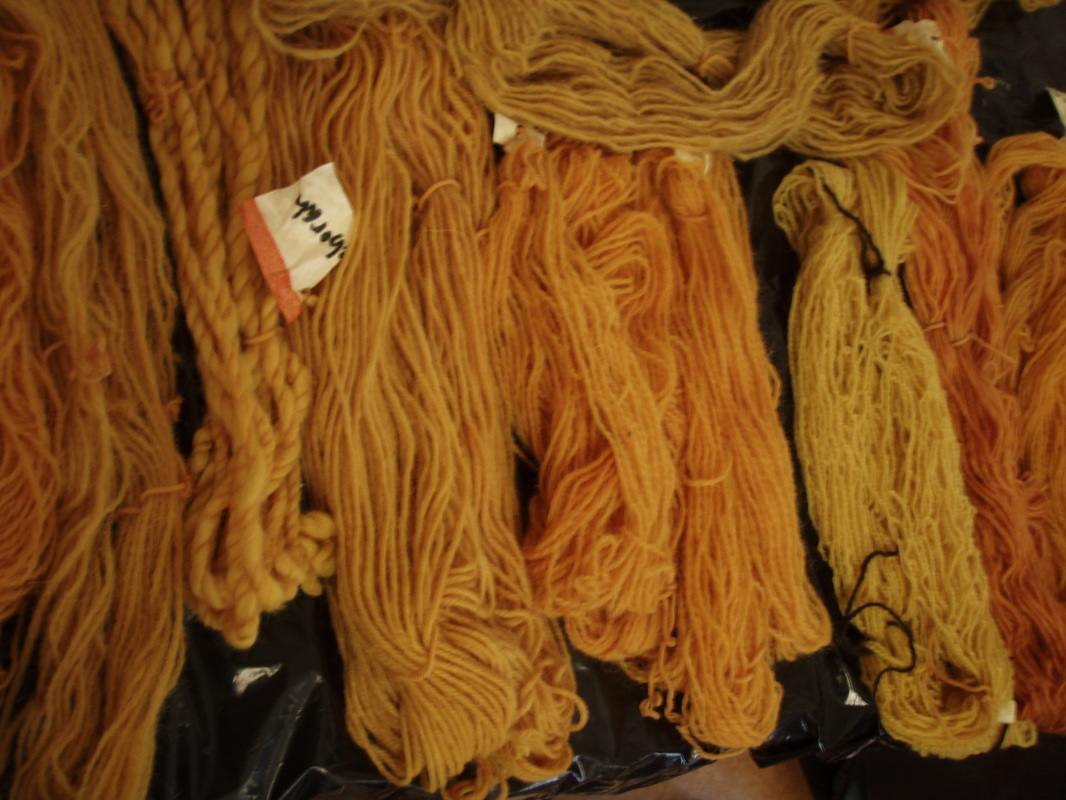 Onion skins make an amazing range of golds and yellows. The fiber on the far right of this photo was "overdipped" in the madder dyepot which is why it gets a bit more orange at the bottom of the skein. Madder RootThe process for dyeing with madder is pretty much the same. The root we used had been harvested around 15 years ago so this was a bit of an experiment. The root bits could have been smashed up a bit more, but other than that, here's what we did...  Madder roots in the mesh bag sitting in the dyepot cooking out their delicious color! We let this cook just like we did the onion skins. These sticks came out during the process; it would have probably been good to use the leg of a ladie's stocking for these bits... Again, we had 9oz of yarn, soaked in cold water then put it in a pot with the alum (again about 2oz) and soaked for 1 hour. We had 8oz of madder root which was soaked overnight in a big glass jar. The liquid went into the pot and the root bits went into the mesh bag.  When we were done with the process, the fibers turned out this gorgeous orange/peach/rust color! After soaking them and hanging them to dry (remember to put them somewhere that if they happen to drip that if it happens to still have dye in it it won't be a problem) - I hang my skeins in a tree in the backyard - the water drips on the grass below... and it doesn't stain anything. 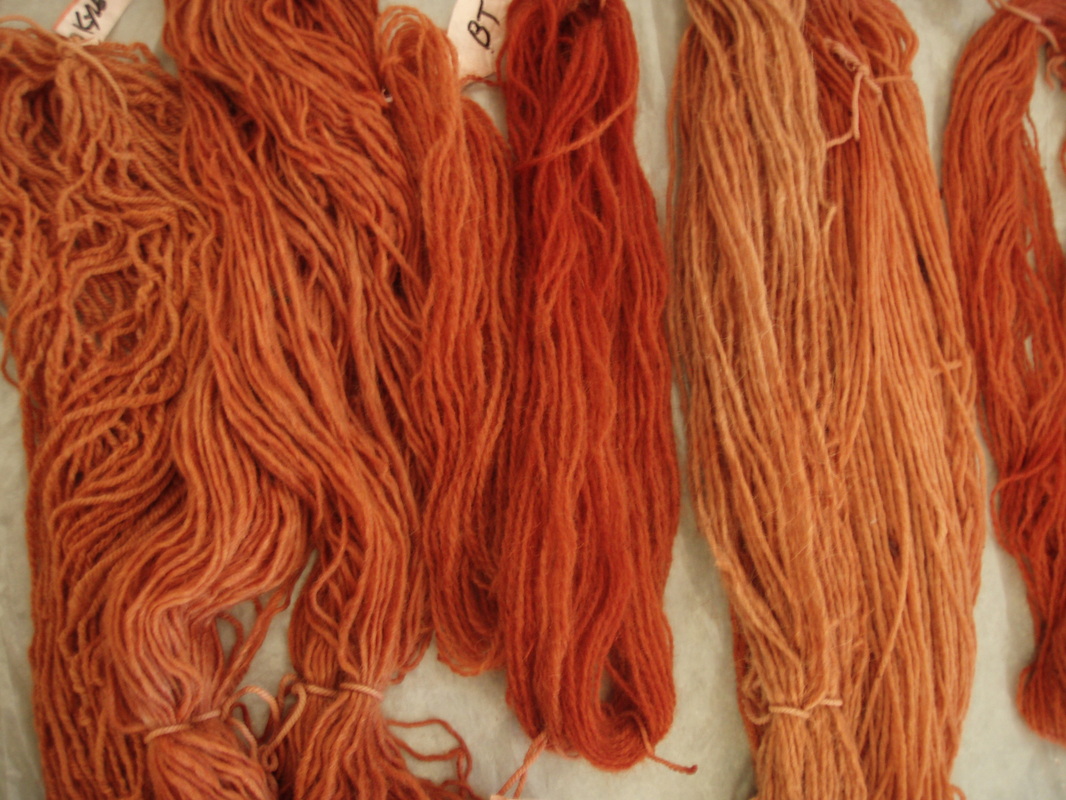 BrazilwoodThe week before we dyed with Brazilwood; an endangered wood! One of the participants got Brazilwood shavings from a woodworker who makes violin bows! The wood is old, and is part of his collection of materials. Instead of the shavings being thrown out, he allowed us to do some dyeing with it! The color we got is a gorgeous pink/orange! You'll also notice that there is some purple colors in here... After the dyeing, we added baking soda to the dyepot which made the purple/fuschia color, and added vinegar to a different "afterbath" and that made the brighter coral color. 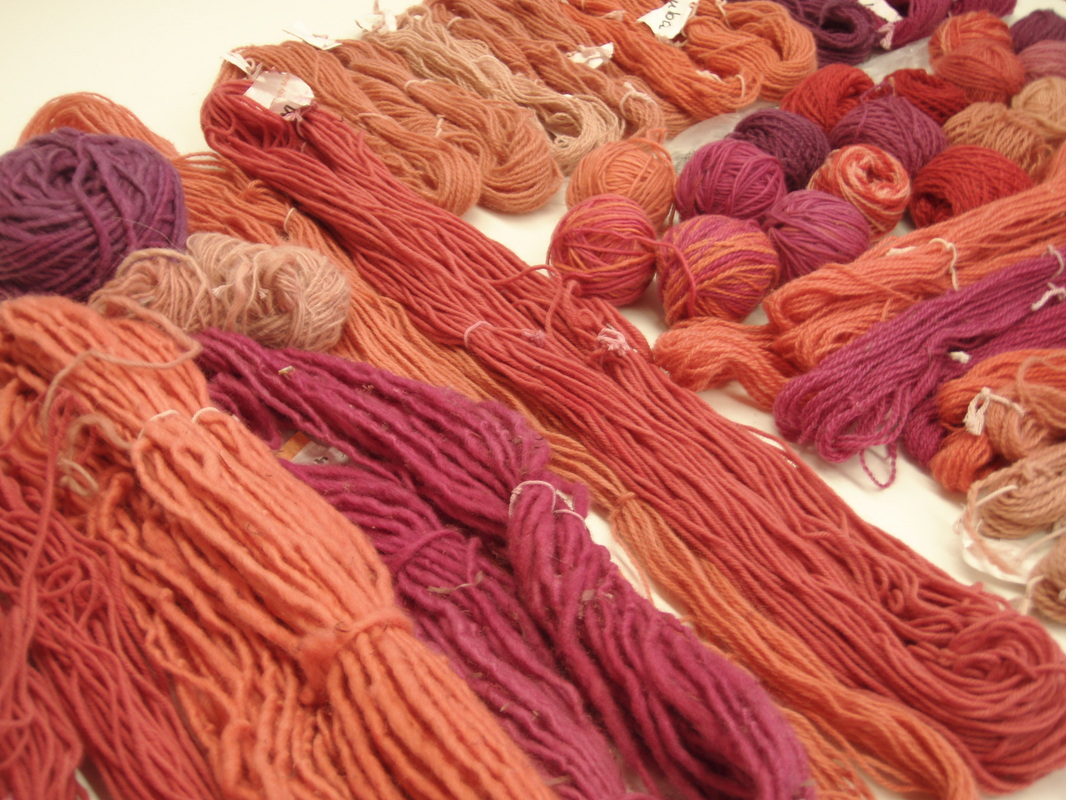 The sort of red ball in the middle of the last image is one that a student overdyed. It's just dyed with the same brazilwood 2 weeks in a row. Gorgeous! 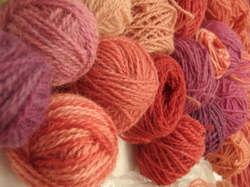 So there you go... natural dyeing, a few different ingredients, and unpredictable (but beautiful) results! Go get a book from the library or your local book shop, do a google search for a natural dyeing workshop in your area, and get to it! There's a world of color out there for you to discover!
Here's a helpful online link: Dharma Trading offers natural dyes and mordants for purchase (as well as a LOT of other things) - if you can't find materials locally, you can always order from them! After many months of working with Kate Godfrey at OkayKate, I am pleased to announce that not only do I have a new logo, I have a new look! Kate was wonderful to work with while developing the logo, and made the process seem effortless. I wanted something timeless; that hinted at my desire to educate the public about social issues through my work... I wanted something that let people know that the pieces I offer are made by hand... I wanted a "look" - and that's what Kate gave me! Here's my new business card:  Kate announced my new look on her website in this POST - and showed these images of my new design package. When I talked with Kate, I explained all my needs to her, including the desire for a logo that would easily translate from business cards to buttons to labels for my knitting and weaving projects. The stationary and envelope (pictured below) are exactly what I wanted; something professional that hinted at my varied interests... something restrained and "adult" looking, and with the logo combined, new colors and font style, Kate certainly delivered! 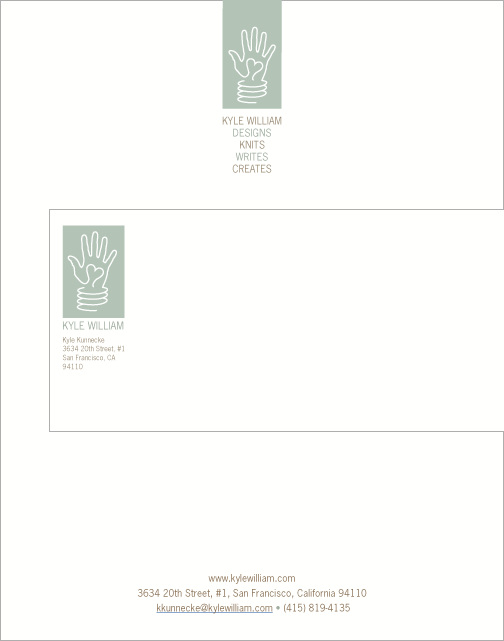 Some people might be interested in seeing what some of the "in progress" logos looked like. At this stage, the specific colors and refining hadn't been done on the logos... Working through the process of printing out the sample images and really thinking about them and what message they conveyed was a wonderful exercise. I was quickly trained to not immediately respond, but to take my time and a few days to study the options. With time, the thoughts changed, and with each revision we got closer and closer to the final look. Kate has a way of "hearing" what the client says, even when the client doesn't have a clue they're saying it. Witnessing the evolution of the design is a treat and an added bonus to having a professional designer guide you through the process. 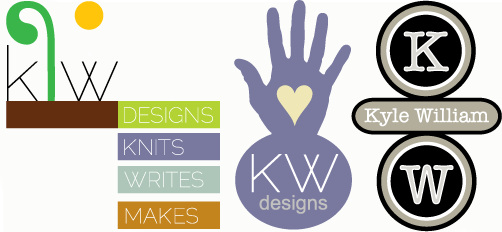 Kate is available to help anyone who is looking for a new logo or look. She works wonderfully with designers (such as me), companies (she designed the new logo for Blackthorn needles) or an individual with a desire for a beautiful logo and stationary for the home or estate (check out this beautiful logo)! For those who have shops on www.etsy.com or sell designs on www.ravelry.com, this is a great opportunity to add a sense of professionalism to your website(s), mailings, and advertising!
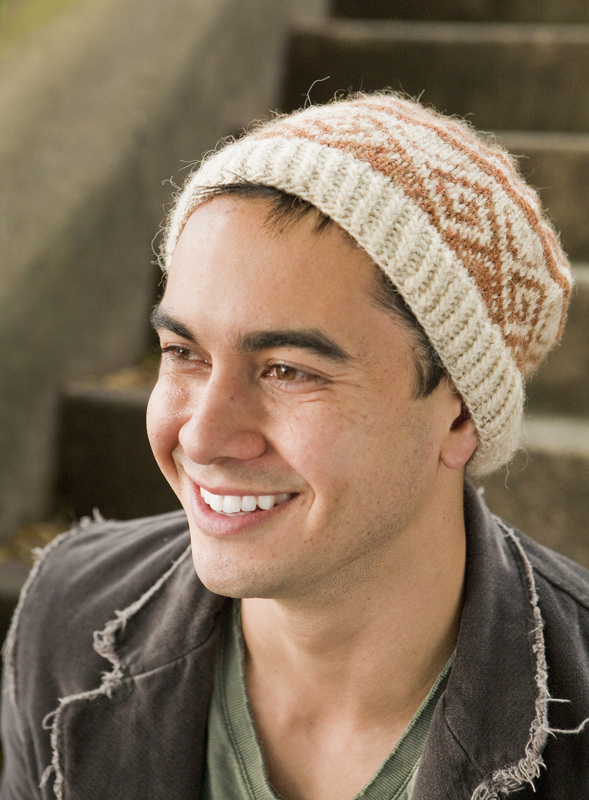
She is reasonably priced, fun to work with, witty, and thorough. After working through the process I must say it was a great lesson in learning what it means to have a brand, how to think about myself as a company, and added to my thought processes with regard to the considerations made when posting online, designing a patttern or writing a proposal. Visit Kate's website and contact her to discuss the possibility of working with her. Save the Date: June 26, 2011!! In addition to other fun projects soon to be announced, I will be teaching two workshops at the San Jose Museum of Quilts & Textiles. First, a basic "Learn to Knit" class that will introduce anyone who has an interest in knitting but has never learned, and second, a more advanced "Banded Hats" workshop that will teach knitting in the round, fair isle and "jogless" stripes while creating a Navajo-inspired hat using Churro wool made by the Black Mesa Weavers for Life and Land. If you live in the San Jose or San Francisco areas, and are interested in taking a class, visit the museum's website and register. Following are the details of the workshops and the corresponding exhibits. For my knitting friends, Primary Structures will certainly be a wonderful opportunity to see firsthand knitting as art. Click the link below for the exhibit postcard:
San Jose Museum of Quilts & Textiles |
|||||||


| primarystructures_release_april11.pdf |
Primary Structures
May 17 - August 7, 2011
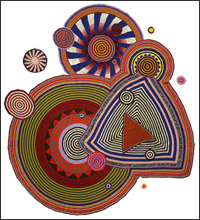
Exhibit Co-sponsors: Lion Brand Yarn, The Indian Store, San Diego North Coast Knitters Guild, Stitch Diva Studios, The Knitting Room with in-kind donations from Skacel Collection, Inc., Crystal Palace Yarns
Southwestern Banded Blankets: Three Cultures, One Horizon
from the collection of Jean and Roger Moss
May 17 - August 7, 2011
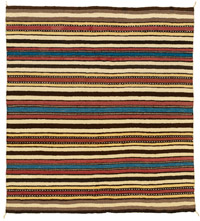
Collector Roger Moss said, “When my wife Jean and I started collecting banded blankets it was because we admired this marriage of utility and beauty and because their virtues had been long overlooked.” Curator Deborah Corsini added, “The understated simplicity of the stripes is a powerful contrast to the visual graphic intensity that resonates with kinetic movement.” Southwestern Banded Blankets provides a special opportunity to examine the austere beauty and subtle variations of three traditions of these rare, well used textiles. A catalog of the exhibition will be available.
Supported by a grant from the Christensen Fund.
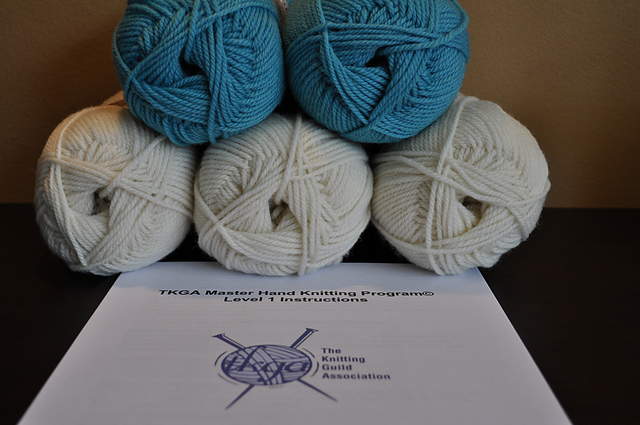
Level I offers the opportunity to research stitch, cast-on and bind off techniques as well as writing a report on how to block knitting. Most of us think we know how to do these things, but when it gets down to the "knitty gritty" (pun intended), a lot of us just do what we were shown without ever having spent some effort to see if what we have been doing is the correct methods. Basically, we are instructed to knit swatches, answer some questions, and write a report. We also knit a striped hat. All easy stuff... the caveat being that we are to follow the directions. If they specify to decrease 3 stitches in, that means 3 stitches in. When it's time to be graded, they will be counting. Everything.
I'm not saying that there's a "wrong" way to knit. Actually, I'm suggesting that there are many ways that ARE correct... and that we should understand WHY we knit a certain way. THIS is what the Master Hand Knitting Program will help me understand.
SO, with that in mind, I am announcing that I am going to be working my way through the program. Level I at least, and I started with swatch #3; seed stitch. Basically I'm going to follow the directions, and guide myself through this process. I'll be chiming in from time to time on here to let you know how I'm doing.
Want to join me? The course is currently $90 and requires a membership to TKGA ($30). Visit their website for more information. I also have it listed on my ravelry projects page if you're there... feel free to add it as a favorite.
This program looks like a lot of work, and it is... but if I have learned anything in my life it's that good things come to those who dedicate some time on long-term projects. THAT's how I ran a marathon and got my degree... one step at a time... with a basic plan in mind, and keeping the end reward in my thoughts.
Happy Knitting, all!

I am HONORED to name Living Beyond Breast Cancer as the official charity for the Cause hat, and proud to donate 100% of the net proceeds from the sale of every pattern to this worthwhile organization. Please visit them on the web: www.lbbc.org to learn more about their efforts and what upcoming events may be of interest.
If you have yet to purchase the Cause hat pattern, now is your chance! Visit the SHOP and purchase the pattern today for $4.00. Included with each pattern is a fact sheet about breast cancer which may provide life saving information, and as mentioned before, the color of the ribbons can be changed to support any cause you choose!
NOTE: Crafty Andy created a crochet version of this pattern! Please visit his website HERE to view and purchase the crochet pattern.
I'd love to hear from you - if you have ideas for other groups or organizations that might benefit from being included in this series of patterns, please fill out the form below:
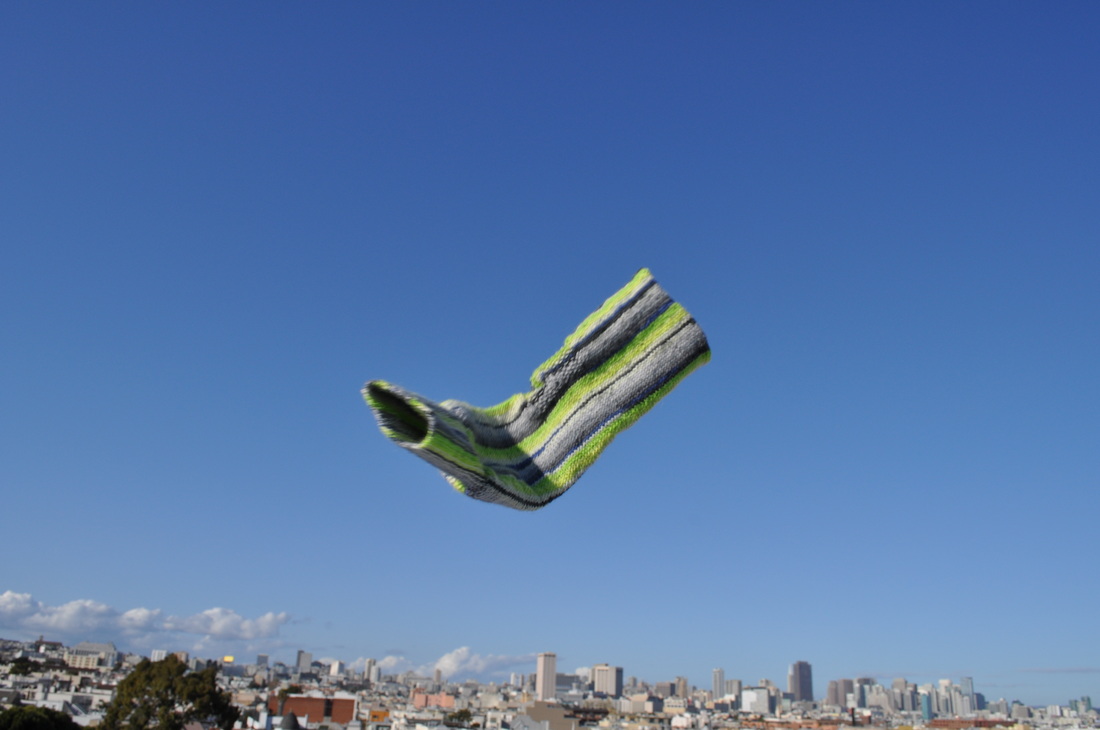
What does one do when a project "fails"?
When animals are attacked and somehow escape, or even when the dog is finished with getting a bath... the first thing they do is "shake off" the fear and experience they had... Someone once told me that this something other animals do, but that humans internalize bad experiences. I decided that I would "shake off" the bad experience of this project. So, in an effort to be symbolic of the tragic fail, I decided the best thing to do with a misbehaving project is to climb to the roof of my building and hurl it with all my might into the abyss... goodbye, "Mr. Sock that didn't work out"... I'm acknowledging that you were not destined to be a finished object!
SISC Installment #2

Survey Says
Finished Object: Seahorse Cardigan
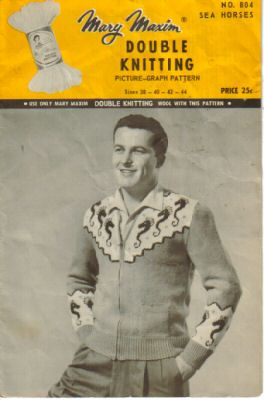
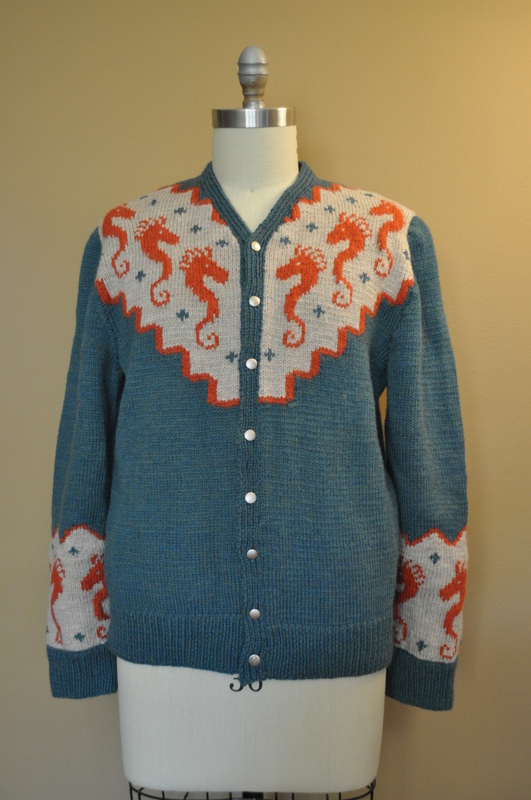
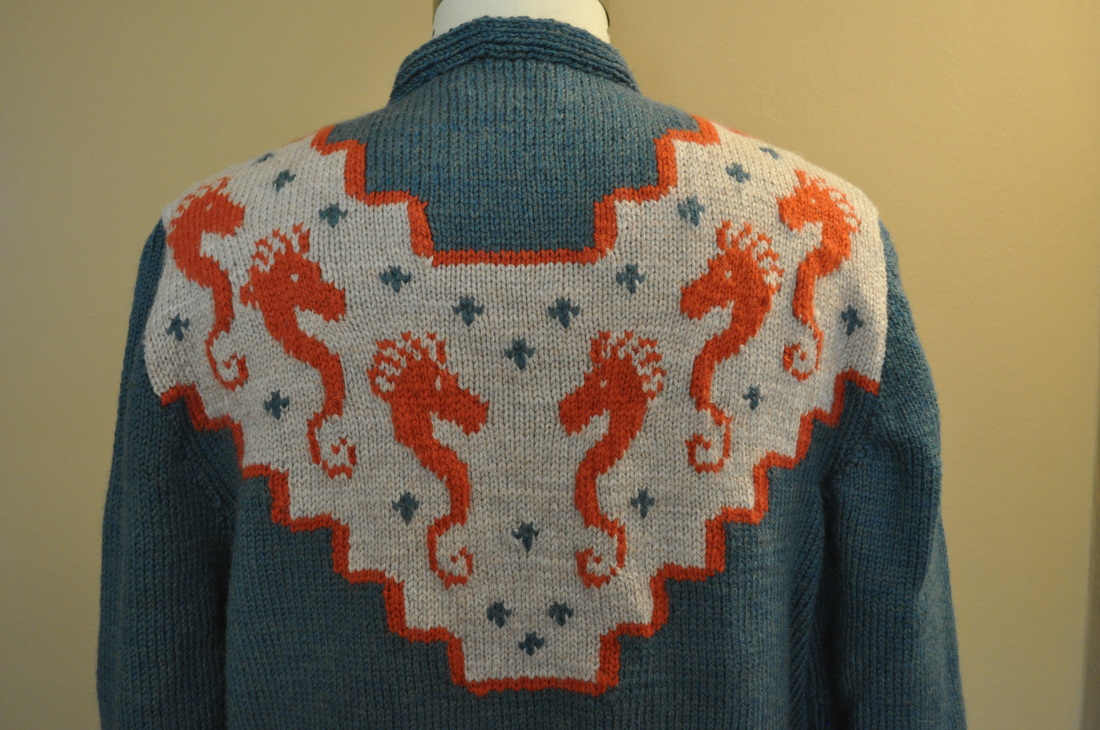
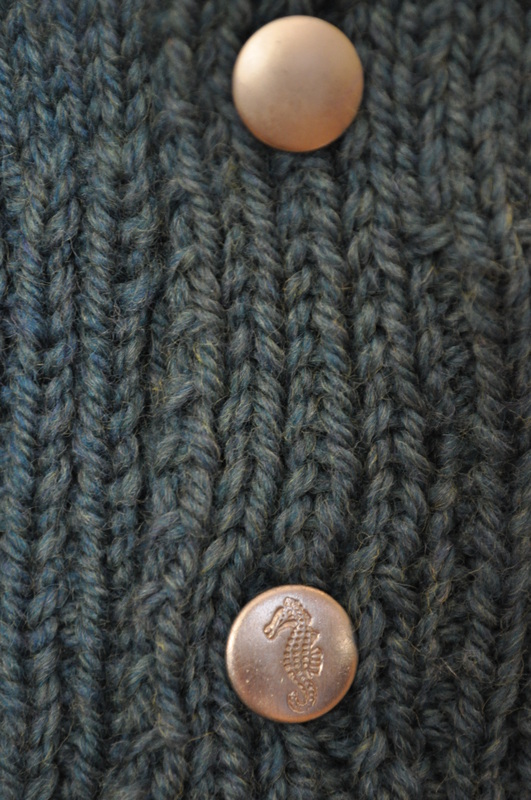
At this point I was really wanting to get the sweater completed in time for Stitches - and on January 13, 2011, it was finally completed! I assembled the sweater and found the perfect buttons to complete the piece. All but one button came from Britex in downtown San Francisco. The antique seahorse button I used is from “Granny’s Thimble” - a pretty fun source for buttons! Check her out: www.grannysthimble.etsy.com
As soon as the weather cooperates I'll get photos of me wearing the cardigan --
 RSS Feed
Archives
July 2023
April 2023
March 2023
November 2016
August 2016
May 2016
February 2016
January 2016
December 2015
November 2015
October 2015
September 2015
August 2015
June 2015
May 2015
April 2015
March 2015
February 2015
January 2015
December 2014
November 2014
October 2014
September 2014
August 2014
July 2014
June 2014
May 2014
April 2014
March 2014
January 2014
December 2013
November 2013
October 2013
September 2013
August 2013
July 2013
June 2013
May 2013
April 2013
March 2013
February 2013
January 2013
December 2012
November 2012
October 2012
August 2012
June 2012
May 2012
April 2012
March 2012
February 2012
January 2012
December 2011
November 2011
October 2011
September 2011
August 2011
July 2011
June 2011
May 2011
April 2011
March 2011
February 2011
January 2011
November 2010
October 2010
August 2010
July 2010
May 2010
April 2010
March 2010
February 2010
January 2010
December 2009
October 2009
August 2009
July 2009
June 2009
May 2009
April 2009
March 2009
February 2009
January 2009
December 2008
November 2008
October 2008
September 2008
August 2008
July 2008
June 2008
May 2008
Categories
All
100 Strangers
Adventures
Animals
Book Review
Ceramics
Charity
Clay
Contest
Cyc
Diary
Dyeing
Etsy
Fiber
Fiberguys
Field Trip
Finished Object
Knitting
Life
Marathon
Master Hand Knitting Program
Media
Mens Knitting Retreat
Museum
News
Paint
Patterns
Product Review
San Francisco
School
Self Imposed Sock Club
Shop
Spinning
Stash
Tkga
Tools
Travel
Travels
Tutorials
Weaving
Workshop
Yarn Bowl
Yarn Shops