
|
The I-cord cast on is one of my favorites. Yes, it takes a bit of time but I promise it is time well invested. The edge is a fun tube that has a bit of structure to it, and it works so well with built-in i-cord edges. Why do I love this cast on so much?
You've never tried the i-cord cast on? Here's a video that demonstrates how to do it! While casting on, I do think about the song One Step Forward by Desert Rose Band - in case you also need audio encouragement! OK! Now that you know how to do the i-cord cast on, what might you make with it? You will find it in a variety of projects, generally ones where the edge of the fabric doesn't need much stretch. Here are a few of my patterns that feature the i-cord cast on as the opening number:
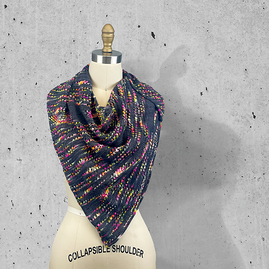
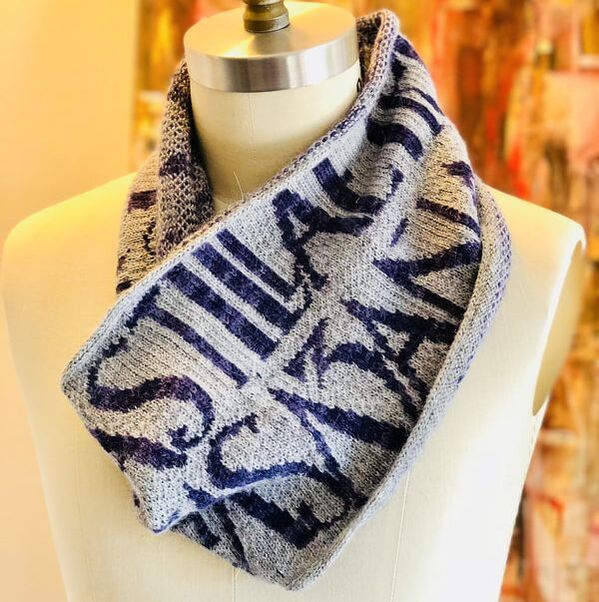
 It has been a while since I posted a tutorial video, and it seems like this is a great place to share with you how to lock floats in knitting. The technique has been explored by a number of people, including Meg Swansen and Joyce Williams in the book Armenian Knitting. One of my sample knitters, Cindy Baily, encouraged me to give it a try and I've been locking floats ever since. I promise you that it becomes really easy with practice. Yes, it slows me down just a touch while working, but it certainly makes the inside of a finished garment so beautiful. Sometimes this technique will cause the floated yarn to "peek" through to the front of the fabric. Yarns with more "spring" work better for this technique, and while I'm swatching I work with different needle sizes to discover the best combination of yarn, needles, and pattern. Here's hoping you are having a beautiful week! Kyle
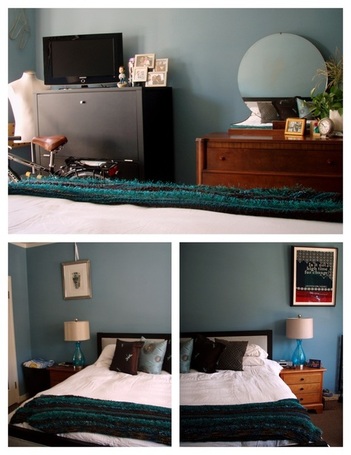
I suggested each of the clients select their very own nightstand, keeping in mind the color scheme we had established. They each chose something different and beautiful, and they compliment the space perfectly, hinting at their individual styles but still remaining cohesive with the space. The highlight of this project was painting one of the walls to look like wallpaper! After
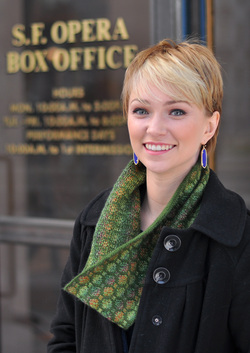
Hours and hours of work went into hand painting the wall in this San Francisco bedroom.
Painted Wallpaper TutorialInspired by this painted wallpaper, I decided this is the perfect way to create a focal point without hanging art on the wall, since most people don't like having art over their beds in San Francisco (earthquakes!) This paint treatment offers a bit of pattern in this room while allowing the occupants to sleep soundly. The process is easy, requires only a few tools, a somewhat steady hand, and time. Following is the tutorial for this project which includes the stencil template as well as general directions for how to go about transforming any wall into a showpiece!
Let's Begin:Once you have selected your colors and painted the room with the base color, it's time to start the process of painting the design. Begin by printing the template out (above). Lay a piece of clear acetate over the stencil and carefully trace it out using the Sharpie permanent marker. Be sure to include the little horizontal bits that hold the center square in the stencil! 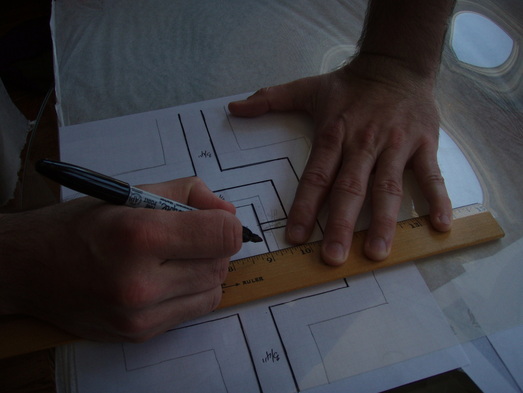
Cut the stencil out using the Exacto knife, paying careful attention to the corners. Again, remember not to cut those little supports that are holding the center square. Once that's done, find the center of your wall and mark a vertical line using a pencil. Lightly trace around the stencil, being sure to add the "additional filler" between each motif. Once a few squares are drawn in, place the stencil between two motifs to the right or left of the line, and, making sure it's vertical, draw it in. Repeat on the other side, then measure and use that spacing to draw the rest of the vertical lines on the wall. Work your way along, taking frequent breaks. The process takes quite a while. once you're done drawing, mix some accent paint and Floetrol in a container. (Floetrol extends the drying time of the latex paint.) Using your small artists brush, begin to fill in the design, doing your best to keep each line straight. I worked in sections, painting different sections at the same time so that I was never touching a spot that was wet. Take your time; making sure you're painting the right place. Make a mistake? Just wash it off with a wet rag, let that spot dry, and try again. As I worked, I would feather out the ends of my painting so that there were no hard lines showing where I stopped and started. 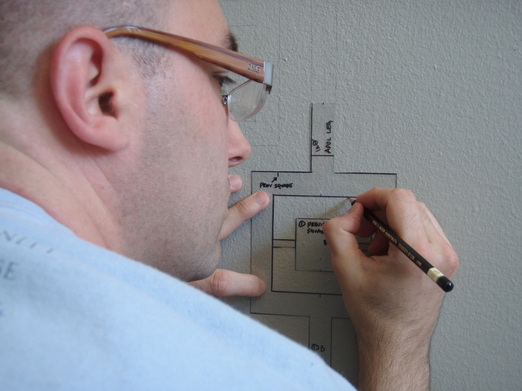
Painting the wall took a LONG time. It's a beautiful result, though, and for those who might not be interested in devoting hour upon hour to the project, as well as those brave enough to tackle the project, I offer a virtual gift: Desktop Wallpaper! Once the wall was completed, I took a photo of the large expanse of pattern and formatted it to fit most standard computer monitors. 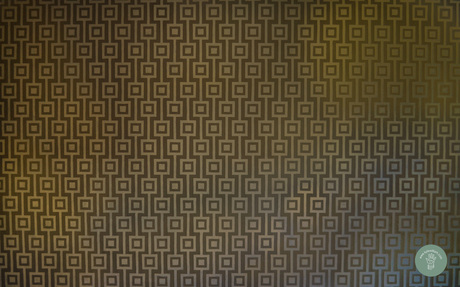 Kyle William Desktop Wallpaper Select the appropriate size and download the file with my thanks for taking time to visit the website and read the blog. Like what you see? Click the "like" Facebook button or share this post on Twitter with your friends. Thanks!
November is here which means in the United States it's the month of our Thanksgiving holiday that, for me, evokes memories of big dinners (complete with pumpkin & pecan pie, banana salad, turkey, ham, oyster dressing for dad (and plain dressing for the rest of us), and usually sweet tea depending where we were celebrating. It also reminds me of dressing like early Americans (complete with construction paper pilgrim hat or paper feather headdress for the Native Americans) and of course, that this holiday marks the "real" start of our traditional holiday season. Retail brings Christmas to us earlier and earlier every year; it's now happening a few weeks before Halloween in mid-October, but November 1st seems to be the indicator for me... With the start of this season, I am taking the opportunity to say thank you to those who make my world so amazing. This year, in addition to my personal reflecting time, I decided to put pen to paper and write notes to some of those who have really made a difference in my life. I spent some time searching for an appropriate image (which, of course, I found at the Graphics Fairy) and created thank you cards. Cut, folded, and ready to go, I spent an afternoon writing a few of those who have greatly impacted my life. It makes sense to me; "thank you" cards for "Thanks"giving... right? 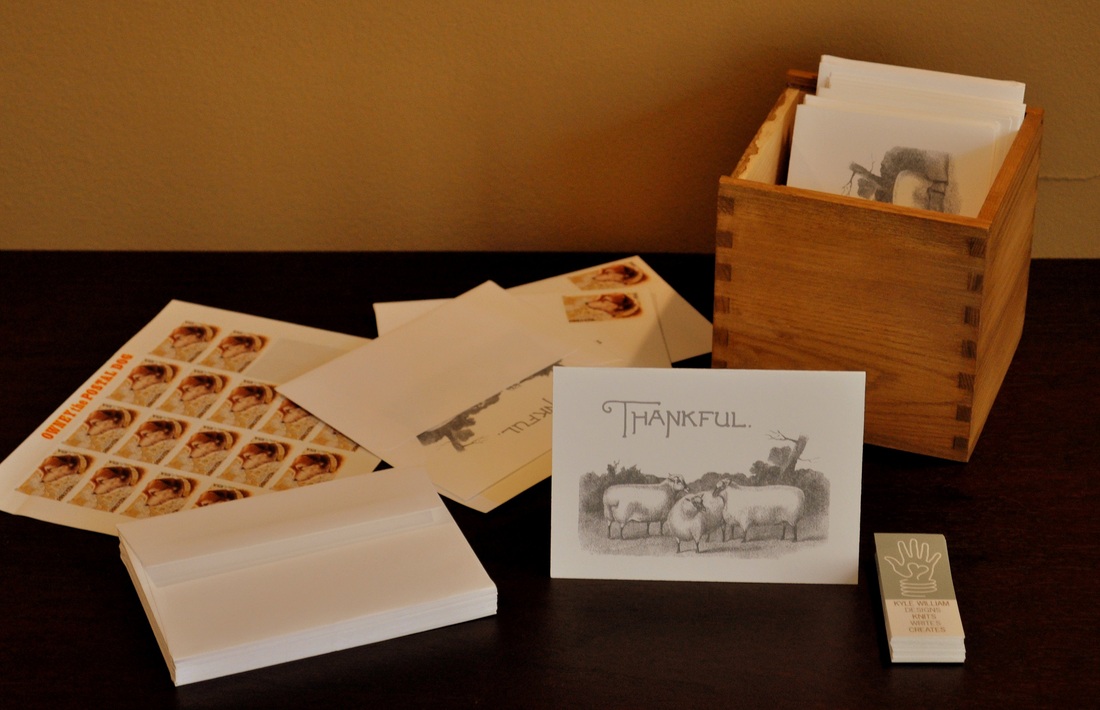
If you'd like to make the same card, I have attached the file for you to download. Print it on heavy card stock, purchase some A1 sized envelopes and you'll be ready to be "Thankful" with this card featuring a vintage sheep graphic.
Simply print the cards on 8.5" x 11" white cardstock. Carefully cut them out, fold, then fill them up with words of gratitude for those that deserve it. The cards fit in A1 size envelopes. (Envelopes and cardstock can be found at most office supply stores. To cut the cards out (if you're not good with a sharp pair of scissors,) a paper cutter will do or rotary paper cutters can be used at copy/print places like FedEx/Kinkos. No time to make these cards? No printer? A purchased "thank you" card would be a lovely subsitute, and of course, a simple, hand written note is always welcome in the mail or taped to a co-worker's keyboard or monitor! This doesn't have to be fancy; take the time to tell those around you how they impact your life. A few sentences can make such a difference. Who could get a thank you note? The list could go on and on for years. Pick one (or a dozen, or two) and write. It feels good to send love (especially when it's unexpected!) Your LYS (local yarn shop) Fiber company Family (distant or not, biological or not) Neighbors Co-worker Favorite place to eat Mail carrier Nurse/Doctor/Pharmacist Those who volunteer in your area (food banks, homeless shelters, etc.) - wherever someone is working to make your community a better place Police or Firemen - address the card to the entire crew The person who taught you to knit Childhood friends Teachers (and many, many more...) It feels good to put on paper a gesture of gratitude... an unexpected note of kindness can brighten a day and possibly change a life. Do some good. Be thankful. Print, write & share.
There's more knitting, weaving and creating going on here than I can talk about... but in time, I PROMISE to share all of it with you... every last stitch. OH - one more thing. Thank YOU for reading. I know that there are lots of blogs out there to read and I appreciate your reading this one... and while not everyone comments on the posts, I know you're looking and that fuels m. Having an online presence is a really fun thing - it affords me a place to sort out and organize my projects and thoughts and it has the added benefit of helping me stay connected to many of my online friends. For that, I'm thankful. Consider this post my "thank you" to you - for reading, being supportive of me (and other designers, knitters, artists), and for being the amazing person you are!! Like what you're reading? Please "Like" on Facebook or "Tweet" on Twitter. Want to leave a comment on the post? I would love to hear from you! Happy Thanksgiving! The holidays are coming and will be here before we know it! In preparation for the impending gift-giving season, I created a tutorial for maing homemade vanilla extract! Despite the fact that this spoils the surprise for those who are going to get vanilla extract from me as a gift this year, I decided I wanted to share it with you! 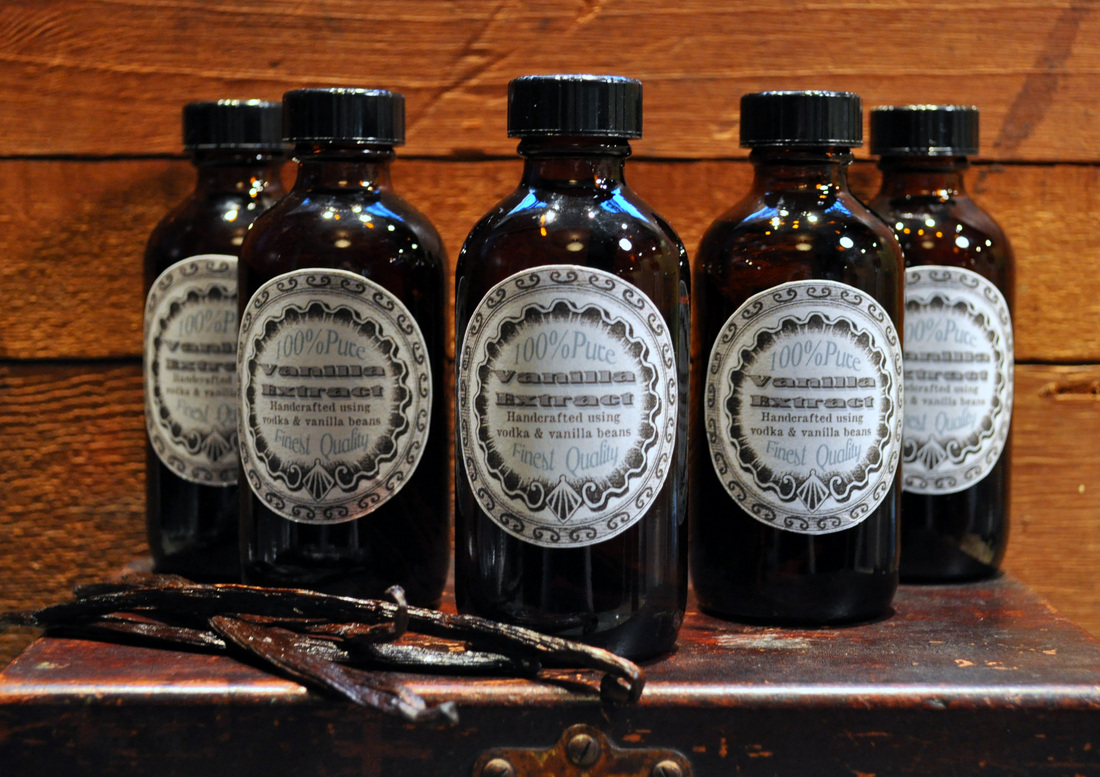 Where does one go to get the vanilla beans? The bottles? Keep reading... We have a fantastic ice cream shop just down the street - Xanath - well known in the area for having some of the best vanilla ice cream in town as well as other incredible flavors, including saffron, saffron ginger and dry cherry to name a few! Each time we visit this shop they offer us a single vanilla bean (it's sort of their calling card) - to remind us that they sell restaraunt quality beans and saffron in addition to their yummy yummy ice cream! I got the vanilla beans for my extract from Xanath, and recommend that's where get your beans too. Did you know that vanilla beans come from orchids that are hand pollinated? The seed pods that develop are hand picked and the curing process takes months. Knowing this helps me understand why it's the second most expensive spice! Another interesting fact: the FDA regulates vanilla extract by bean weight, not bean quality, so you never know what you are getting when purchasing mass produced extract. Making your own vanilla extract ensures that it will be free of the artificial colors and the corn sweeteners found in even high-quality vanilla extracts. 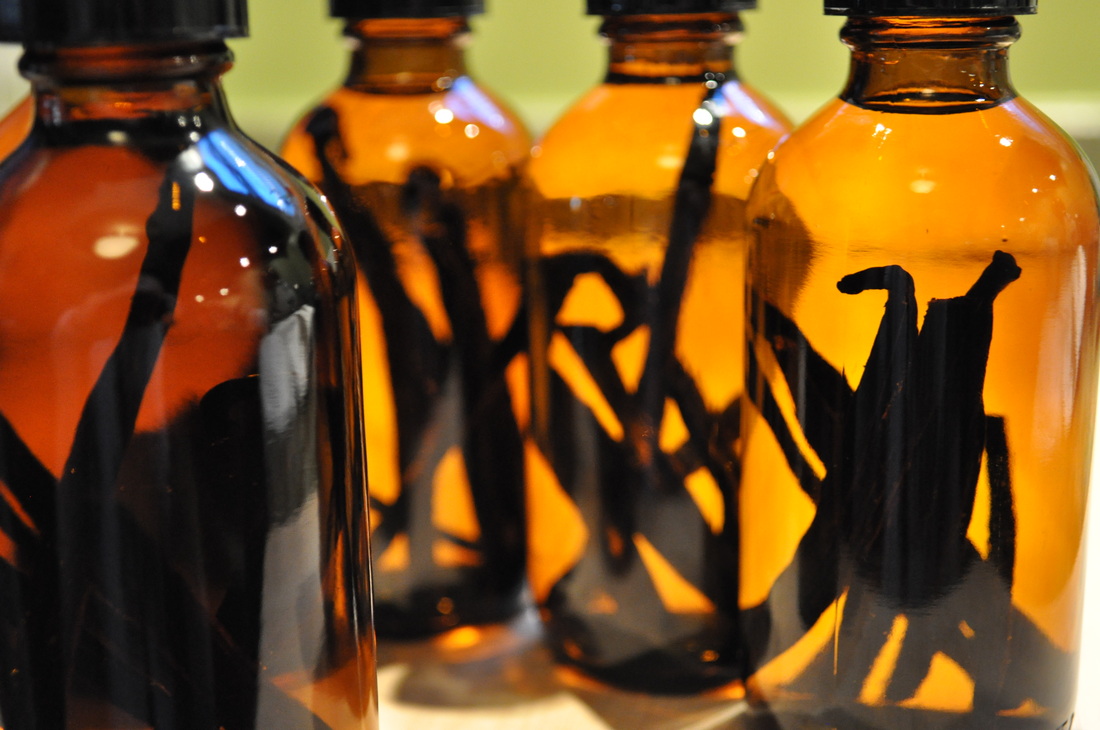 So... here's my tutorial - just download the link for all the directions. Keep reading to learn about my resources and inspirations.
Resources: Click on the links to order these supplies online: Vanilla Beans Glass Bottles The labels I designed were created with ephemera inspirations offered through my friend Karen at www.graphicsfairy.blogspot.com. She has an amazing collection of old pharmacy labels, clip art and all kinds of neat images that can spruce up any project! In the San Francisco area? Be sure to go Xanath and get some ice cream; I highly recommend the saffron ginger shake! They're in the heart of the Mission district on Valencia St. Xanath Ice Cream 951 Valencia St. San Francisco, CA 94110 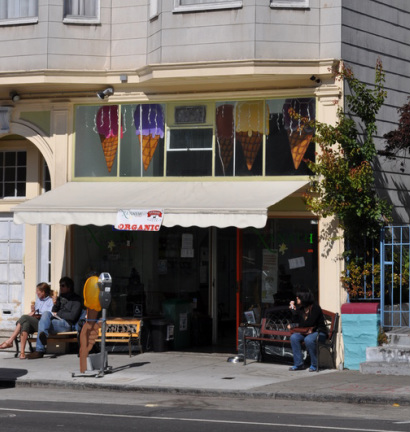 Like what you see? Click the "like" Facebook button or share this post on Twitter with your friends. Thanks!
We have been hard at work here at the Kyle William studio! The latest items added to the website are two new tutorial videos; one on the KFB (knit front and back) increase technique and the other on how to make a seamless join when knitting in the round. First, here's the video that shows a great example of when KFB is the increase to choose: The second video recently added explains an easy way to join knitting in the round: There will be additional tutorial videos made available as they are produced. Have an idea for a video that should be made soon? Send an EMAIL and we will see about moving that topic up in the list.
If you subscribe to my YOUTUBE channel, you'll be able to stay up to date with all the tutorials as they are released! Like what you see? Click the "like" Facebook button or share this post on Twitter with your friends. Thanks!  This is a short post but an important one... announcing a new feature on the Kyle William website: the VIDEO channel! Videos will be added over time, focusing on knitting techniques, hints & tips, and should be helpful when attempting a new technique or taking the first steps to learn how to knit. Techniques featured in this series are based on the right-handed English (or throwing) style knitting, where for the most part the working yarn is held in the right hand.
Click the VIDEO link at the top of the site to be directed to the page showing the various videos. Have a particular technique you'd like demonstrated? Send an EMAIL. Like what you see? click the "like" facebook button or share this post on twitter with your friends. Thanks! What fun this project is! With a few simple household ingredients, you can dye yarn a beautiful color! The first time I heard of this technique was scribbled in the margines of an old natural dyeing book another artist had left in one of my classrooms. Intrigued, I jotted down the notes and went hunting and gathering in my neighborhood for the required materials. Download a complete tutorial on the process by clicking the link at the bottom of this post. You'll notice that it doesn't take much to do this experiment! It also doesn't require fancy yarn... any 100% wool yarn should work quite well. The first part of the project is to gather the materials necessary to make the solution. 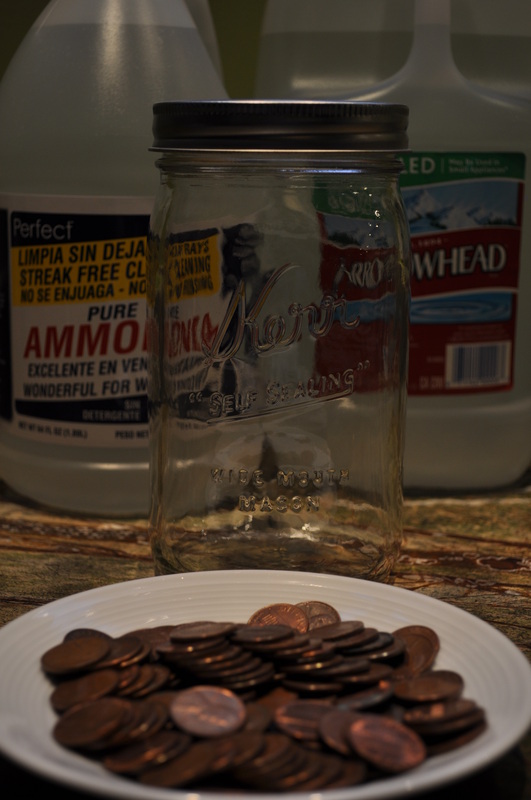 Why pre-1981 copper pennies? It has to do with the copper content. According to Wickipedia, (which is always accurate, right??) the copper content of pennies before 1981 is around 5%, and from the varous websites I researched for the recipe, they all specify pre-1982 or pre-1981 pennies. Years Material 1793–1857 100% copper 1857–1864 88% copper, 12% nickel (also known as NS-12) 1864–1942 bronze (95% copper, 5% tin and zinc) 1946–1962 bronze (95% copper, 5% tin and zinc) 1943 zinc-coated steel (also known as steel penny) 1944–1946 brass (95% copper, 5% zinc) 1962–1981 brass (95% copper, 5% zinc) 1974 Experimental aluminum variety (test strikes only, not circulated) 1982–present* 97.5% zinc core, 2.5% copper plating Where do you get 100 pre-1981 pennies? The bank, of course! (First I went through my change piles and sorted the pennies... I found almost enough for the experiment there.) I visited the teller at my local bank and got $4 worth of rolled pennies. in the first 2 rolls I found a total of 11 pre-1981 pennies which was enough to complete my first experiment, and after opening the other 2 rolls (and finding a few additional ones lying around) I have 51 more pennies saved up for the next time I want to try this!  Of course, after all the preparation, I got a bit ahead of myself in the experiment and used tap water instead of the distilled water that my recipe calls for. Tap water includes iron which might change the way the solution develops. The metals and minerals in tap water affects dyeing, so if an attempt at controlling the color is desired, then distilled water is the way to go. I'm going to proceed anyway with this version (I could pour out the liquid and re-start it since it was such an immediate realization) to see how it looks. I'll then repeat the experiment with distilled water to see how that compares. 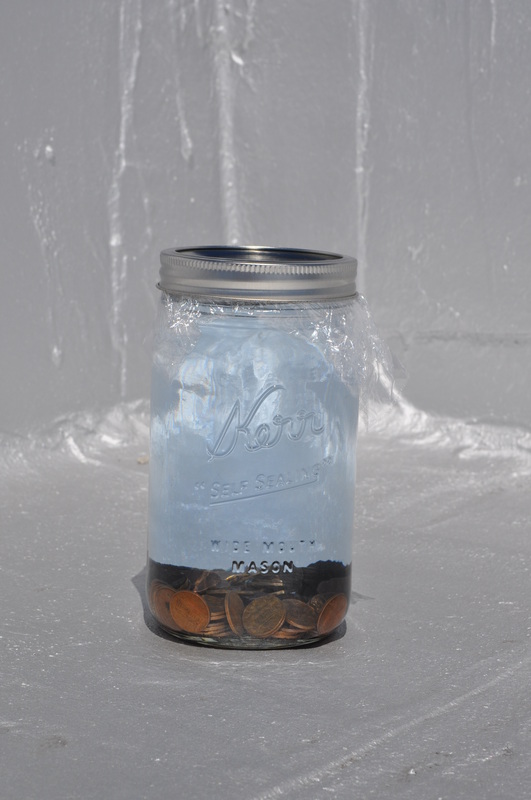 I put the sealed jar on the roof of my building with a note, letting the other tenants know what wacky experiment I was doing, and then followed it up with a quick email to let them all know, just to be sure everyone is aware. It was mixed around 11:30am on Monday, May 9, 2011. The liquid almost immediately started to change color. Even on the silver paint of my rooftop it is noticeable! 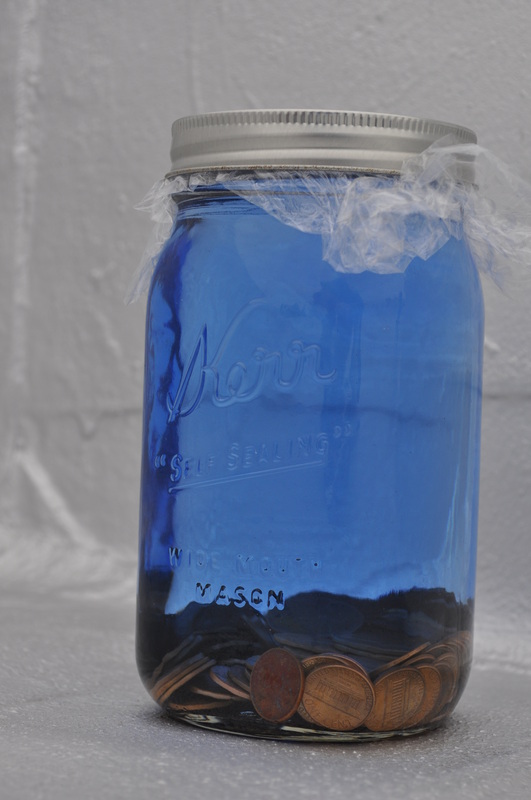 The above photo was taken after 48 hours, and the liquid is even more blue. (The sky was very cloudy when I took this photo; the blue is actually more brilliant than it looks). I am checking the liquid daily to see how it looks, and I shake up the jar each time to mix around the pennies. 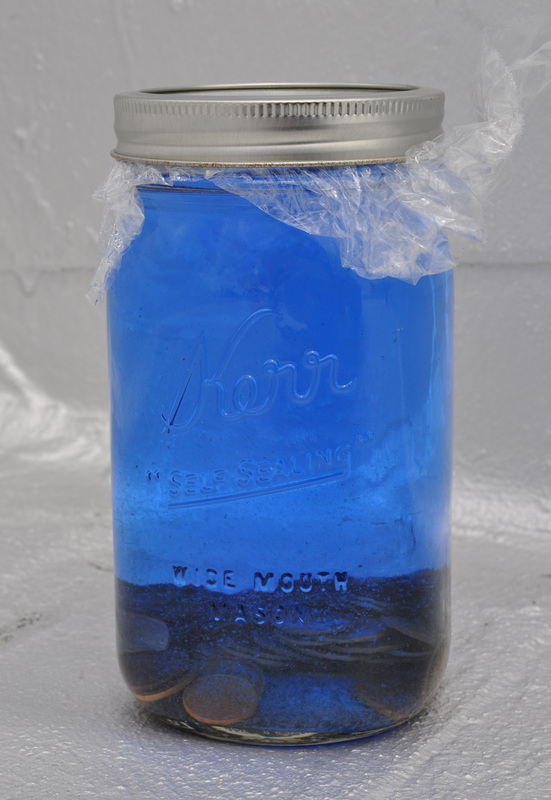 ...and here it is one week later - in brighter light... it doesn't seem that much more intense when I compare the photos. (It actually seems lighter/brighter). That being said, my guess is the solution is probably not harmed by leaving the copper in for longer than recommended. The next step is to soak your wool. I used Patons Classic Wool (100% wool) in the color "Aran" for this experiment. It comes in skeins that weigh approximately 3.5 ounces. I wound 2.25 ounces onto my niddy noddy, and loosely tied the skein using scrap bits of yarn in a "figure 8" through the yarn to keep it secure in 4 different places. Here's my skein of yarn bundled up for a "before" photo: 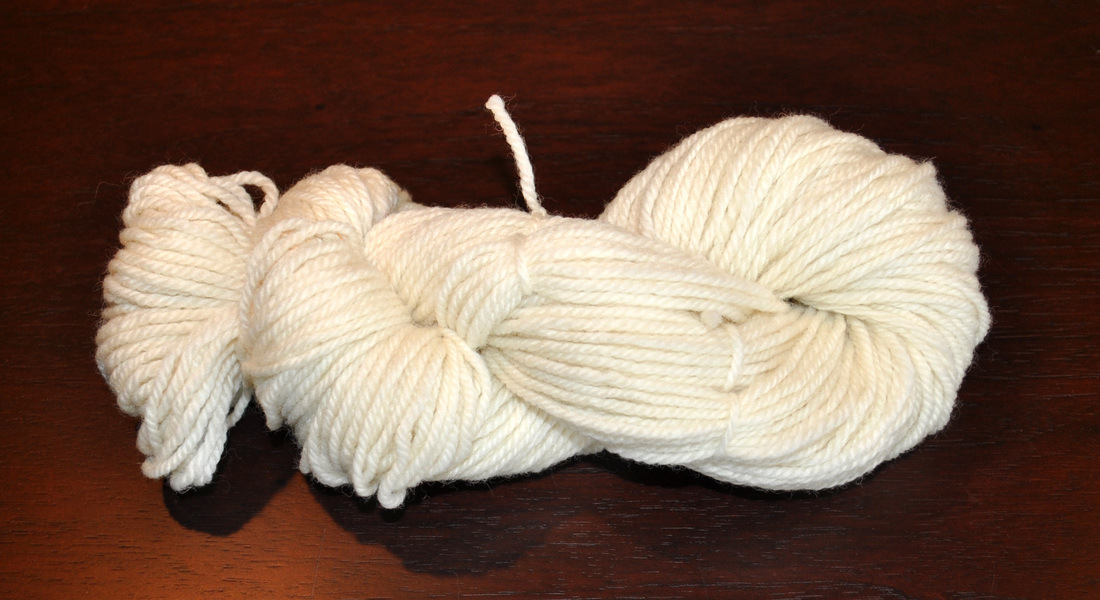 Then, fill a large bowl or pan with cool water. Open up the skein and submerse the yarn so that it's all able to soak up water: 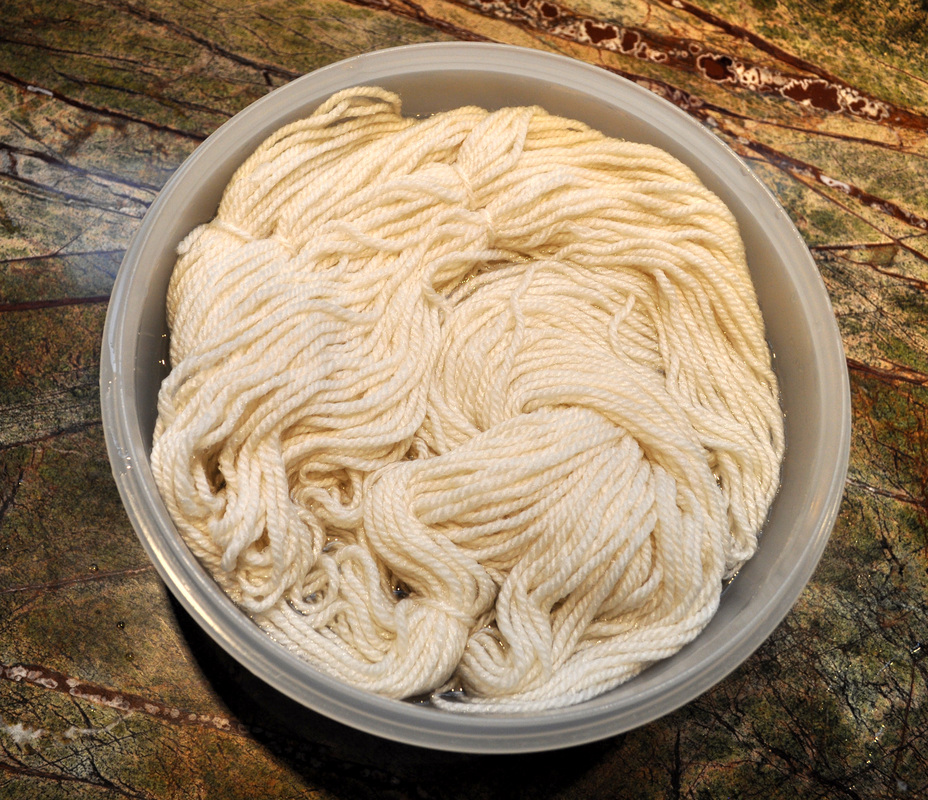 Some of the yarn sits on the top of the water and is exposed to the air... it's not getting wet! In order to fix this, I put a plate on top of the yarn and allowed the water to submerge the plate: 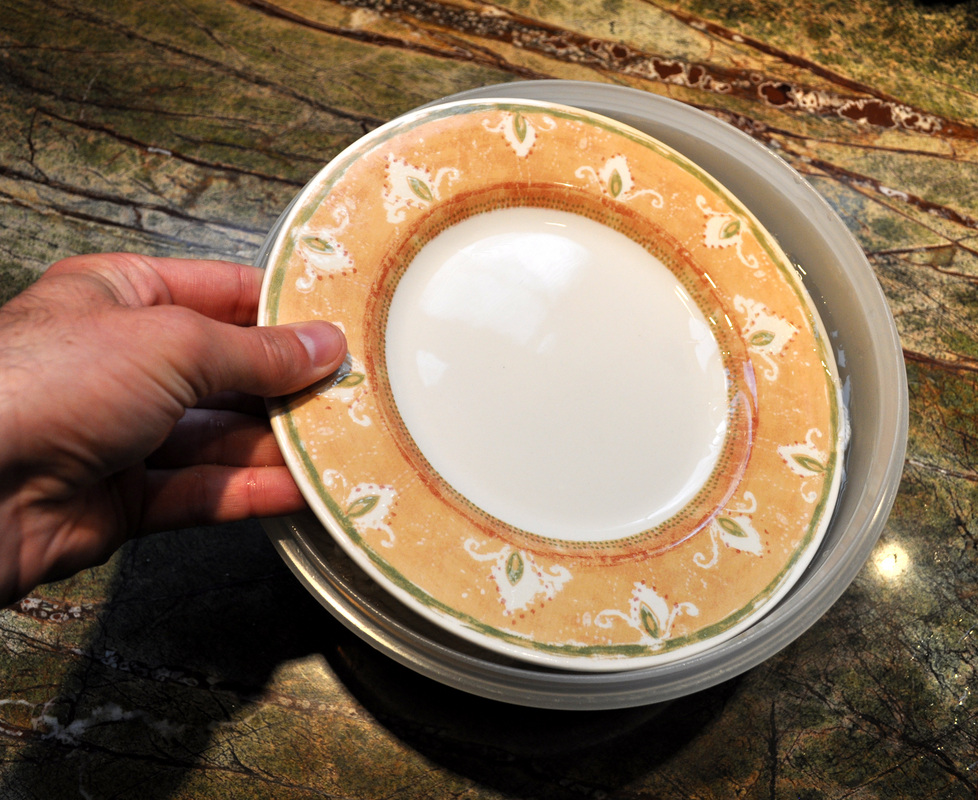 Let the yarn soak for about an hour in the water so that it is fully wet. Next, take the pennies out of your blue solution, being careful not to breathe in the vapors. Rinse the pennies in water. I don't know for sure if you would want to re-use the pennies for dyeing again or not (anyone have thoughts?)... The next steps require a few additional items: rubber gloves, a strainer of some sort to easily drain the liquid and keep the pennies in the jar, and a container of some sort in which to soak the yarn. Hooray for the dollar store; $3.00 plus tax for these additional items! Note: even though we are using simple household ingredients, I really suggest not using food preparation items that might come into contact with the blue ammonia solution. It's best to have dedicated supplies and materials for your dyeing and experimenting. When in doubt, don't use something that you use for food preparation. 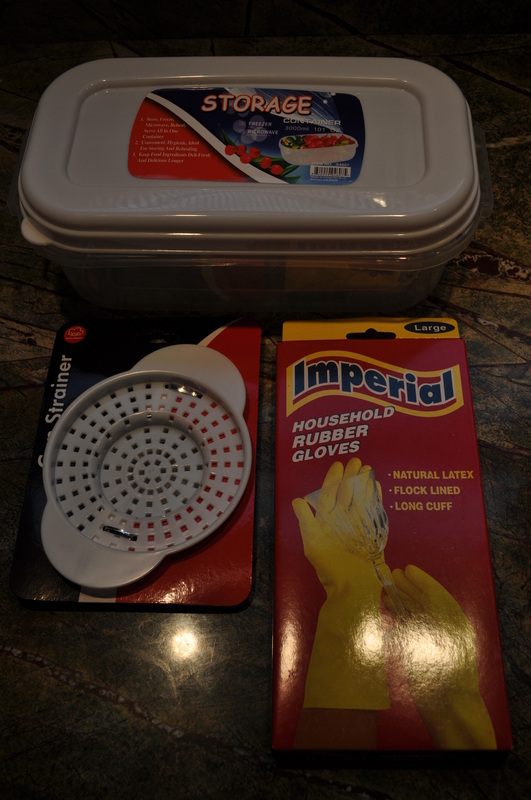 Carefully wring out the yarn from the bowl of water, and put the wetted yarn into the blue solution. BE CAREFUL not to get the solution on you. (If you do get it on your skin, wash immediately with soap and water.) When I did this, the yarn turned a strange beige-gray color. I put the plastic wrap on top of the yarn to try to be sure that the liquid was in contact with all of the yarn. After 30-45 minutes, there was no more blue in the solution. 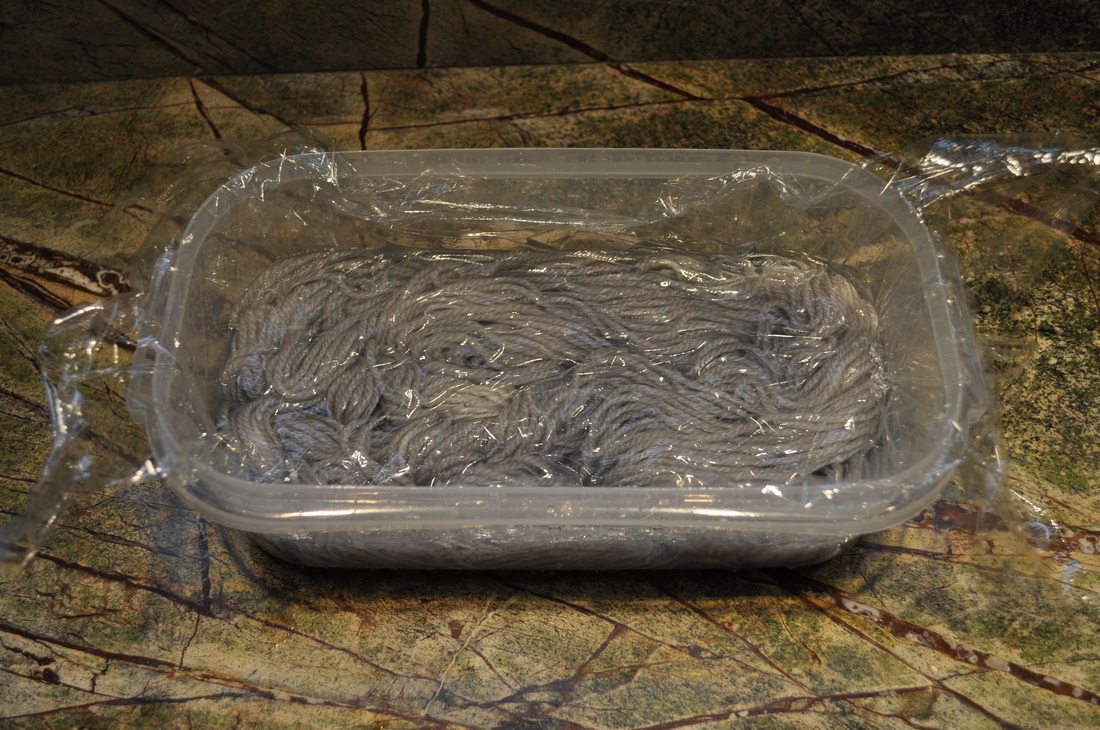 Once this happens, remove the yarn and rinse in a soution of vinegar to set the color. Note that this color is considered fugitive, meaning the color might/will fade over time. Be aware of this when you do the technique, knowing that if you combine it with other colors that this one may fade. 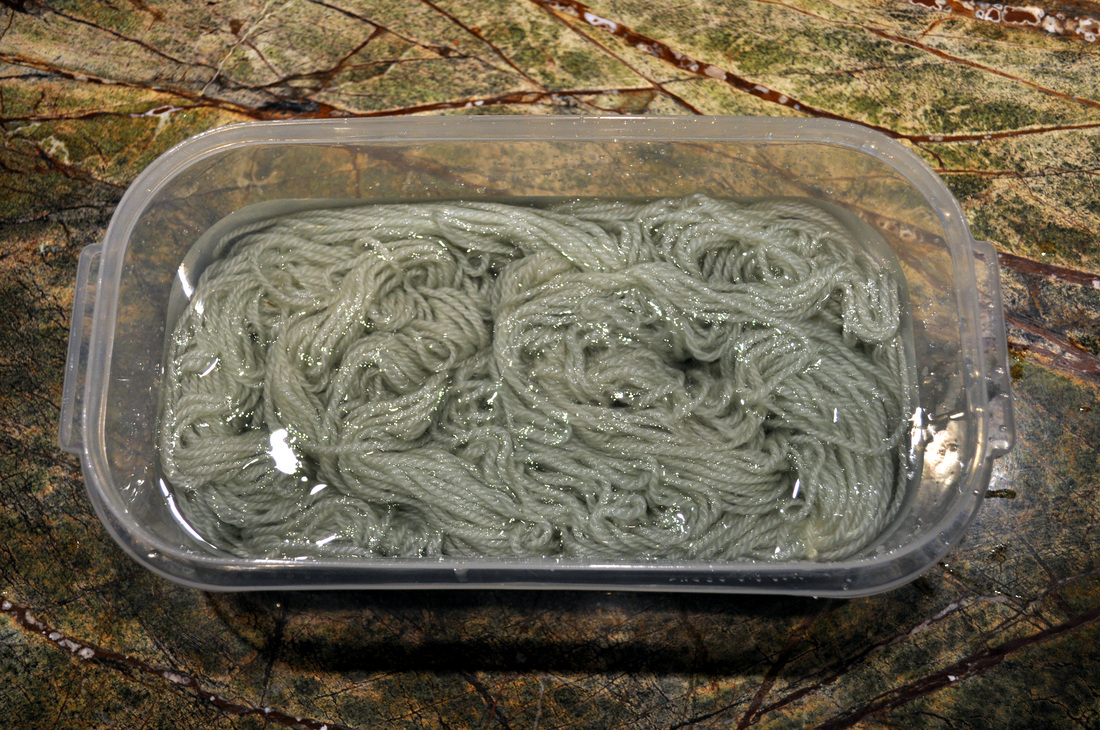 The photo above was taken after the yarn had been rinsed and vinegar was added to the rinse bath. There's a distinct but subtle change of color when the yarn is put in this "afterbath" - it got lighter and more green. The photo below shows an attempt at illustrating this difference. Click on the photo to enlarge. 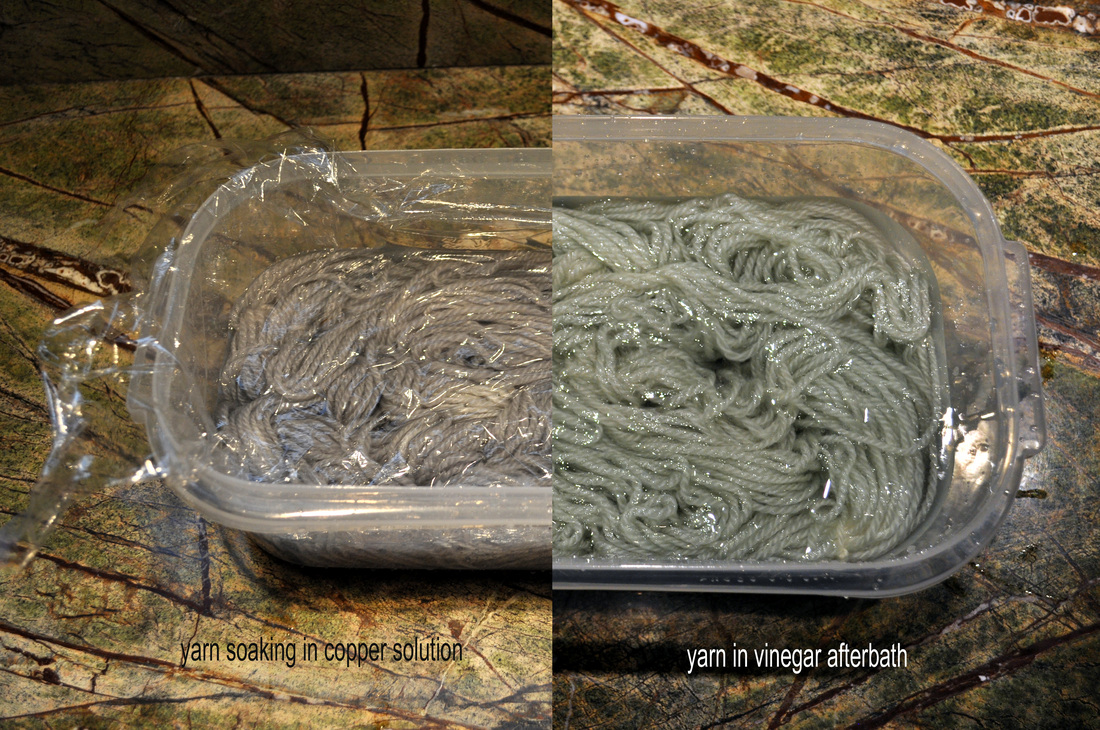 At this point, there's not much more to do. Rinse the yarn well, remove the excess water, and hang it to dry. In the end, I ended up with a green/gray yarn that I'm pleased with. Note that this dye is fugitive, meaning the color will fade over time, much like many other dyes. It's worth noting, however, and keeping in mind when pairing with other yarns. 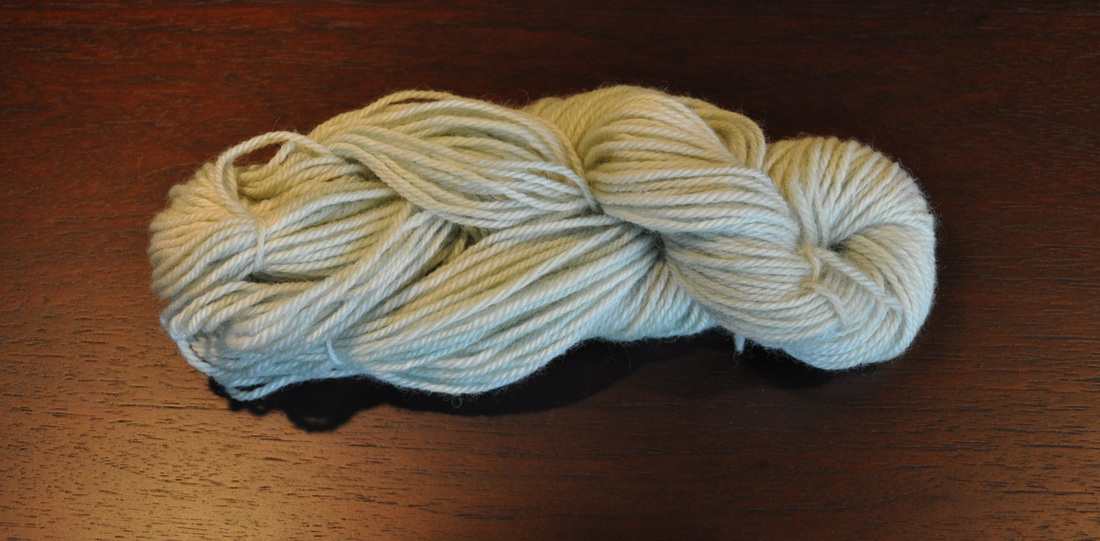 One more photo to compare the colors. If you do try out this fun technique, be sure to send me a note to let me know how it goes! Ready to try? Click the link below to download the tutorial for copper yarn dyeing! 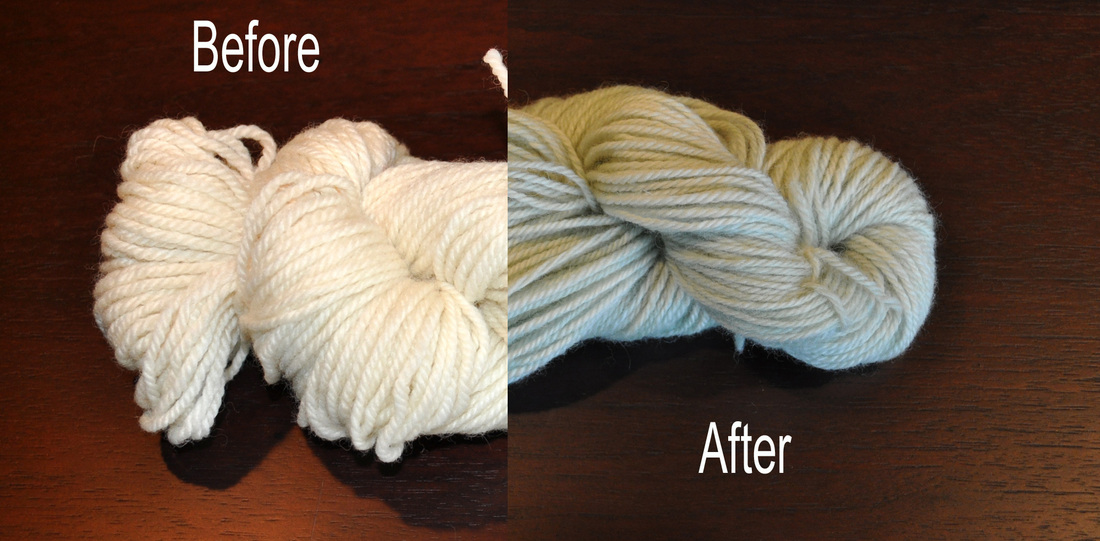
Like what you're reading? Click the "like" button for twitter or facebook below to share this post with your friends!
|
Archives
July 2023
Categories
All
|
|||||||||||||


 RSS Feed

|
ExploreFor Fun
|
Support |
Connect |
© 2006-2023 Kyle William. All Rights Reserved.