
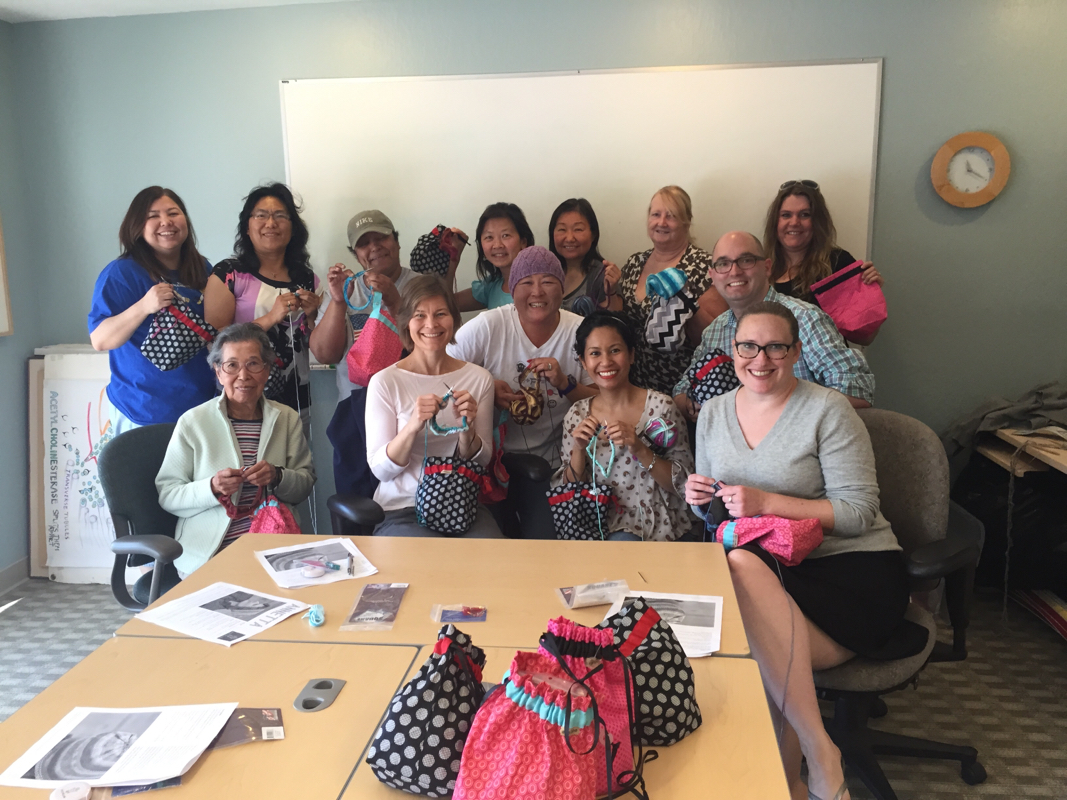
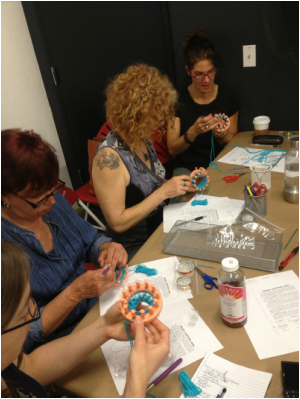
 I had the best time spending the day with this great group of women at Bay Area Cancer Connections in Palo Alto,CA. Each one is either supporting a friend or on her own journey facing cancer. The learn to knit workshop was a success and they are all well on their way to making a hat of their very own. It sounds like they may begin an informal knitting group at the Center! Many thanks to those who donated materials, including Erin Lane Bags, Kollage, Brittany, Skacel, and HiyaHiya! Thanks also to my friend Darin who helped out all day.  Yesterday I spent the day at the Museum of Craft and Design in the Dogpatch neighborhood of San Francisco, assisting Arline Fisch in her workshop that provided participants the opportunity to knit and crochet with wire. I met up with the Museum staff a few minutes before class began and, along with Laurel, another volunteer, had a crash course on the projects we were making. The workshop (and the speaker series event on Friday night) were arranged to compliment the current exhibit: Creatures from the Deep, which displays a beautiful collection of sea creatures crafted from wire. The class was sold out, with folks even flying in just for the workshop. Yes, Arline is THAT well known; her work is even in the collection of the Smithsonian. Others talked about week-long retreats they had attended led by this artist decades ago. Students brought in copies of her books and asked for autographs. It seems most (if not all) of the books are out of print now. I looked through a few of them and was overwhelmed with the creativity and inspiration they contained. For those interested in jewelry or metal arts, I'd suggest getting one (or many) of her books as budget allows. 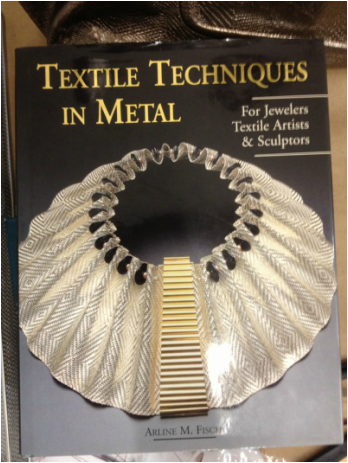
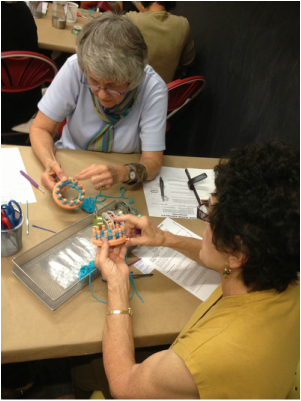
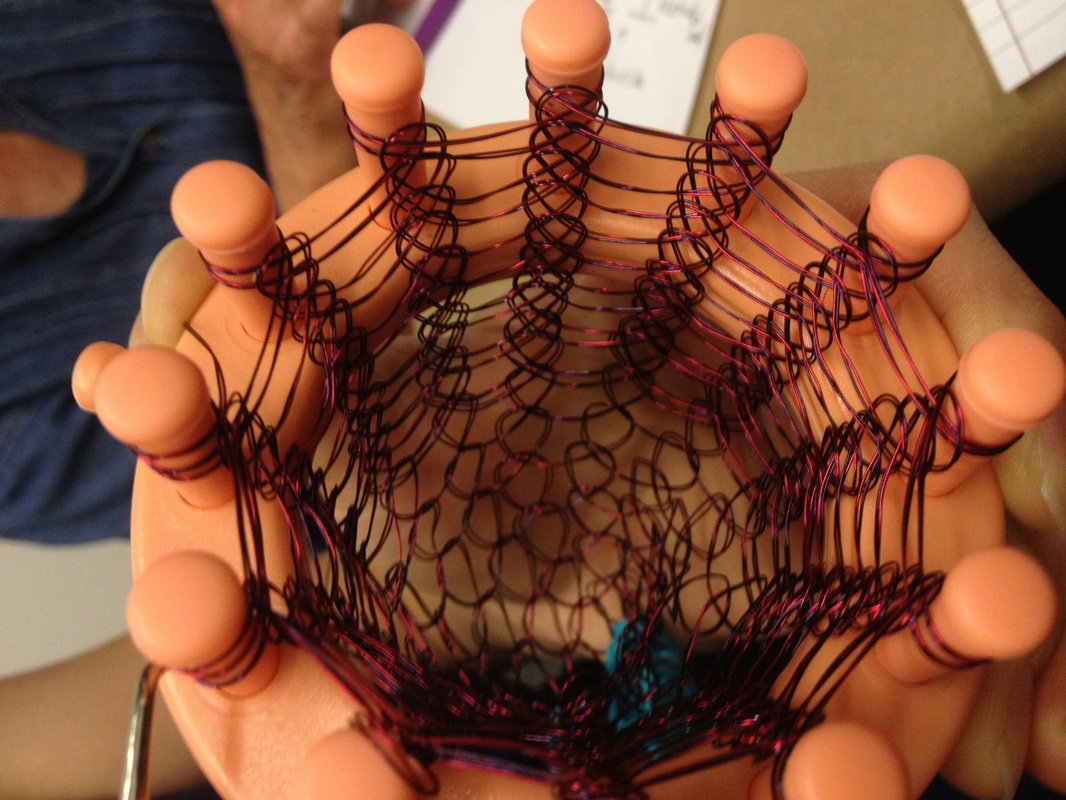 As the workshop progressed, we circulated, offering help with projects. For this workshop, students were first able to make a little jellyfish, then a bracelet using special wire and a round knitting loom. The process of using the loom was pretty easy, and working with the wire was surprisingly fun! As we worked, Arline related the workshop to the exhibit, explaining how she used the same technique for many of the pieces in the show.... even explaining how she had custom rings made for projects of varied scale. 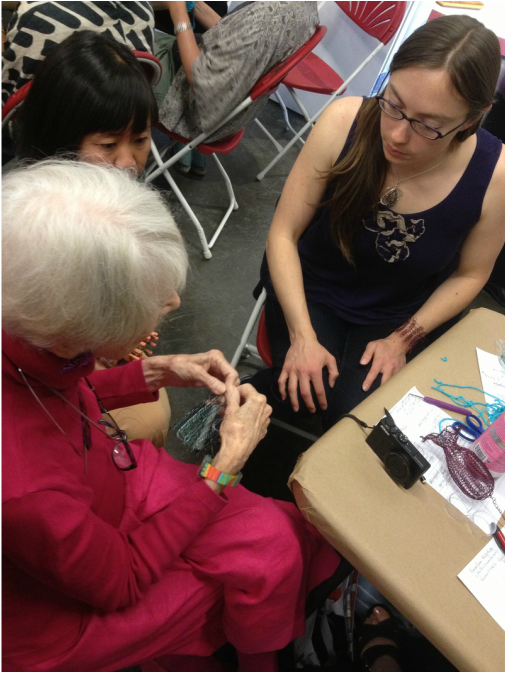
Arline was generous with her time, even staying during the lunch break to answer questions about the workshop or projects that students were working on. I was pleased to hear how everyone had a great time at the workshop, and it was a joy to watch this woman who has spent much of her life devoted to the art she loves, enjoying the experience as much as her students! The participants came from varied backgrounds - social workers, engineers, social workers, landscape architects and gardeners - and it was really neat to watch them work as they were gathered by this common interest.
At the end of the day, students filled out a survey for feedback about the workshop, gathered their new creations, and headed out into the beautiful Saturday afternoon. We cleaned up the room, folded up our aprons, and got ready to go. Arline gave me this sweet little jellyfish that she had created as thanks for helping out with the workshop. She gave Laurel a knitted bracelet. I was giddy with excitement to have a work made by this legend and asked to take a photo with her. 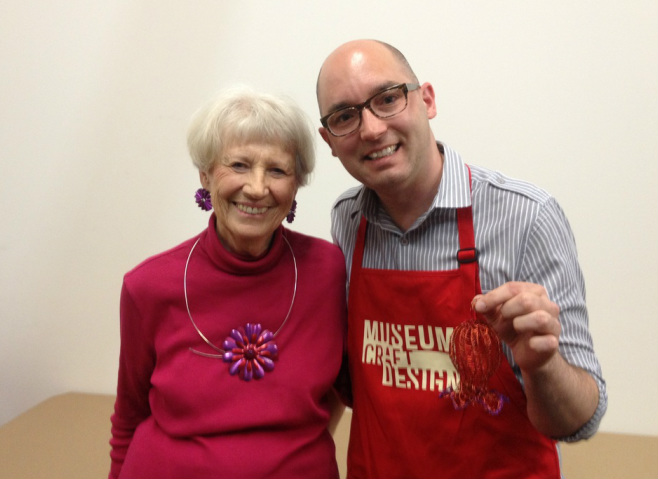
Leaving the Museum, I realized how important craft is to my life, and I look forward to being a part of their workshops in the future! Current KnittingI'm working on a swatch for a design proposal at the moment. It's taking a bit of my time away from progressing on things that I can talk about on the blog. I'm happy with how it looks and (some day!) I hope to share it with you! Current Spinning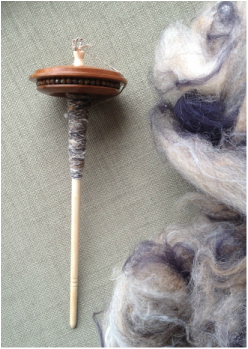 After a fun day working with Arline, I came home to a little gift! John remembered how I had wanted the "Space Needle" drop spindle by Cascade Spindles when we were at Madrona last year, and ordered one for me. So... last night, after having a beautiful dinner outside, I gathered up an art batt made of wool, alpaca, llama, firestar, angora, mohair, AND silk/soy silk from Lush Fiber Farm and started practicing on my new beautiful drop spindle.
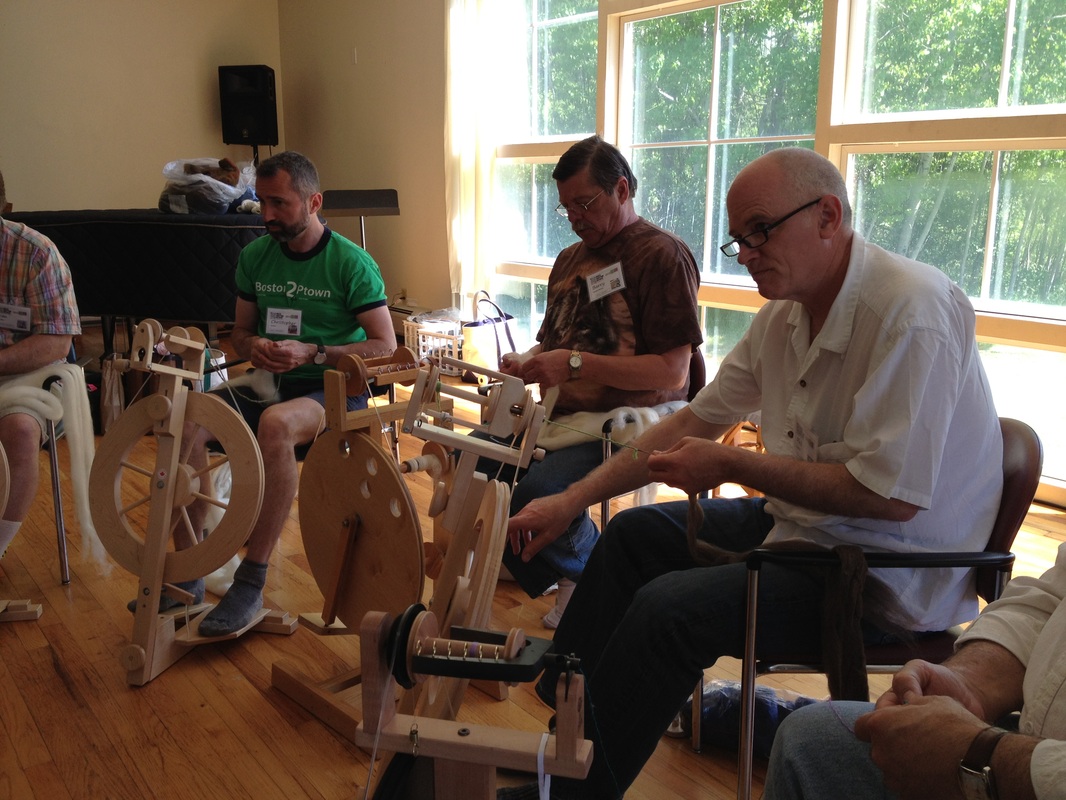
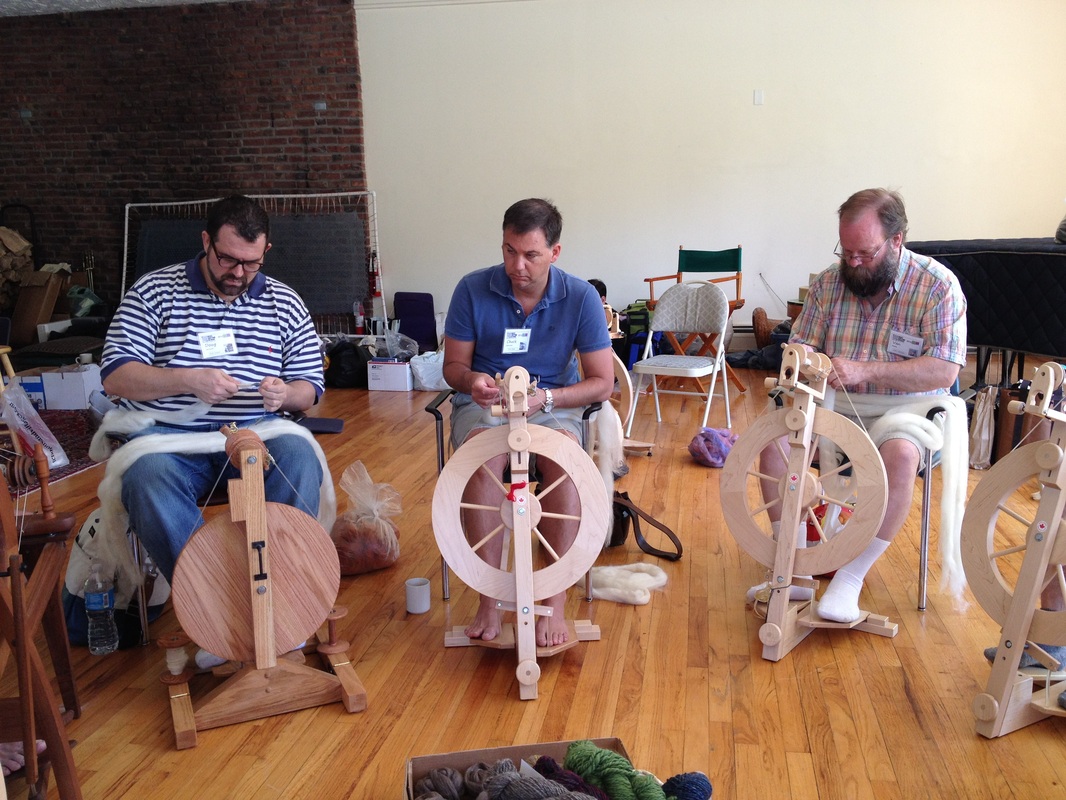
The first time I tried working with a drop spindle I didn't like it because it took a long time. Last night when I was experimenting with it, I realized that using a drop spindle means I can take spinning with me! - (yes, I know, that portability is one of the major reasons for using a drop spindle... I just had never thought I might want to take my spinning WITH me!) What fun. (now I can start hunting for other drop spindles to add to the collection!) As promised, here's the second blog post about the 2012 Men's Spring Knitting Retreat. We're traveling a bit back in time to before the retreat, where I'll talk about two different outings; Trumpet Hill yarns and Battenkill Fibers. Immediately after arriving in Albany, NY, Aaron and I headed over to Trumpet Hill Yarns; an adorable shop that is one of his favorite spots for knitting and spinning. We walked in to find Celeste and the gang all sitting in a knit/spin group, happily talking about the events of the day as the weather suddenly turned from cloudy to rainy. It was the only time it really rained during the trip and we all felt safe, knowing that if something happened the yarn shop has plenty of fiber, yarn, patterns and supplies to keep us satisfied until help arrived!  Trumpet Hill uses knitting as art This shop is a must-see for anyone visiting the area - it's full of friendly, knowledgeable fiber-enablers; full of creative ideas and, if you're not careful, you'll end up with a new project (or a new spinning wheel!) 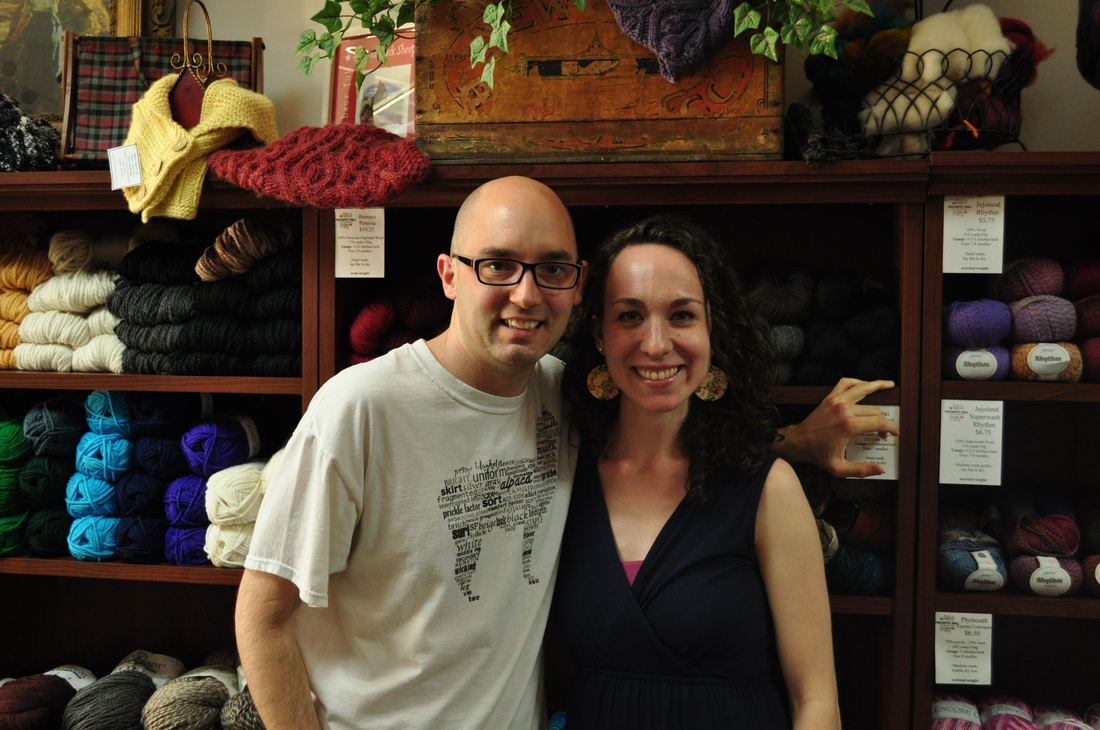 Kyle & Celeste
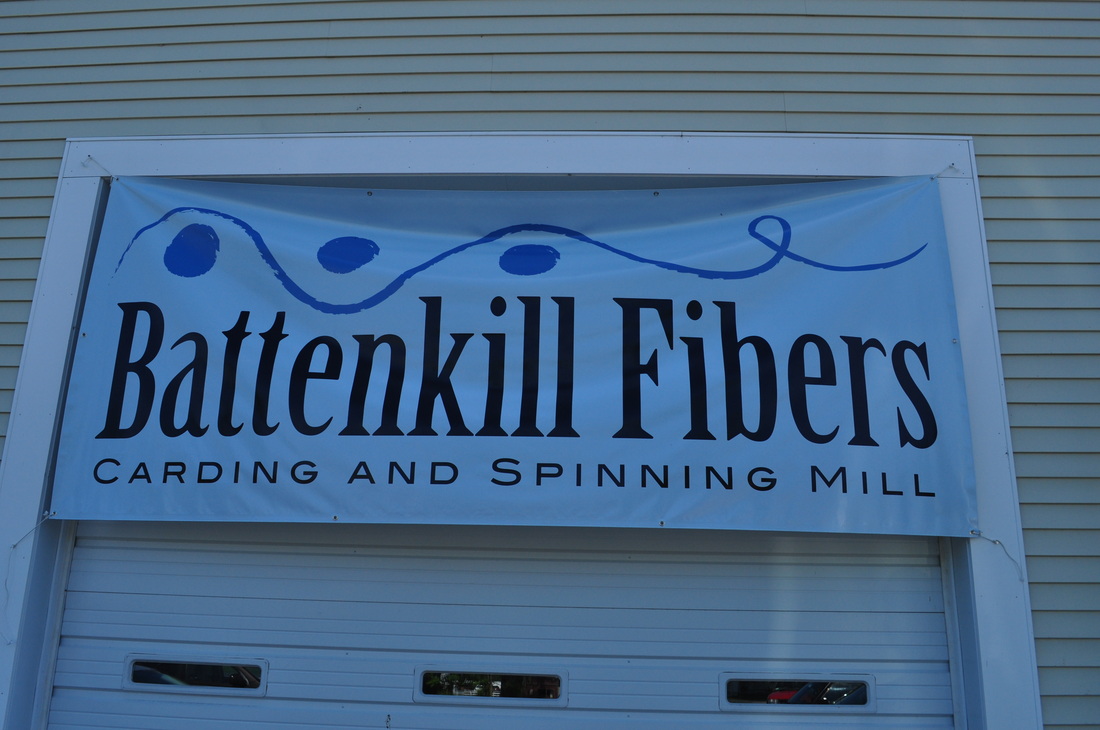
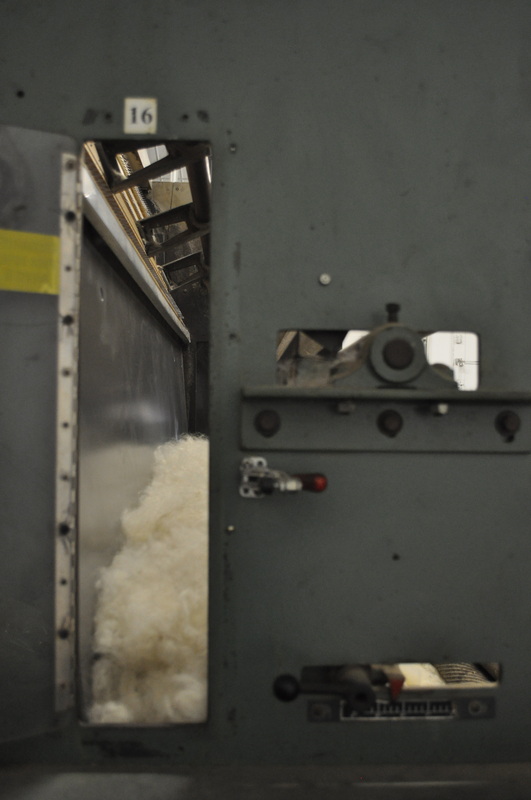
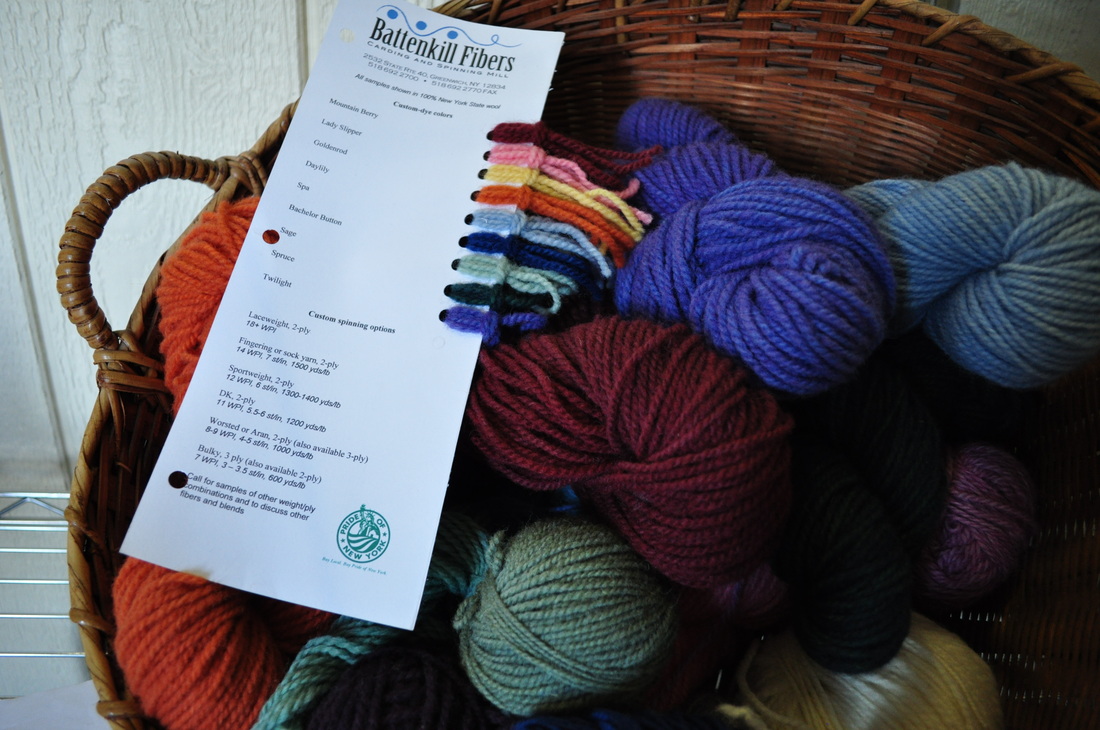
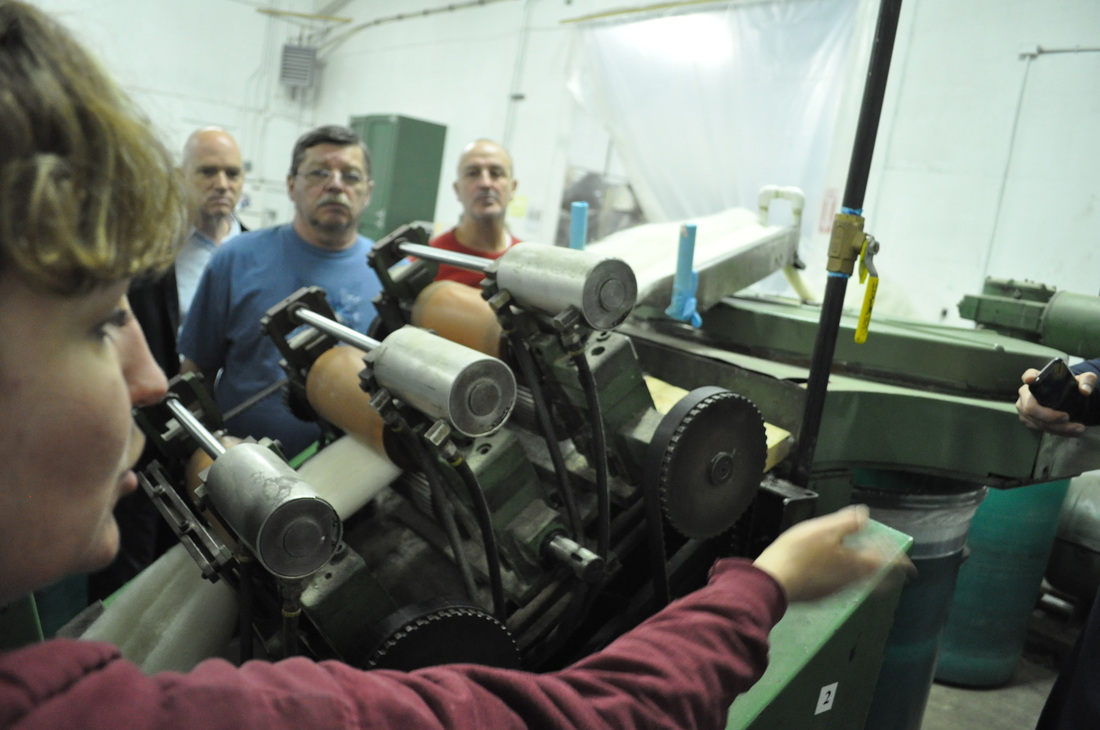
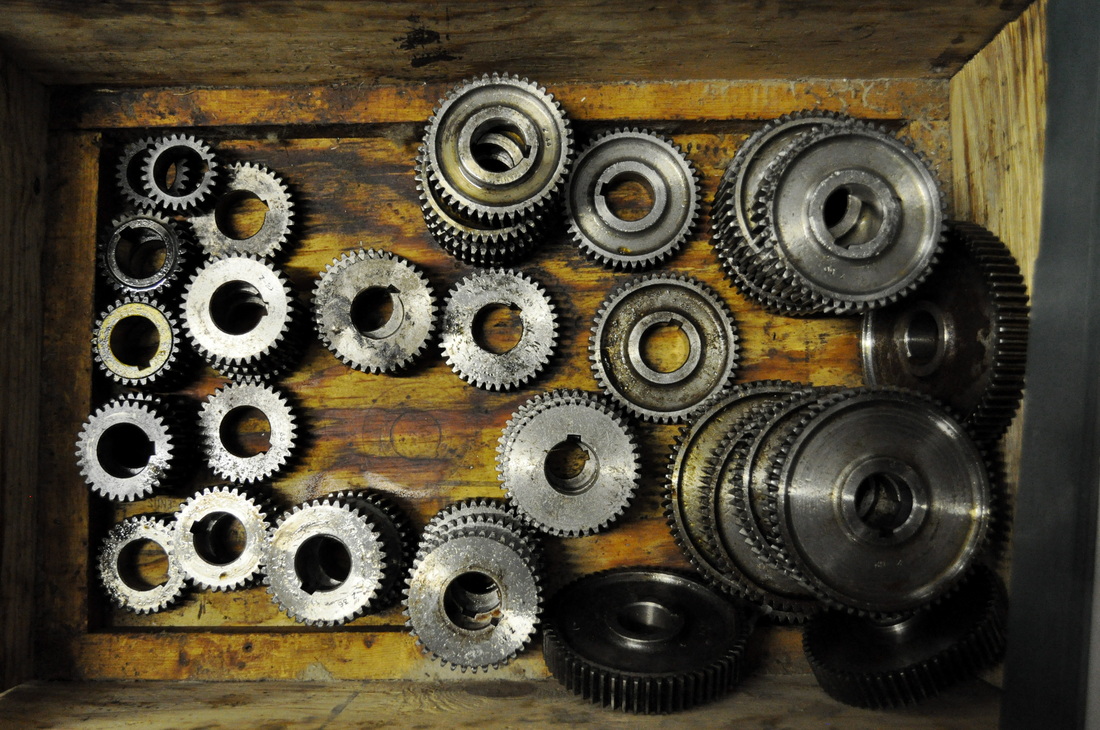
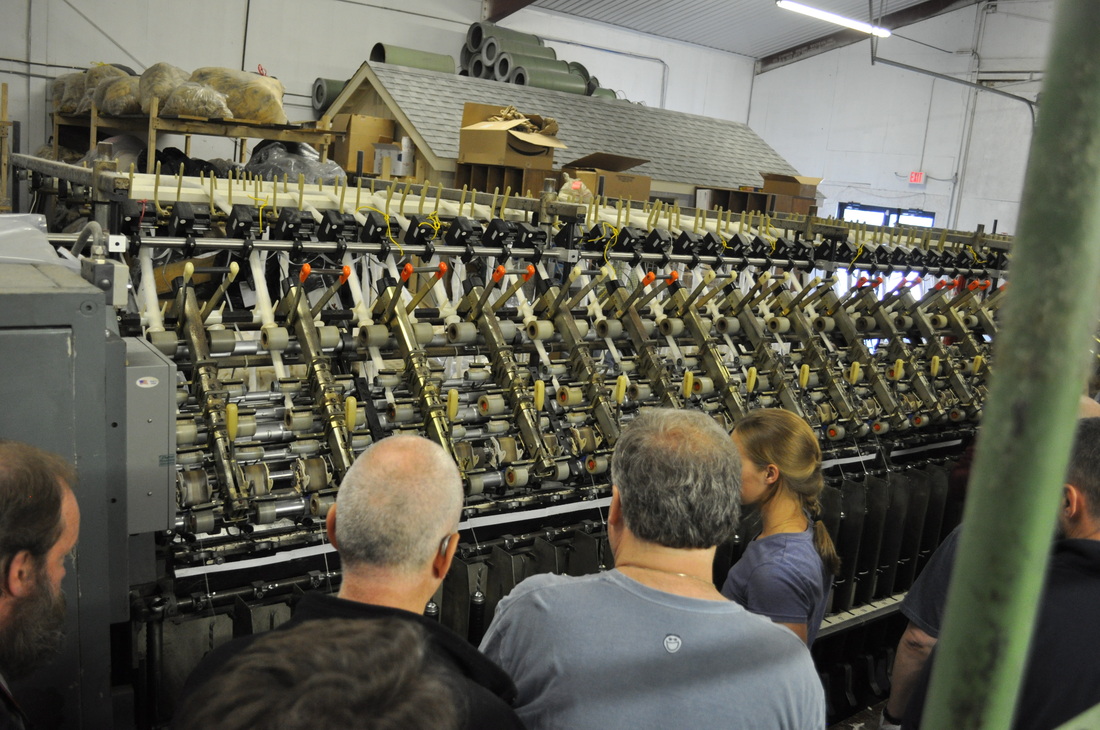
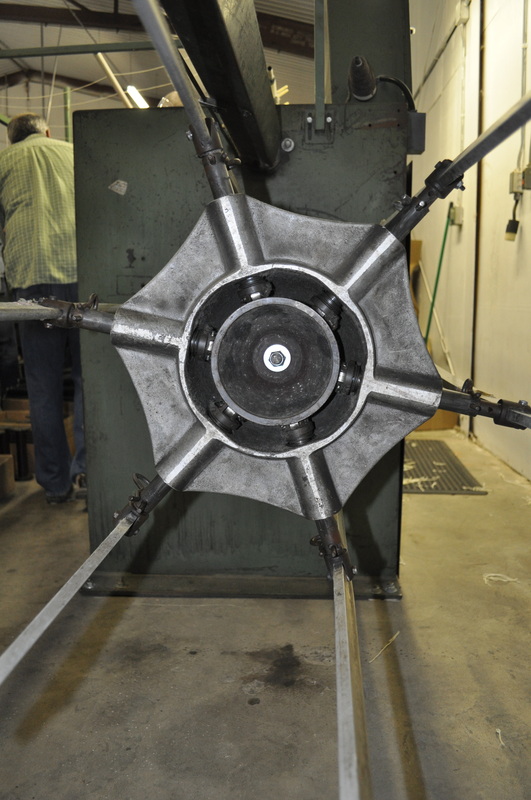
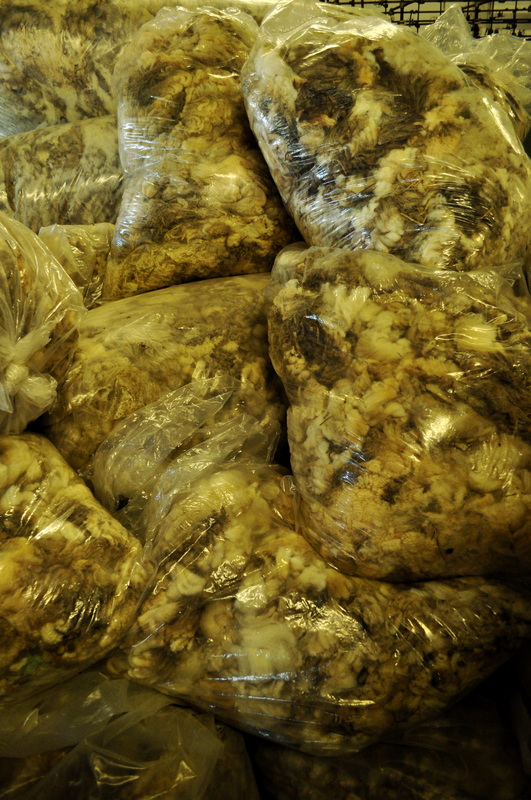
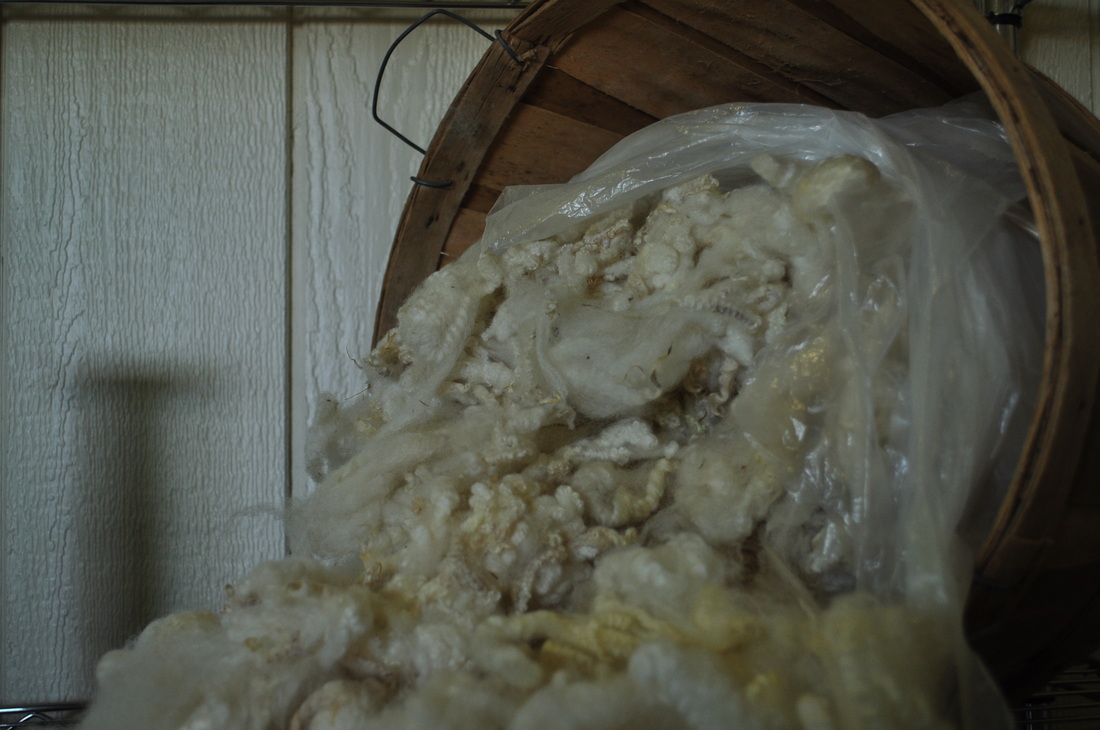
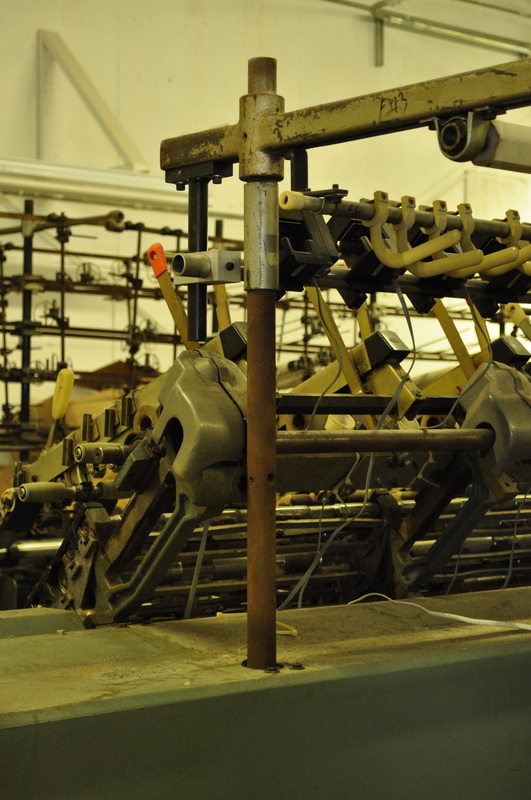
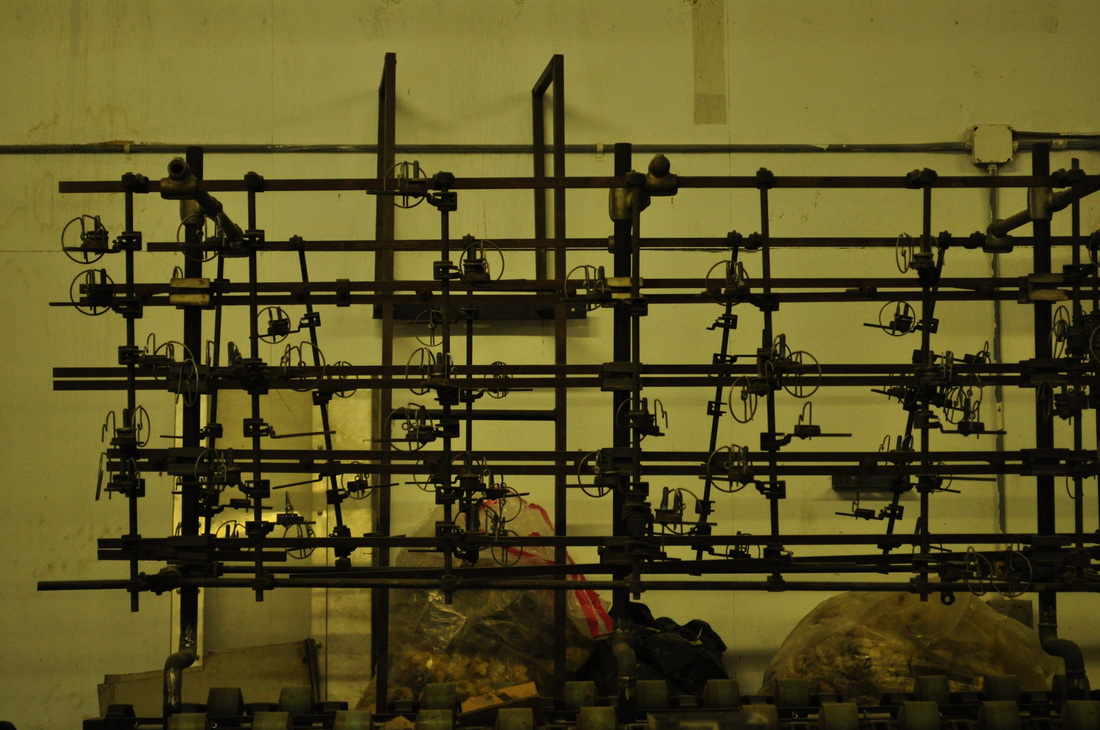
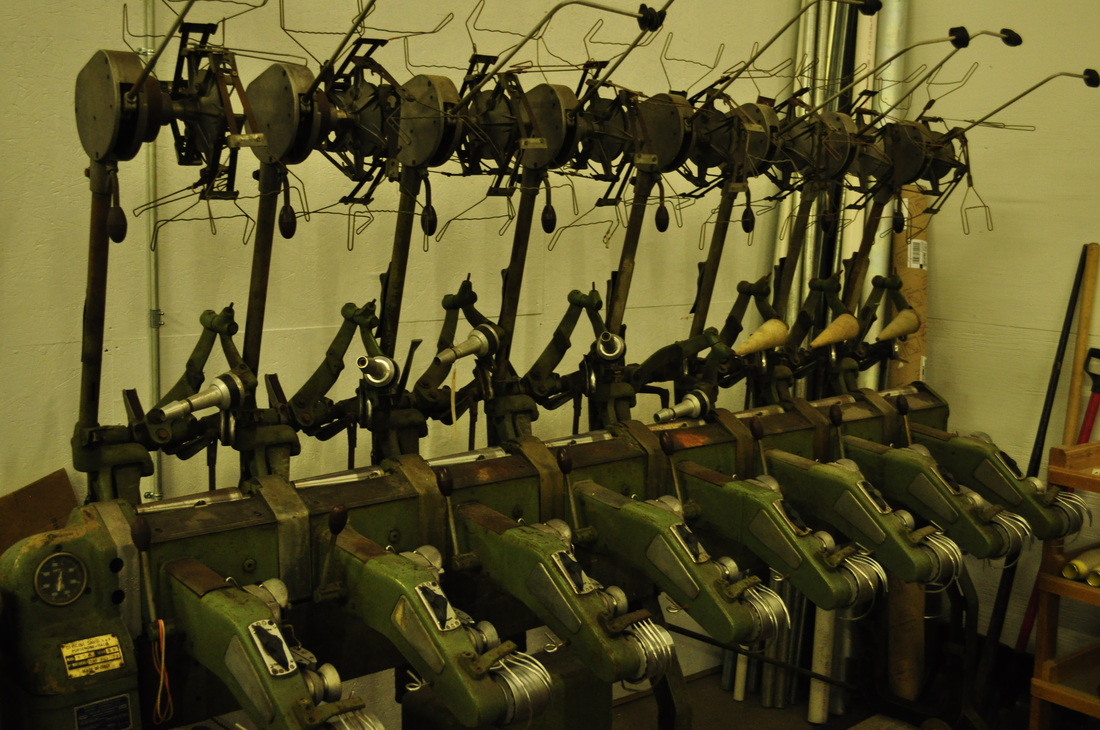
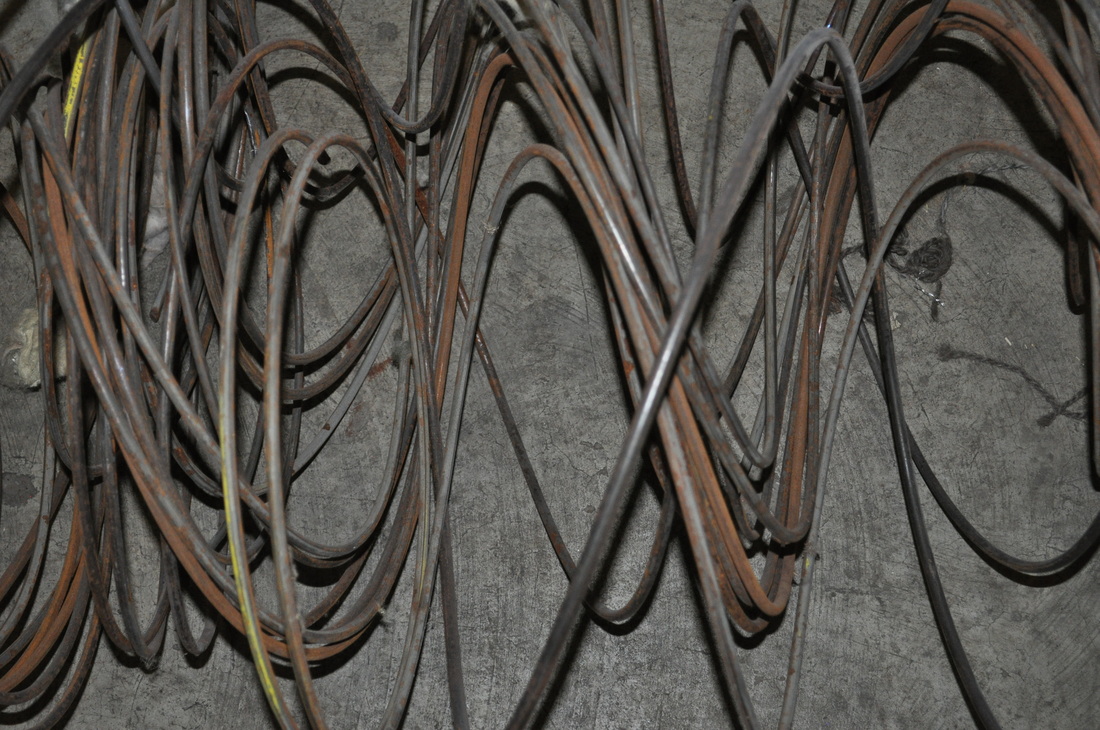
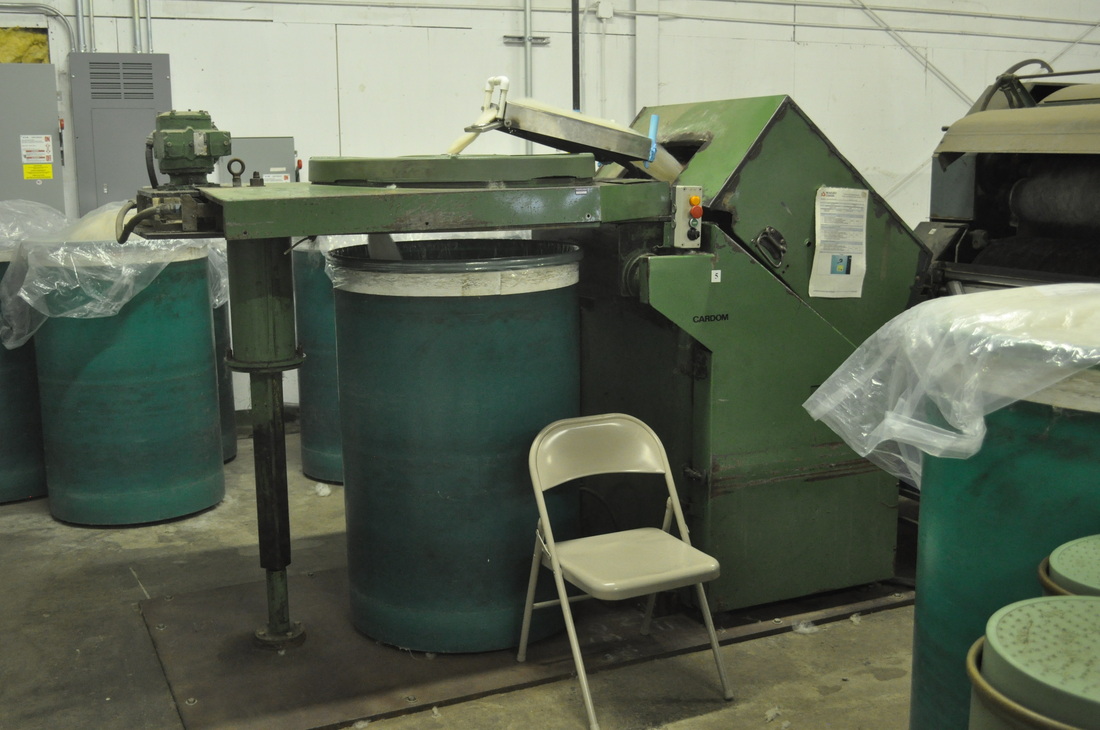
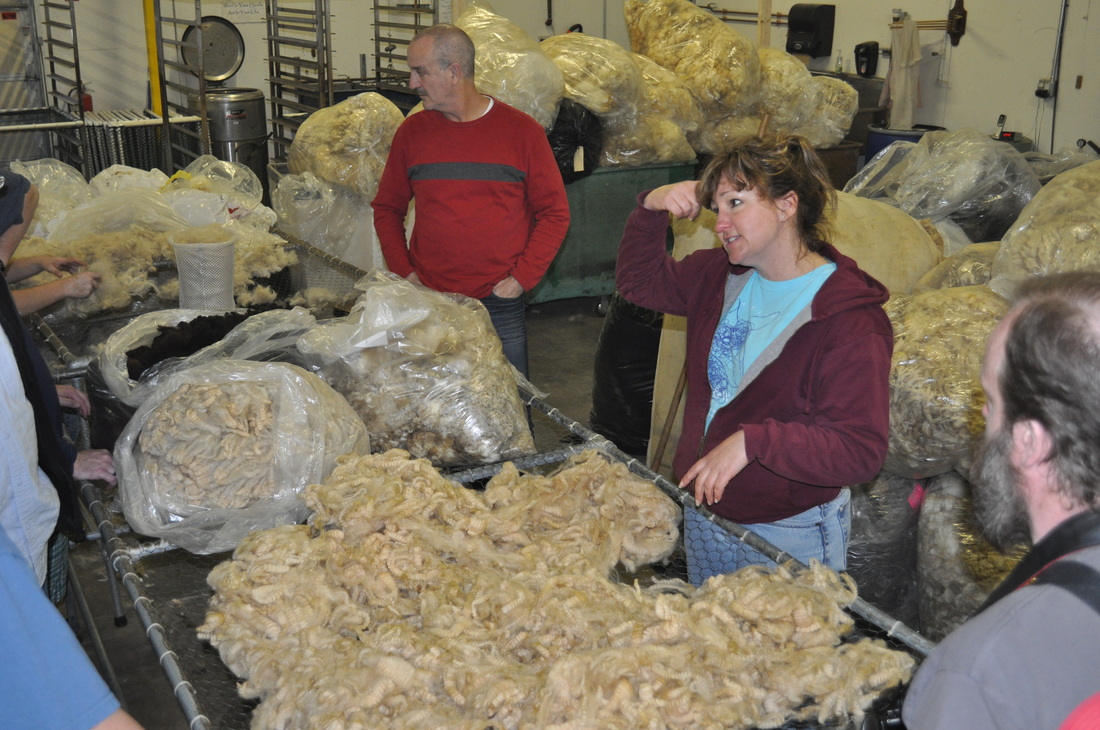
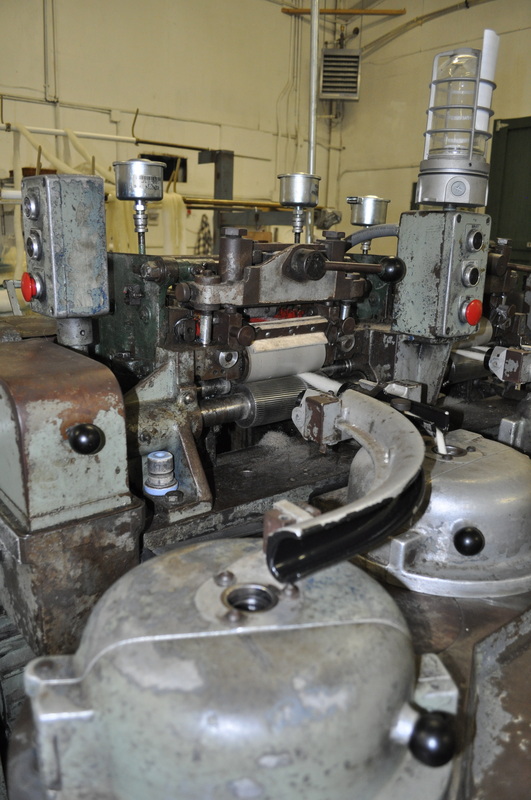
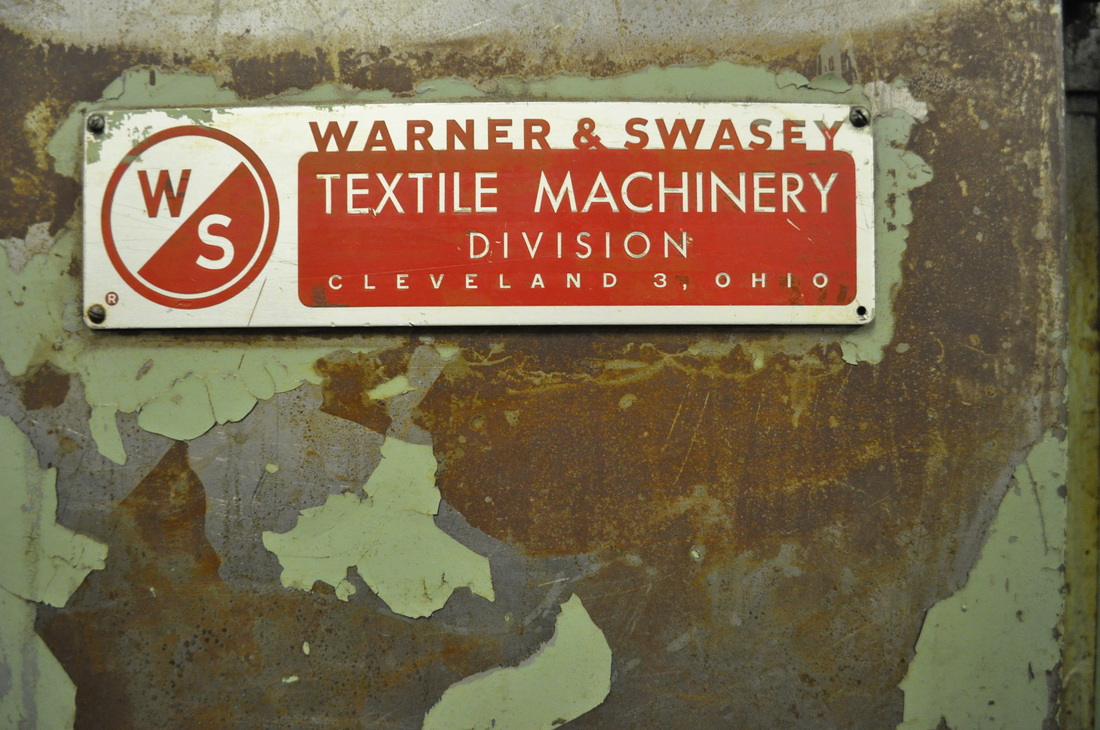
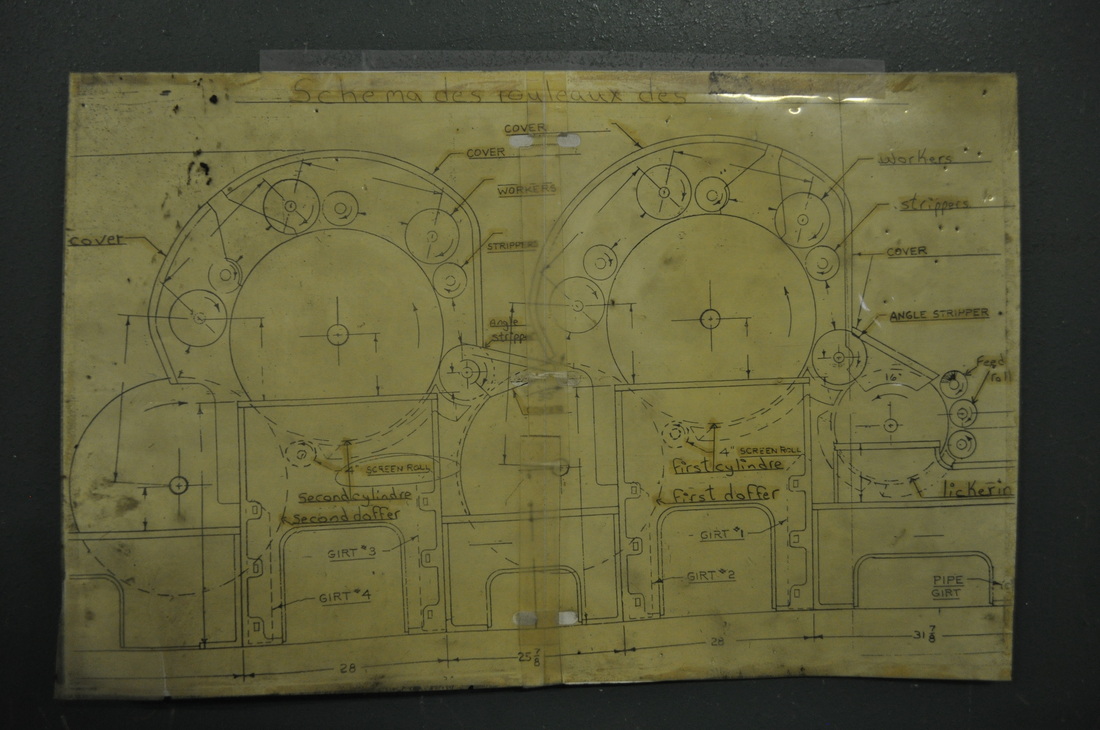
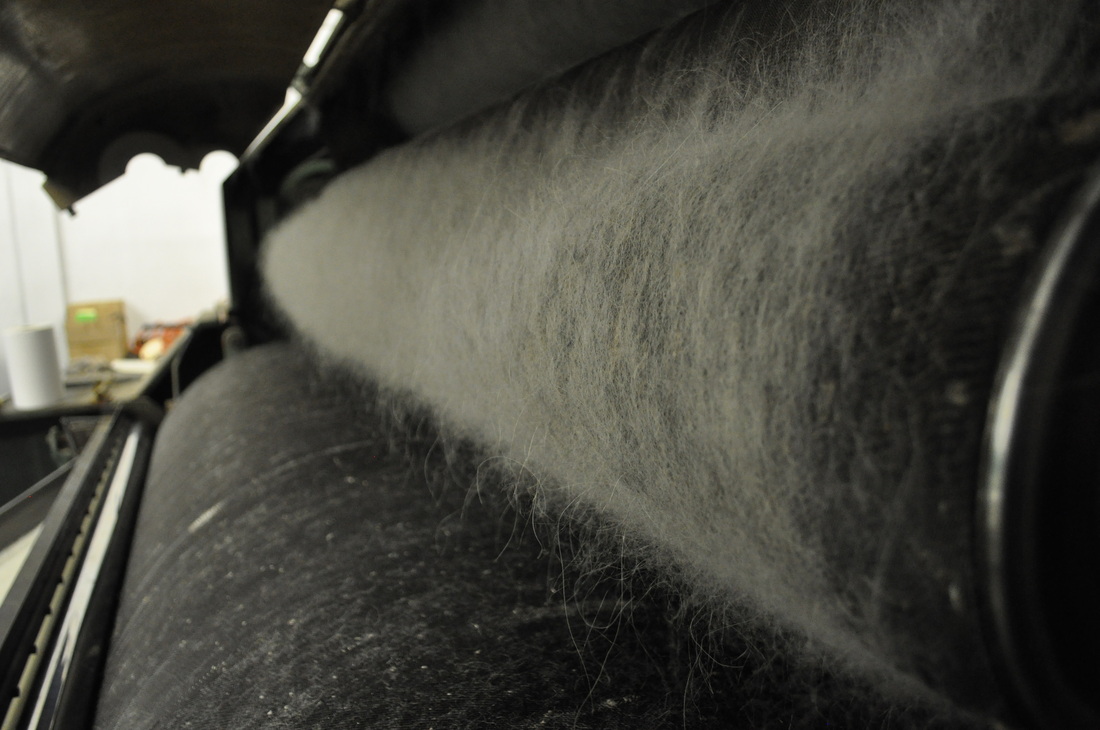
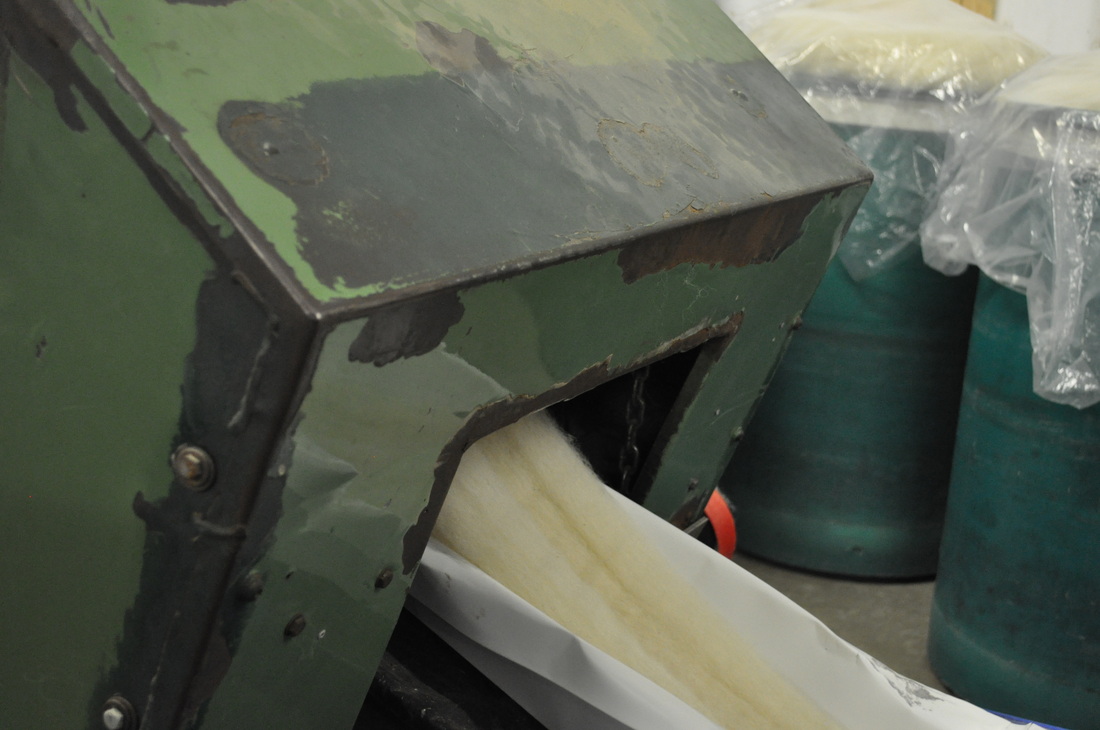
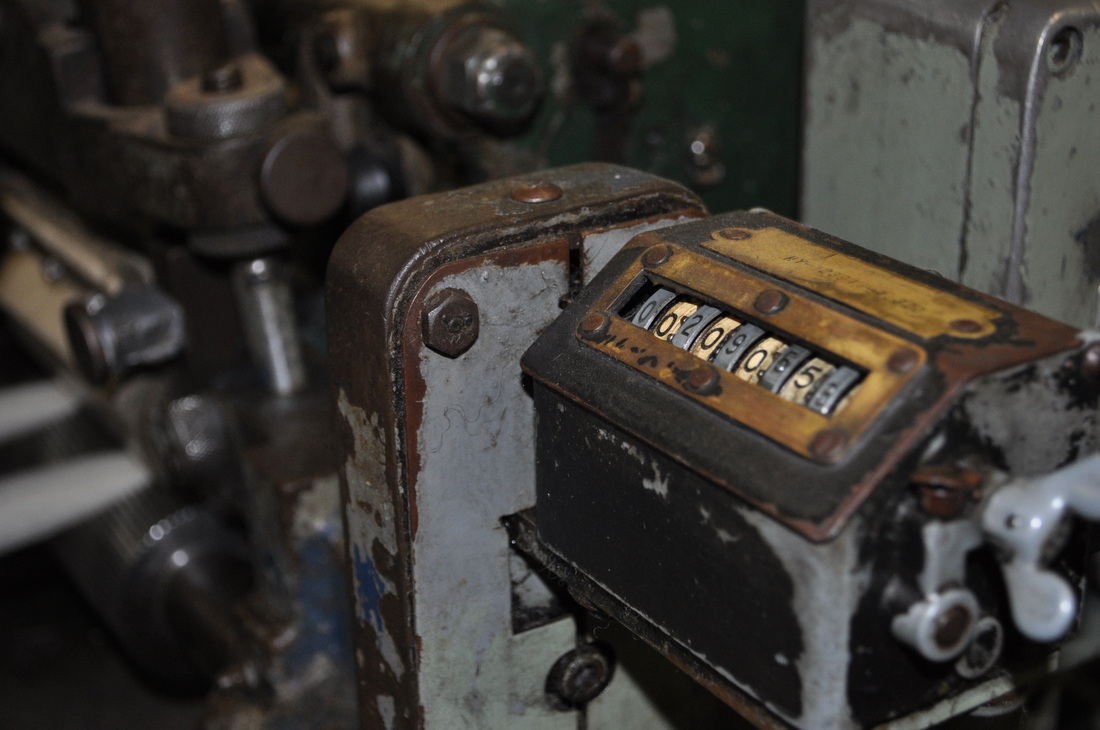
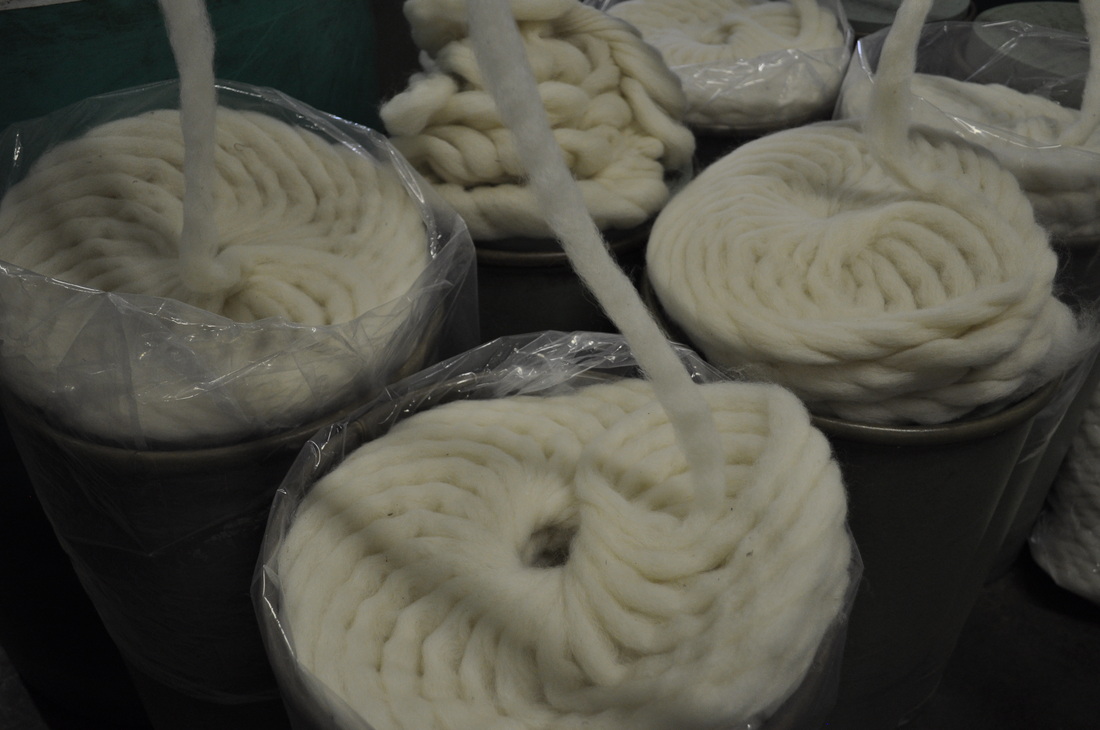
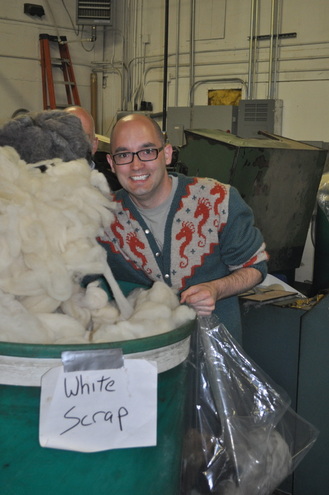
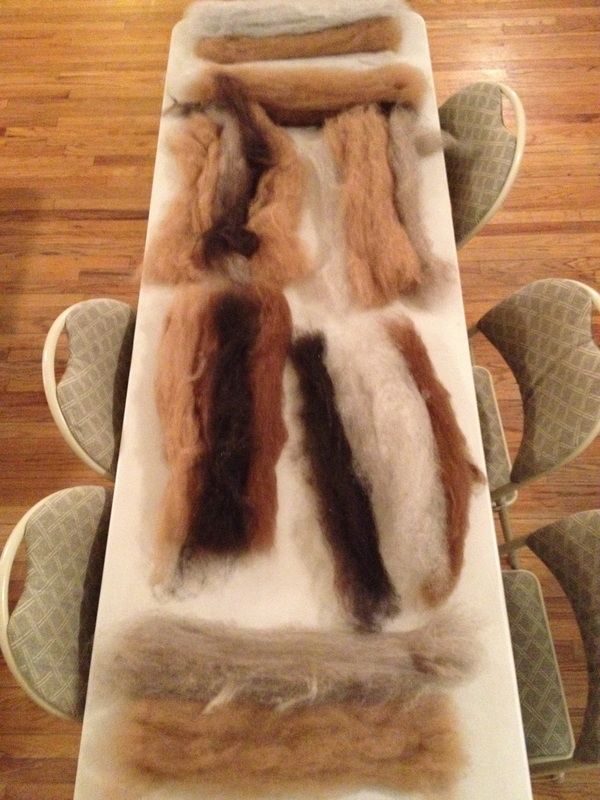
 Thursday morning we ventured off to Battenkill Fibers; a custom carding and spinning mill in Greenwich, NY. They welcomed about 30 guys from the retreat in our pre-retreat outing, and took time to show us some of the processes involved in transforming fleece and fiber into yarn. They had a number of projects in the works and we were all in awe as we went from step to step learning how much work goes into making yarn. Here are a few random photos from the visit to the mill. I made some short videos to share with you some of the steps for turning fiber into yarn. First, we learned a bit about how a fleece gets skirted (this video). Then, we watched how they clean the fibers, and many different steps (and machines!) it takes to turn fleece into yarn. This machine takes the fiber and "flicks" it open. I apologize; I didn't take notes on the different machine names or their "technical" responsibilities... but if you ever visit Battenkill Fiber Mill, they'll certainly explain it all to you! The next video shows the fiber flying through that little hole in the wall into a room that's exclusively to catch the fiber as it floats to the ground. The operator of this machine sweeps the fibers up from that room and they go into a carding machine from there. (Yes, a few of us thought of just sitting in that room to experience the "rain of fiber!") Once the fiber is cleaned, carded, and drafted out, it goes into the pin drafting machine. This machine makes the roving even and prepares it for spinning. (I am SO glad I don't have to clean these machines!) From there, the fiber is spun into singles on a GIANT machine, and then plied on ANOTHER machine... then, the plied yarn is skeined into hanks. There's so much work that goes into creating yarn that many of us don't think about. Even commercial yarn has been hand worked by many talented people. Here's one last video showing the process of making hanks of yarns, talking about the plying machine and then the skeining machine: The tour was a bit overwhelming. So many machines, and questions that could be asked. By the time I had asked one question, 5 more had popped into my head. I have a new appreciation for fiber and the artists who make it for us at the mills after visiting Battenkill! Of course, I knew it was an involved process before but WOW. This was a real treat to get to tour a mill and learn and share more about the processes.
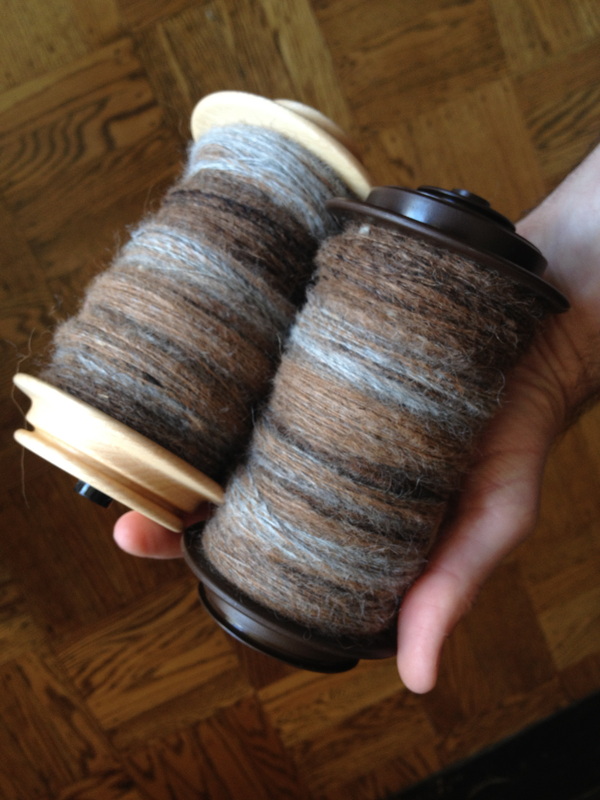
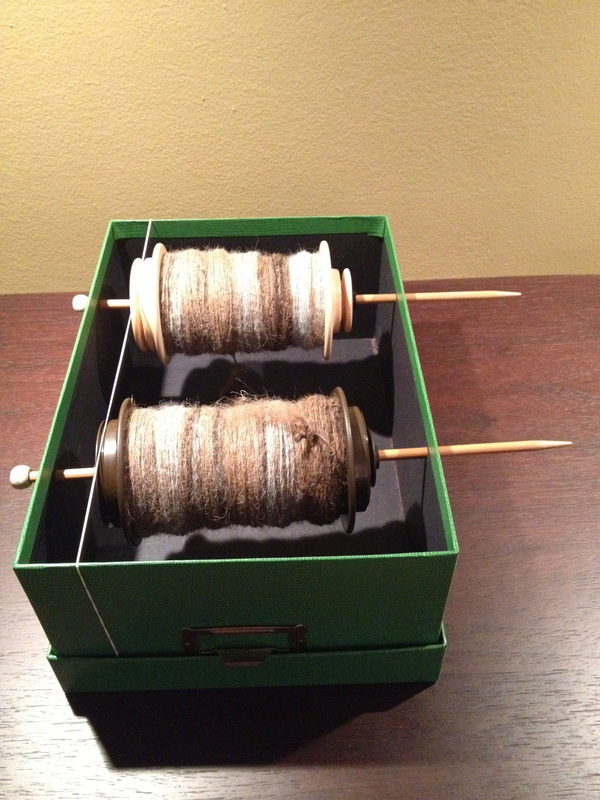
(I told you lots of work goes into preparing fiber!) -- OK. now that the fiber is all ready to go, remember I wanted to create a 2-ply yarn that would have sections of color. I didn't want to make yarn with long color changes (like Noro) - but more mottled looking "barber poled" yarn. To accomplish this, I decided to tear off a bit of each ball of fiber and use them in a random order as I spun. I'd work bits 1-7, then stop and tear a piece off of each ball again, put the pieces in the bag and randomly select them. As I got one bobbin nearly full, I began the second, repeating the process. As I got close to the end of the balls, I unwound the remaining fiber, and looking at the longest remaining length of fiber decided I could do about 5 more repeats. I broke that piece into 5 sections, then evenly divided the other pieces and added them to the last repeats. If a ball only had enough fiber for 2 or 3 more repeats, I only added it to 2 of the remaining repeats. Once those final rounds were divided, I kept them separate and then randomly spun them onto the bobbin. At the very end, I went back to the first bobbin to try to evenly distribute the singles.
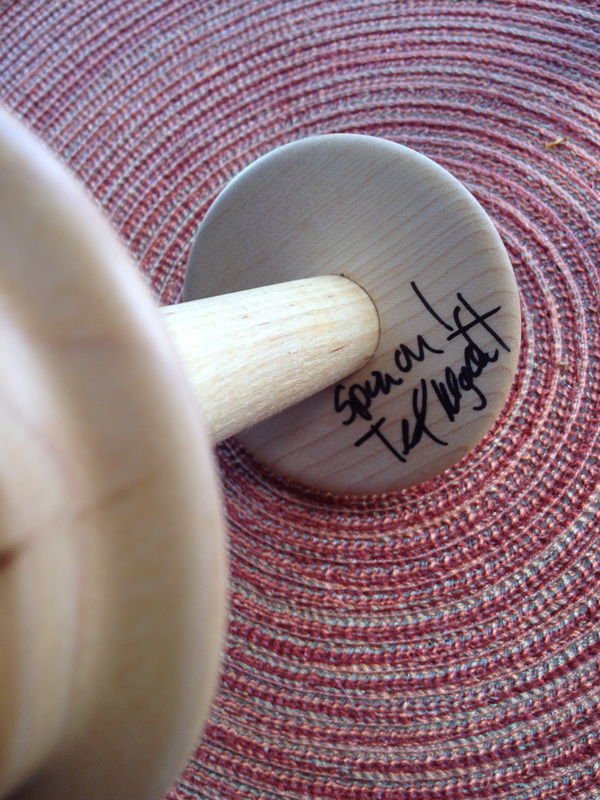
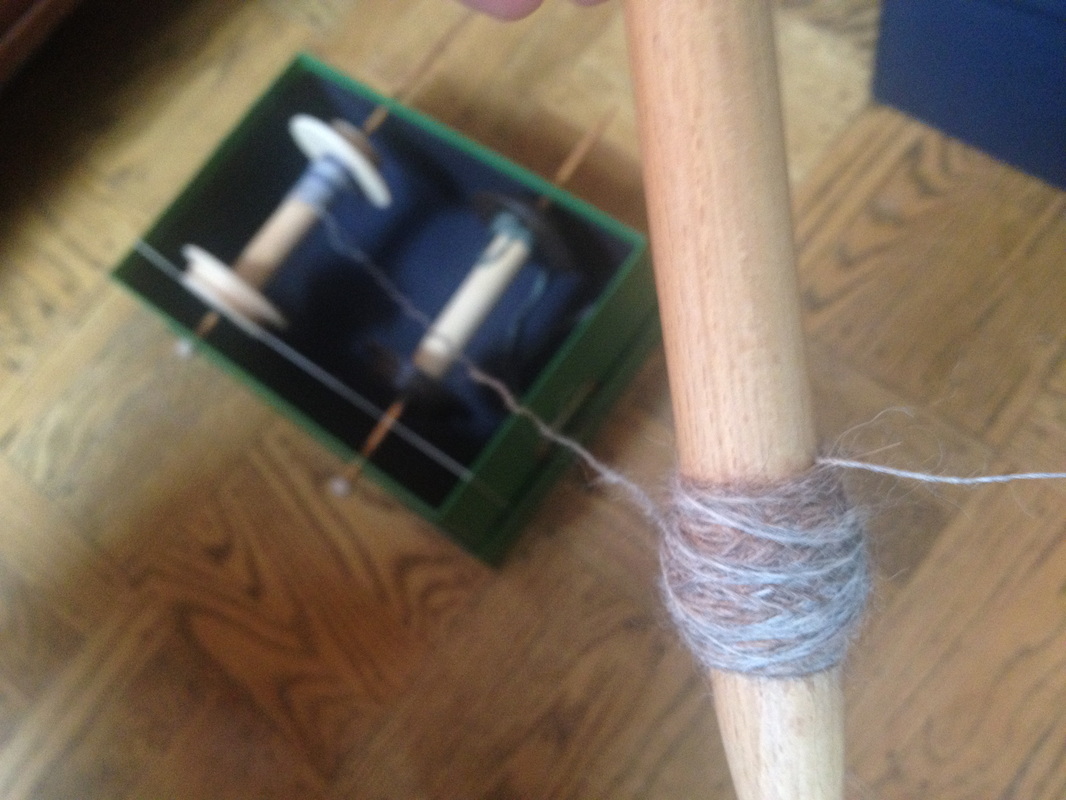
As I ply the two singles together, inevitably there will be one bobbin that has more on it than the other. When I asked Ted Myatt what to do when this happens, he taught me a trick to use all your singles. With the singles still attached to the plied yarn, secure the shorter single.  Using a distaff, create a center-pull ball with the remaining fiber. Once that's completed, join the end of the longer single with the end of the shorter single (either by spit splicing or tying a knot).
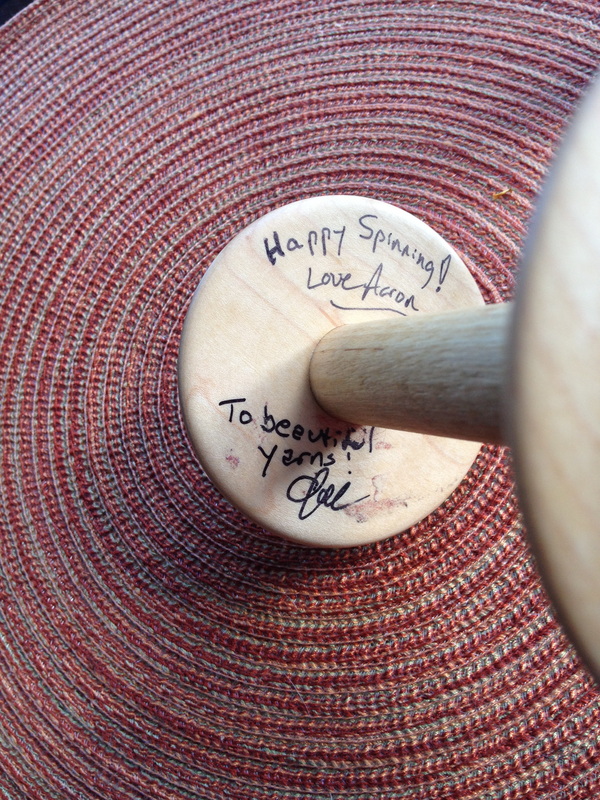
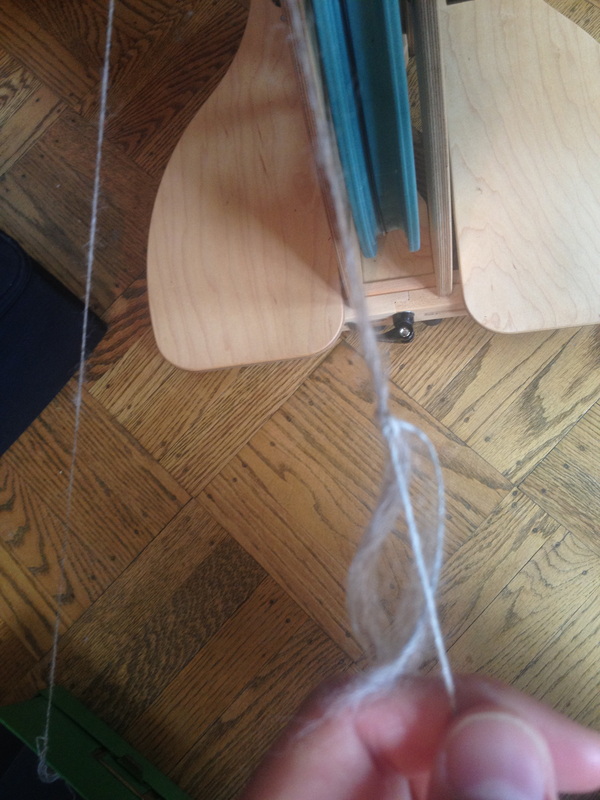
Remove the wound fiber from the distaff and (this part works best with a friend!) continue to slowly ply the yarn while attempting to keep the ball of fiber from tangling up. After you are done plying, you'll end up with a loop at the end, connecting the two plies. Tie a small knot here and you're done! Look: no wasted singles! After all of this is done, The yarn is wound off of the bobbin (did you know you should stand about 10 feet from the wheel when hanking up the yarn? It's another tip I learned during the retreat - standing a bit away from the bobbin allows for some room for the twist energy to distribute itself along the length; it's the same reasoning for putting your lazy kate far away from the wheel when plying). Tie the yarn up, give it a good soak and let it hang dry. I ended up with 2 HUGE hanks of hand spun yarn from my 6oz of fiber! I haven't decided what this yarn will be yet. For now, I'm going to let it be a reminder of the retreat. 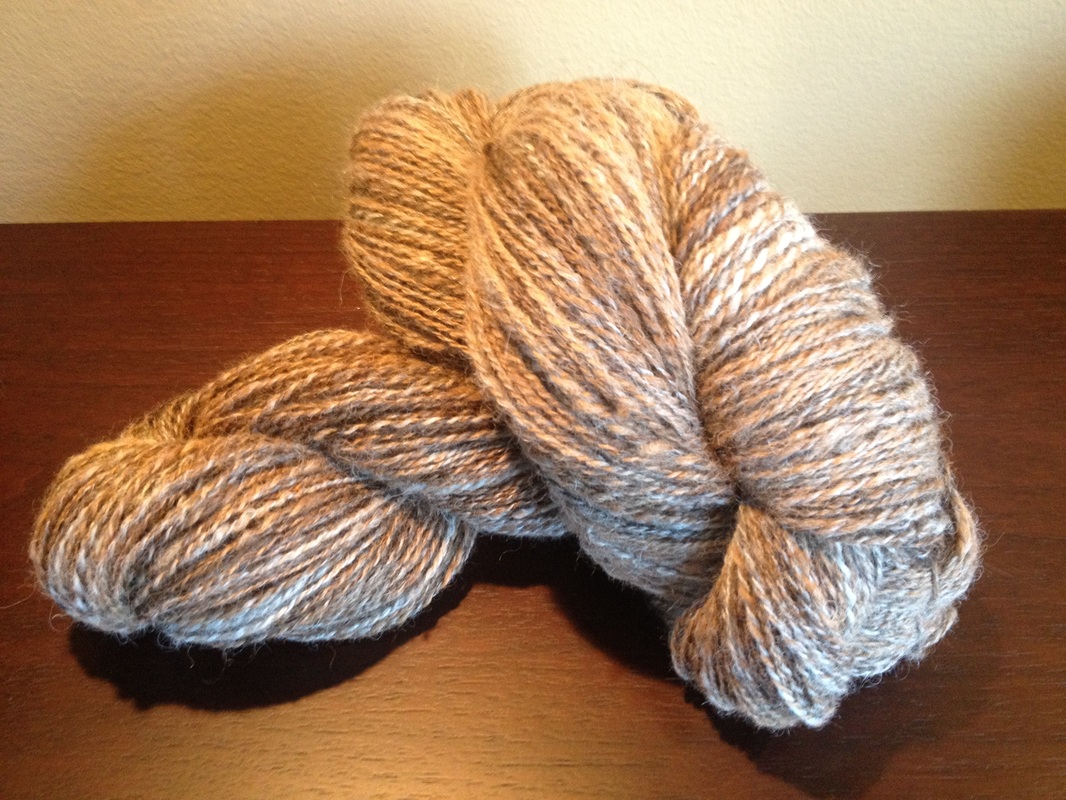 That's about it for Part 2 of the MSKR12 retreat review. I love writing blog posts about the event because it gives me time to relive the experience. One note on my packing: I had to check my bag because of my wheel but I wanted to share with you how cute and snuggly my Sidekick fit into the luggage! The fiber I got during the retreat acted as extra padding and there was enough room for my clothes, knitting, etc. as well. I'm looking forward to the next time I am able to take my wheel on an adventure! 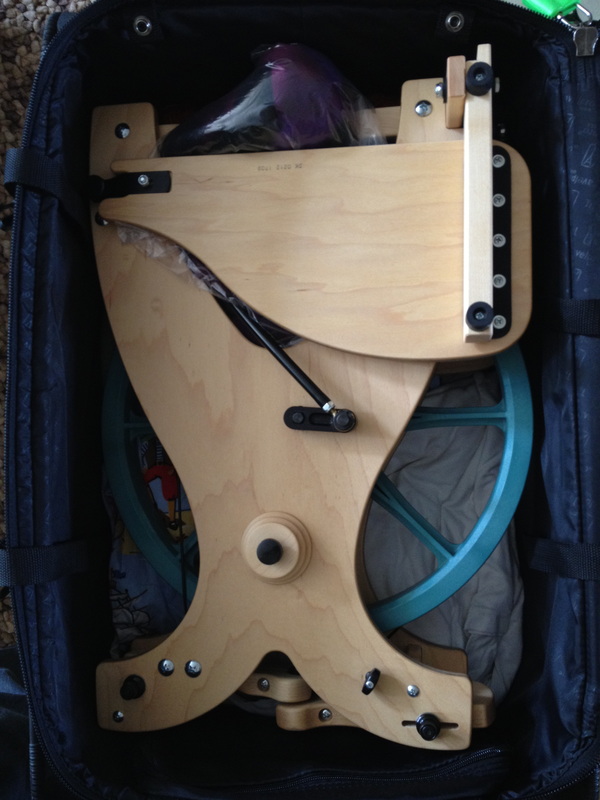  The 2012 Men's Spring Knitting Retreat is over and it's difficult (as it is always difficult!) to put into words how amazing the experience was. This year, 41 attendees made up the group, and we reconnected at the amazing Easton Mountain Retreat Center. It's a calm space where everyone is encouraged to relax and enjoy the beauty of nature while being surrounded by creative people. Recaps of these retreats end up being L-O-N-G and photo-heavy posts so I decided to attempt to divide it into 2 parts. Welcome to part one: a retreat review and ramblings about the "official" parts of the weekend. 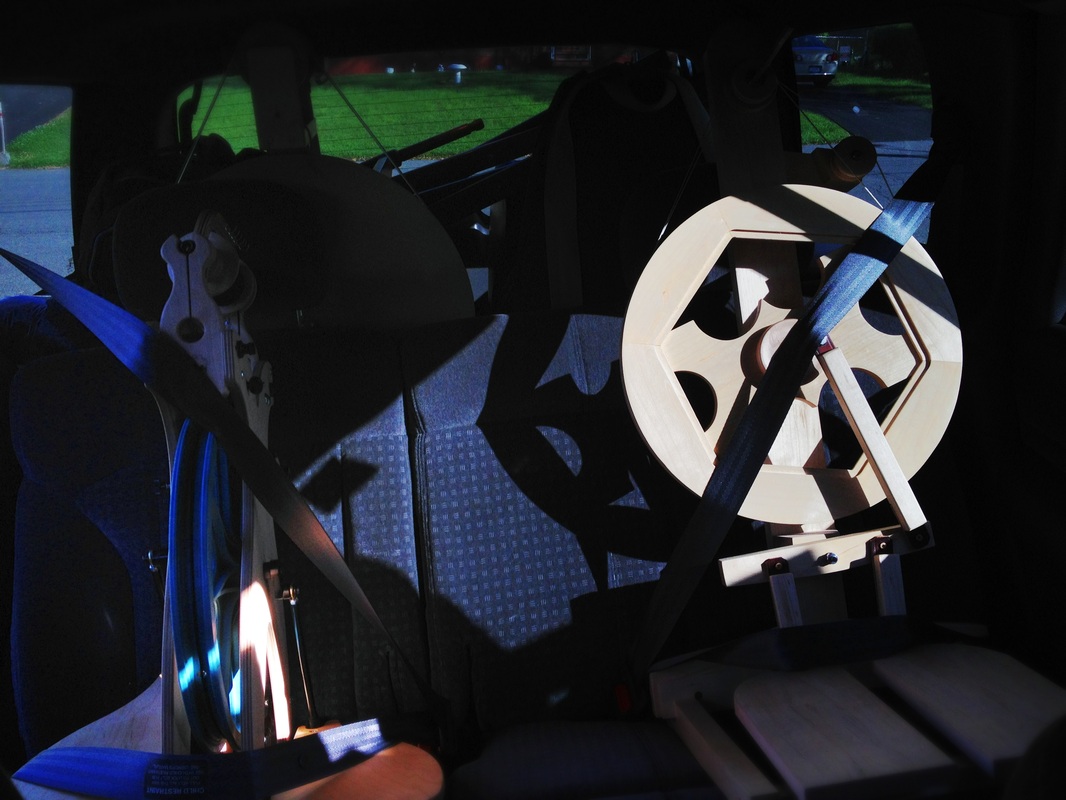
Are we there yet??
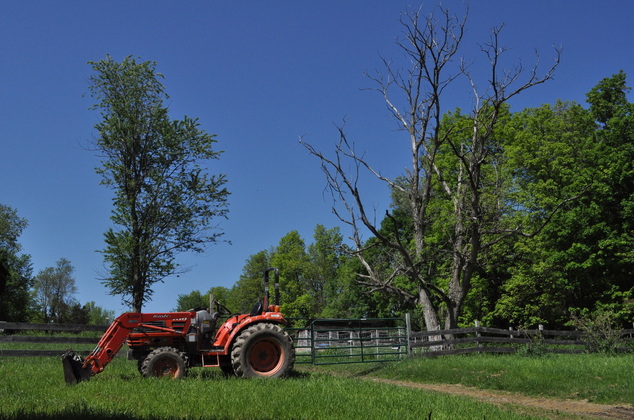
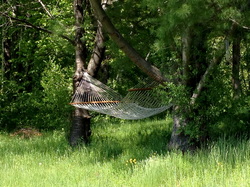 The hammock at Easton This year, I flew from San Francisco, CA to Albany, NY and met up with Aaron Bush. The retreat actually began Thursday afternoon, so we're going to fast forward past the "pre-show" and begin there. Driving to Easton Mountain is refreshing. It's back roads that go from striped and paved to simply paved... to gravel... to narrow and what a city-person might think should be only one-way. Returning to Easton for the retreat is a bit like coming "home". It's walking into the large gathering room and hearing people call my name. It's not having a chance to put my bag down before there's a group of guys waiting to give me a hug; excited and happy that we are about to share this experience. Returning to a Men's Knitting Retreat is seeing familiar faces, recognizing people that I may have never met, but recognize through their blogs, twitter feeds, and facebook posts, and they feel like old friends. It's re-uniting with people who, through fiber, have become a big part of my life. Arriving at Easton, we are greeted with Easton Mountain (in the background of the video below). The Center used to be a ski lodge and now it's just a beautiful space to retreat and relax. The sounds of nature are so different from those I hear waking up in San Francisco! I thought making a short video of walking down the driveway to the lake might help you understand how amazing and magical this place is. ...and here's a listen at the birds singing one morning during the retreat. It really was a "change of pace" that allowed us to all decompress, relax and recharge. During the retreat, we usually go on one field trip. This time, it was to Ewetopia Farm in Whitehall, NY. The drive through the beautiful country could have been outing enough, but turning into the driveway of Chris and Max Crossman was a true treat. Chris had set up a small shop with a selection of fibers and yarns for us to peruse, featuring her Cotswold sheep locks! It wasn't long before I started to explore the immediate area, taking photo after photo of this idyllic place! Here are a few of my favorites: 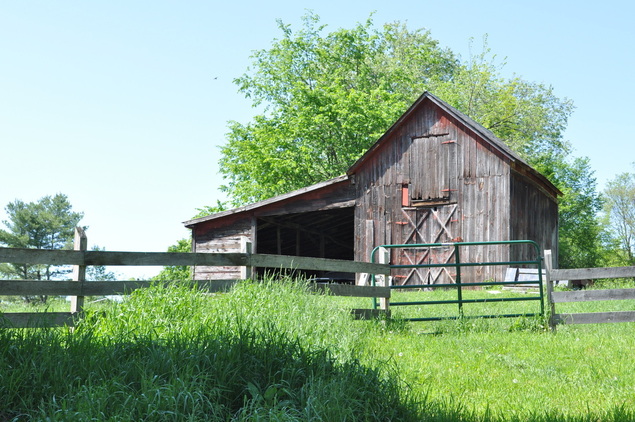
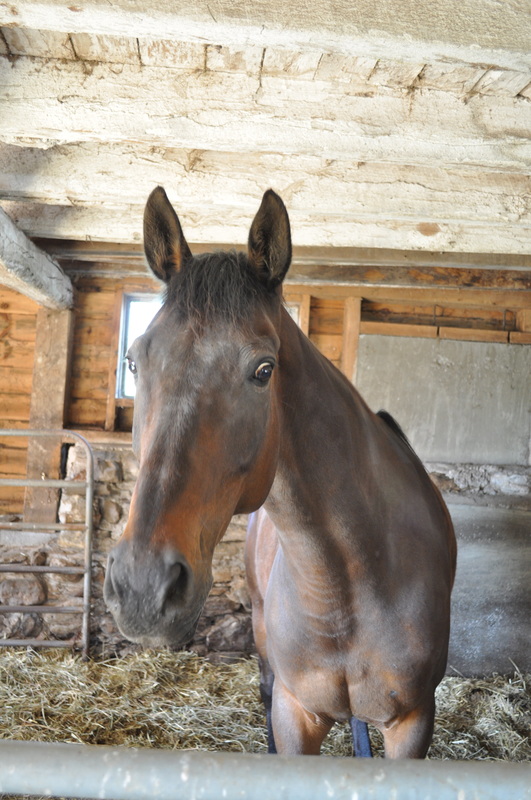
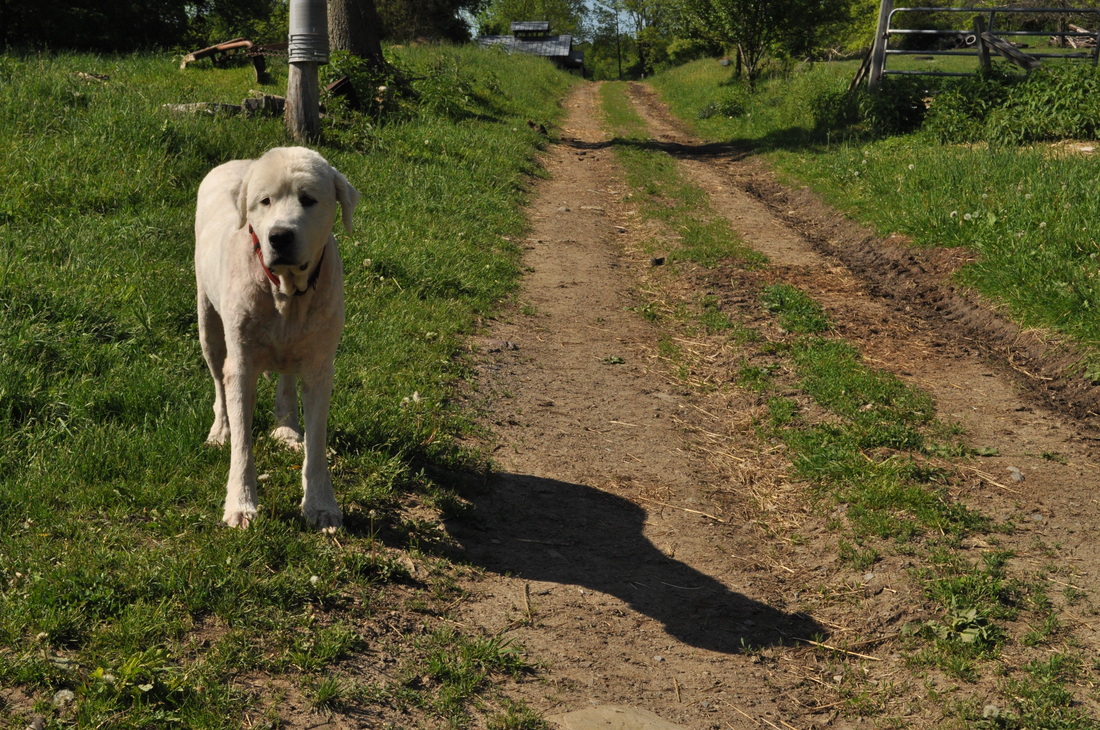
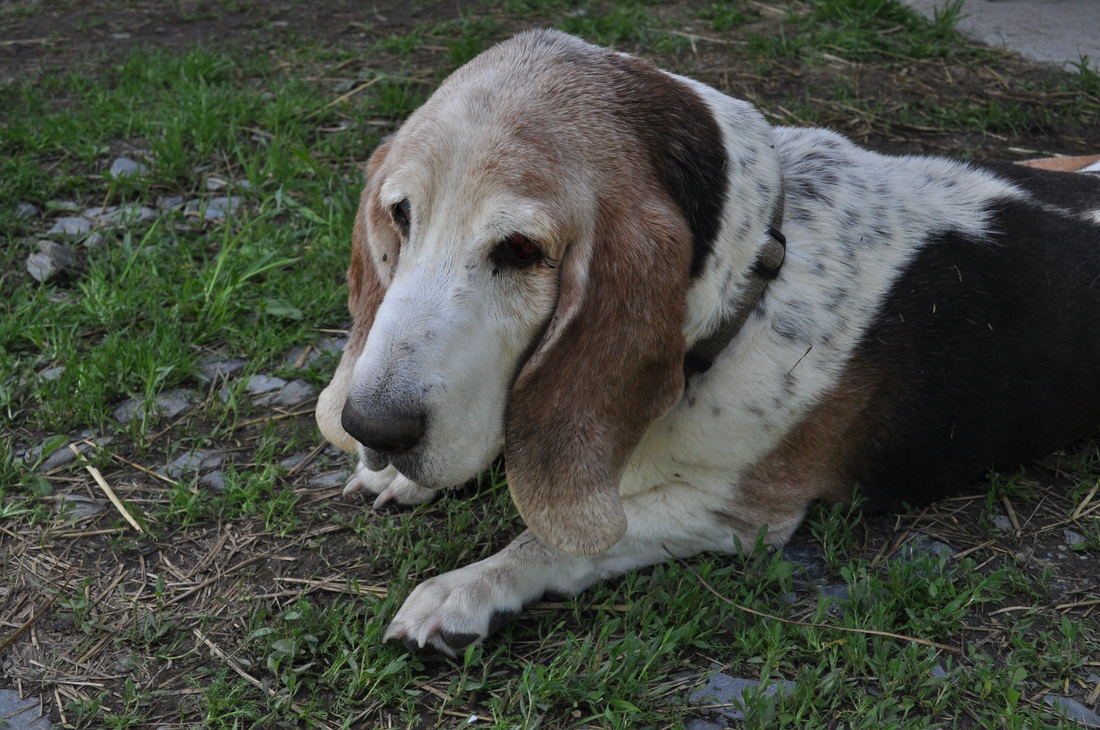
We met one of the Rams and he was in LOVE with us because we all took turns scratching him on his back where he can't reach. (That's Farmer Max holding the lead to this sweet animal.) His fleece is beautiful and from what Chris said she is going to continue breeding him to hopefully get some more of his coat characteristics in the flock. I remember last time I was at the MSKR we visited Alpacas of Easton, and the owner was talking about phenotype and genotype and it made me smile since that was what had just been discussed in my Biology course. Years later, it wasn't a fluke. That same talk was being given at this sheep farm! Lesson here: If you want to be a success at raising fiber flocks, chances are you'll need to have a good understanding of these topics. 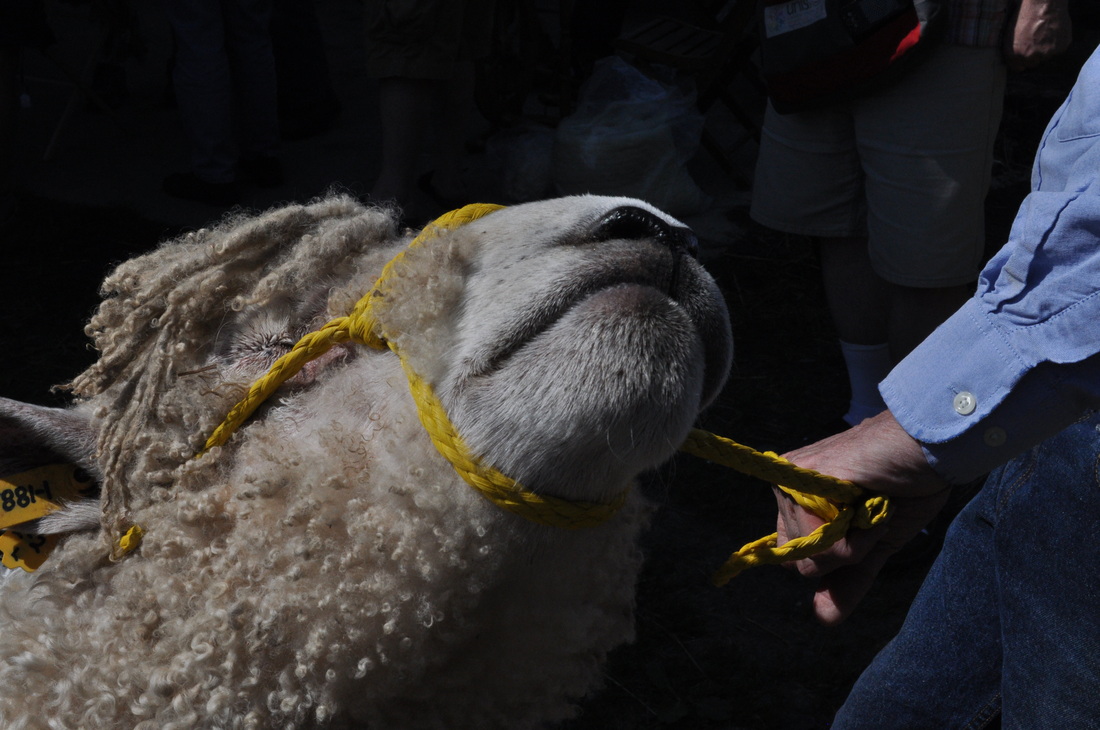 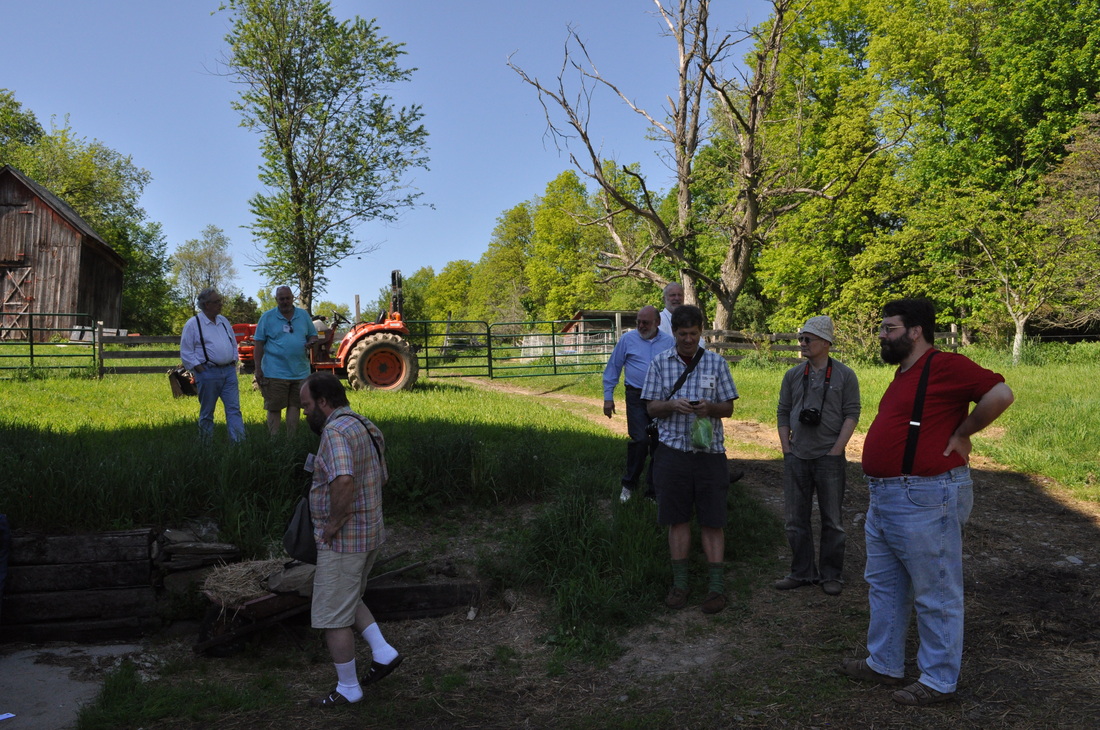 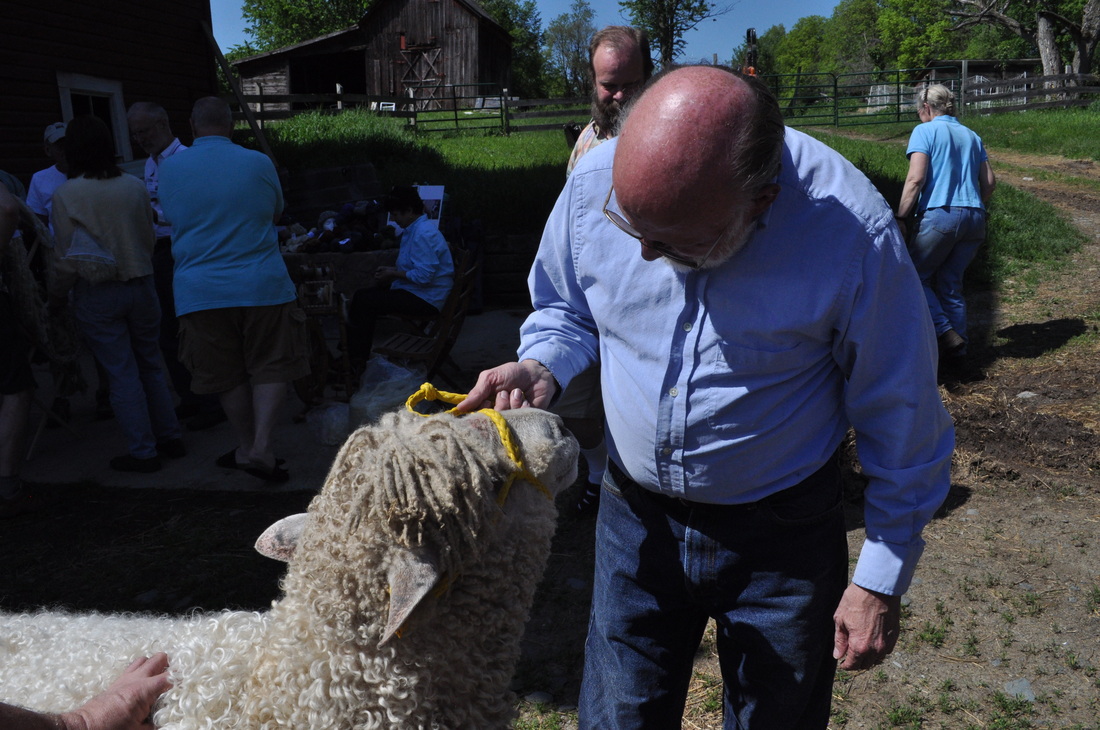 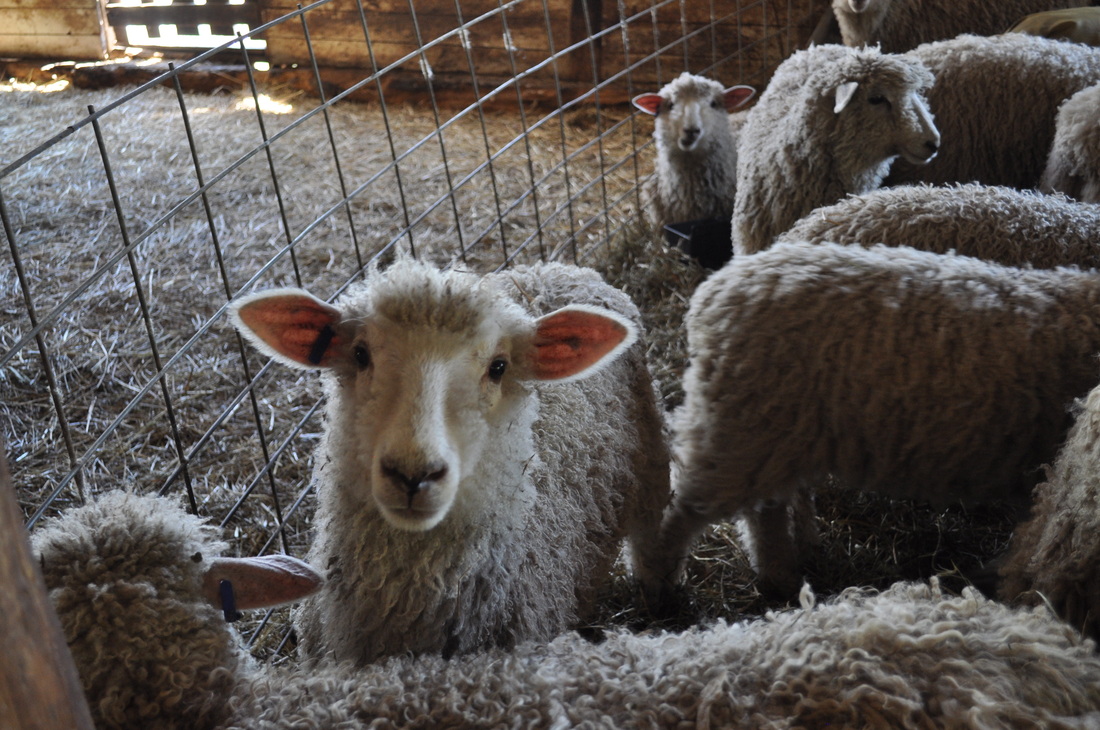 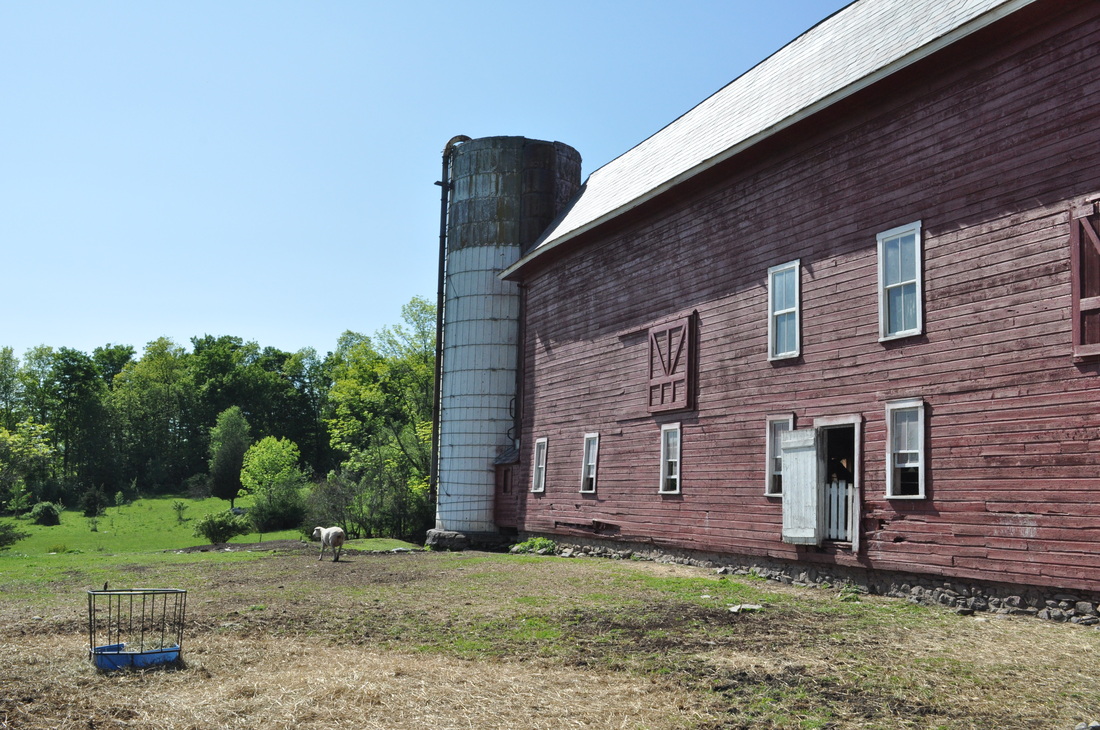 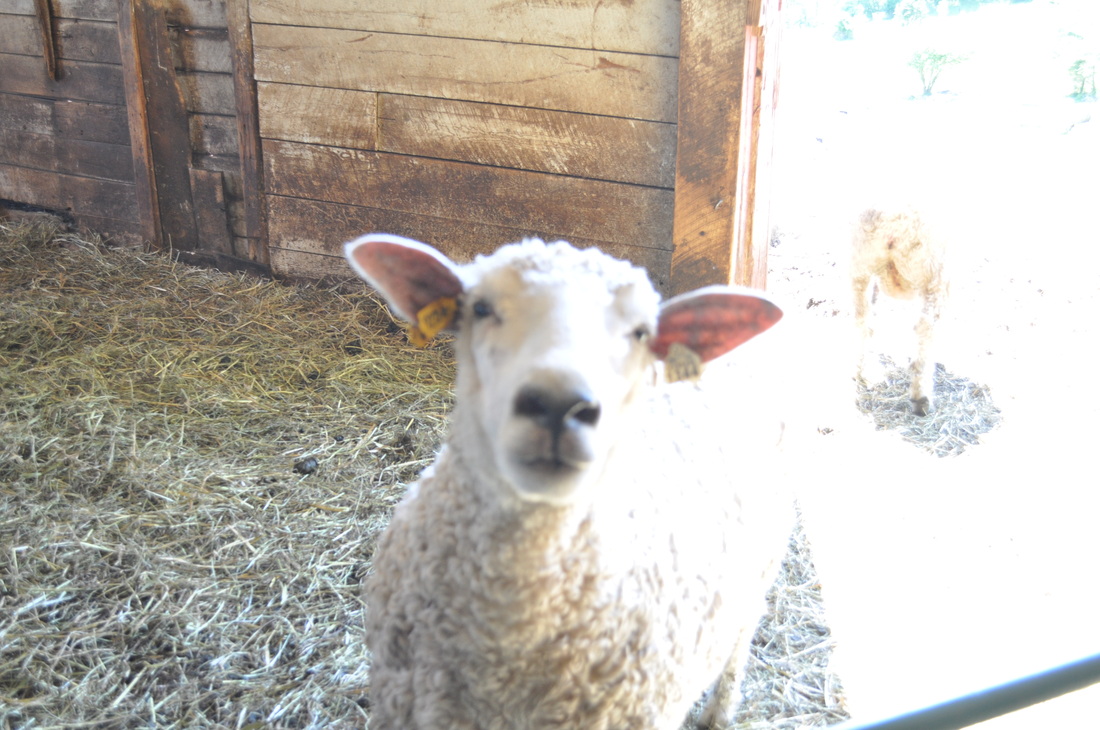 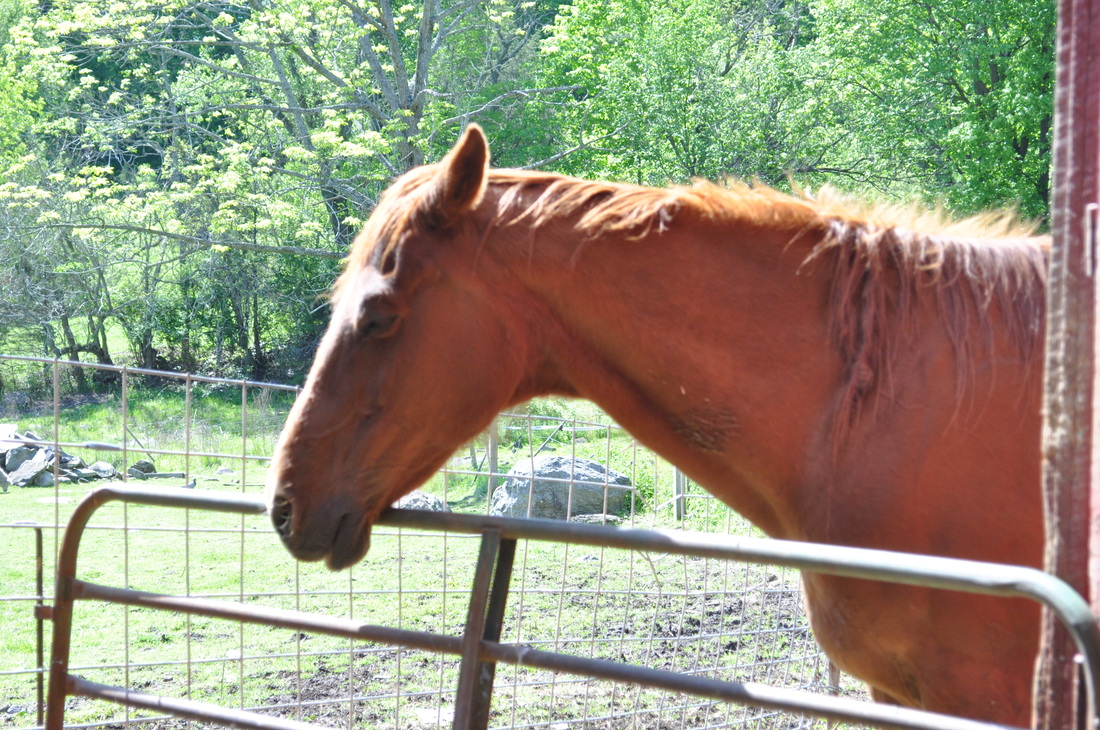 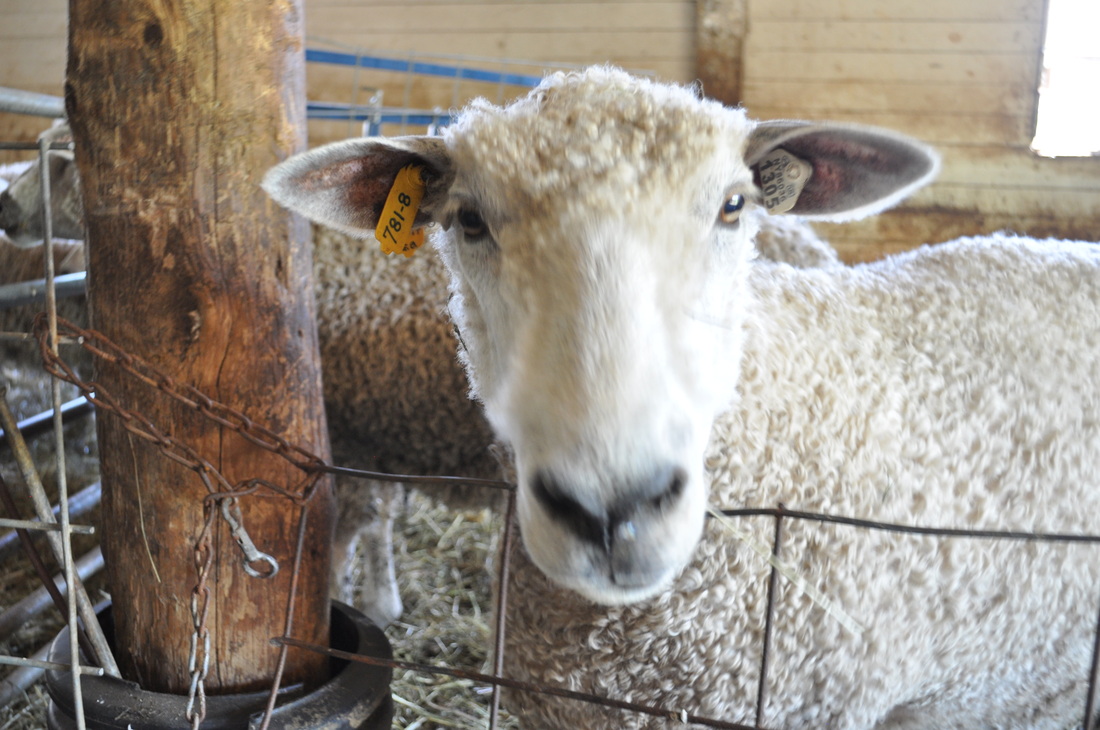 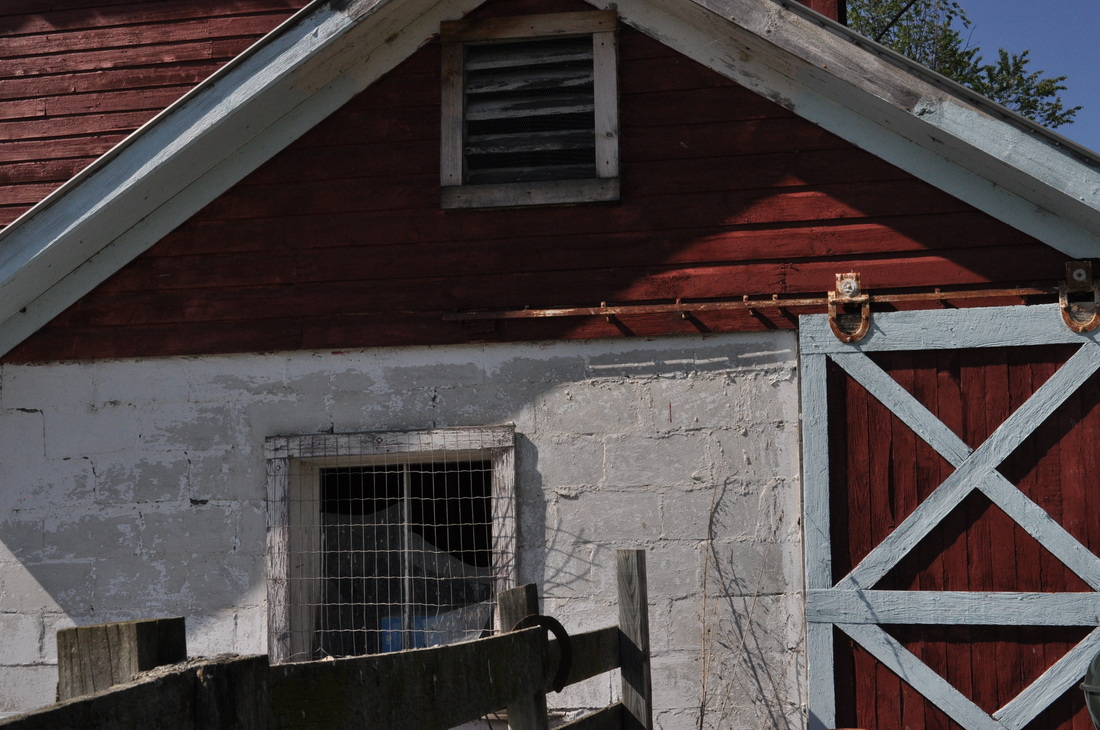 In addition to the sheep, the Crossman's have a few horses and some adorable dogs! These two were beyond sweet. Leddie (on the left) is a bit of a guard dog and a BIG dog at that. She's standing on the road that leads to the farm's sugar shack! The other doggie was a fat old sweetie and just wanted its belly rubbed! (Click any of the smaller photos to enlarge them).
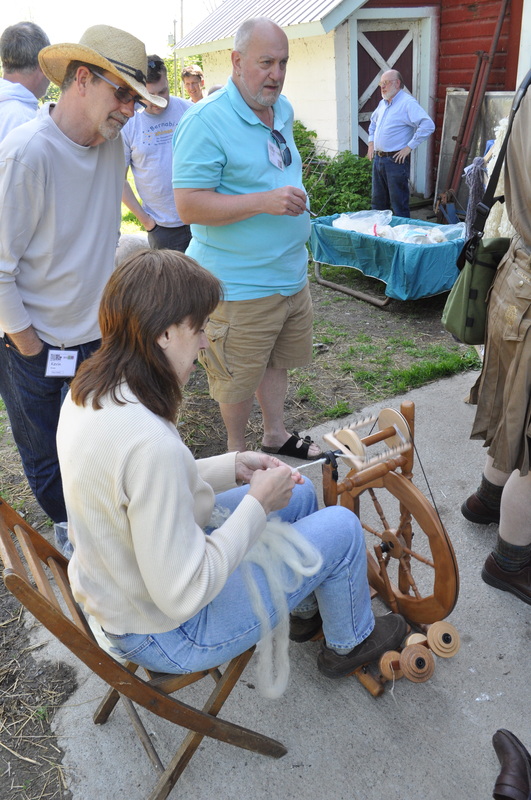
See? I haven't even begun to talk about spinning or the workshops.... trying to explain what the retreat is like is a difficult process. It's seriously something that simply must be experienced. There were a number of workshops, and I was able to participate in two: learning how to spin (with Aaron Bush), and knitting and purling backwards (with Matthew Hesson-McInnis). The spinning workshop helped me continue to hone my skills as I learn more and more about my Sidekick wheel. Aaron was a gentle teacher, helping the guys wrangle fiber and spin it into yarn. I was able to offer a little guidance to my neighbors, and I think that at least one participant decided to purchase a wheel by the time he had returned home! Knitting and purling backwards with Matthew was more of a focused exercise. His instructional style is suprisingly gentle; asking the students to follow a few simple steps to really understand what happens when a stitch is made. With a little practice, we were all doing it! (Slowly, but we WERE doing it!) The technique will come in handy for ribbing or stockinette almost immediately. All it'll take is a bit of work to get faster at it but will be well worth it.
Probably the biggest treat to attending these retreats is sitting outside, knitting, spinning, crocheting, and talking with new (and old) friends about ideas, experiences, techniques and, life in general. The world often gets in the way and we don't find time to take care of ourselves; these few recharging days allows for just that. It's rewarding, relaxing and inspirational to be at a Men's Knitting Retreat. 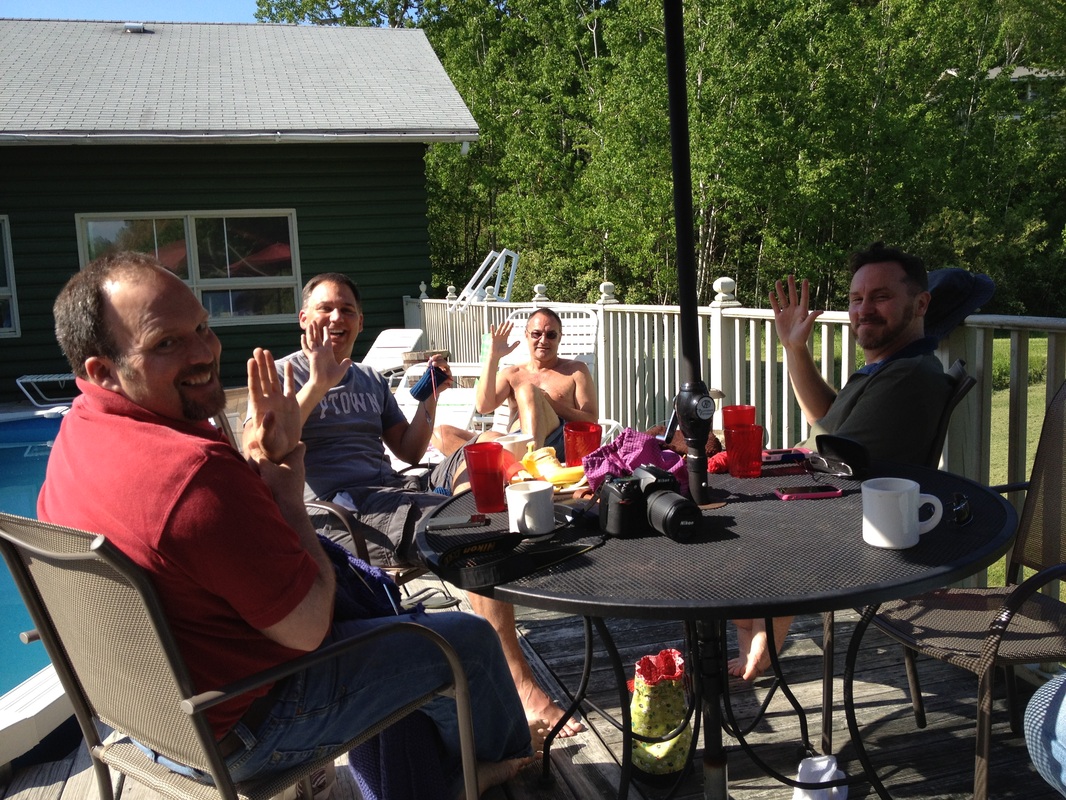
We have a tag sale during the retreat where we offer special fibers, books, magazines and finished objects for sale to the other attendees. It's a chance for us to donate a percentage of the sale to a scholarship fund which helps some guys attend who otherwise couldn't. This year, Bill Jones from San Francisco hand-knit this AMAZING teddy bear and we put it out for silent auction. John Wise was the high bidder and the envied one who got to take this sweet bear home! (If you enlarge the photo, you can see the intarsia around the eyes and inside the ears where Bill used subtle color changes to highlight these spots.) Bill said that he plans to make one of these bears for each of the retreats. 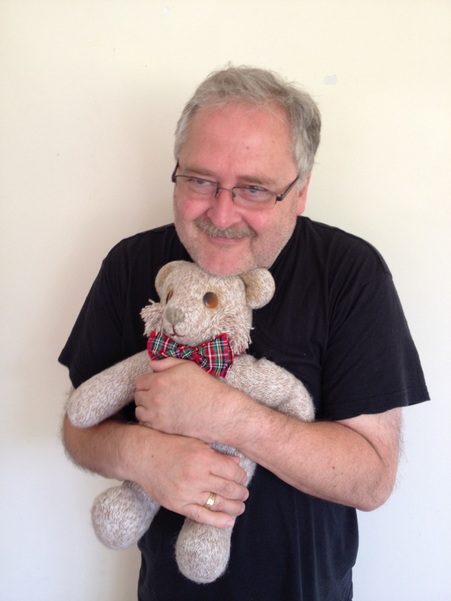
A visit to this part of the country would simply not be complete without a visit to the Ice Cream Man! They have been in business for nearly two decades and I can't imagine a trip to this area without visiting and getting a couple scoops of their amazing hand-crafted ice cream. We also got ice cream from the Ice Cream Man for movie night - where we all gather and knit/spin/weave/crochet our way through a movie (or two!) 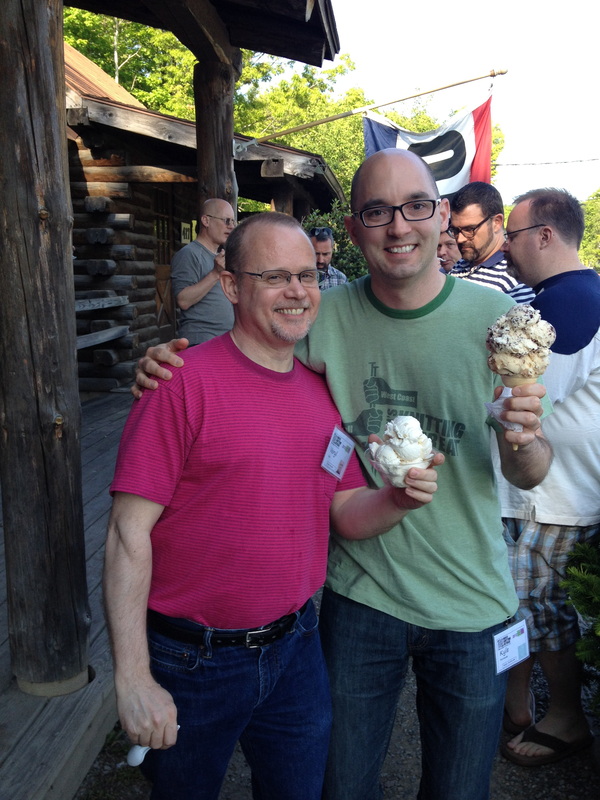
...I swear I only ordered 2 scoops!
...speaking of eating, the food at Easton is certainly worth mentioning. It's healthy, thoughtfully prepared, and, quite frankly, delicious. They are considerate of dietary needs and I never went without a full tummy while visiting. There's no soft drinks, so it was also a great opportunity to stop drinking so much Diet Coke! 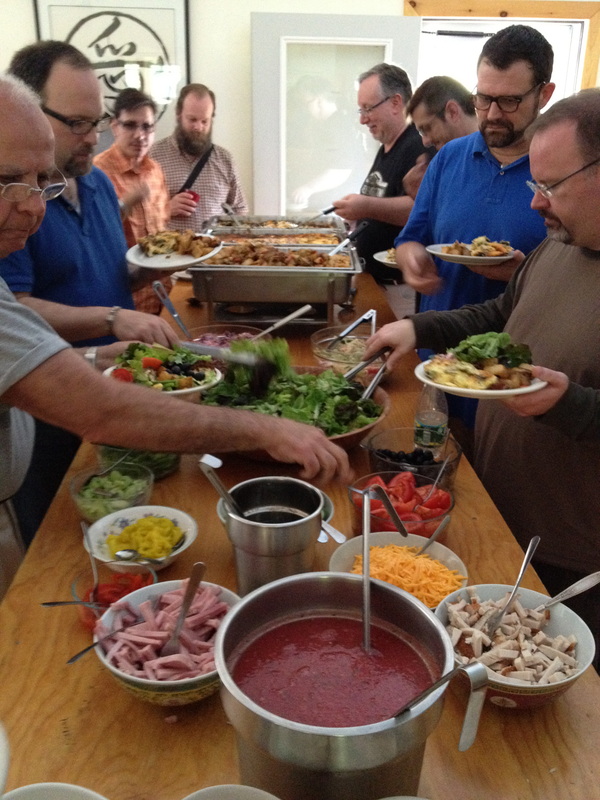
Gosh. There's so much to talk about - and even if I wrote 100 pages about the few days we were together, I'd still be leaving a lot out. Once more: It's impossible to express what this retreat means. It is an amazing experience and for those men who might want to find out what it's like to attend one of these retreats, there are a few coming up! Visit the Men's Knitting Retreat website to learn more. 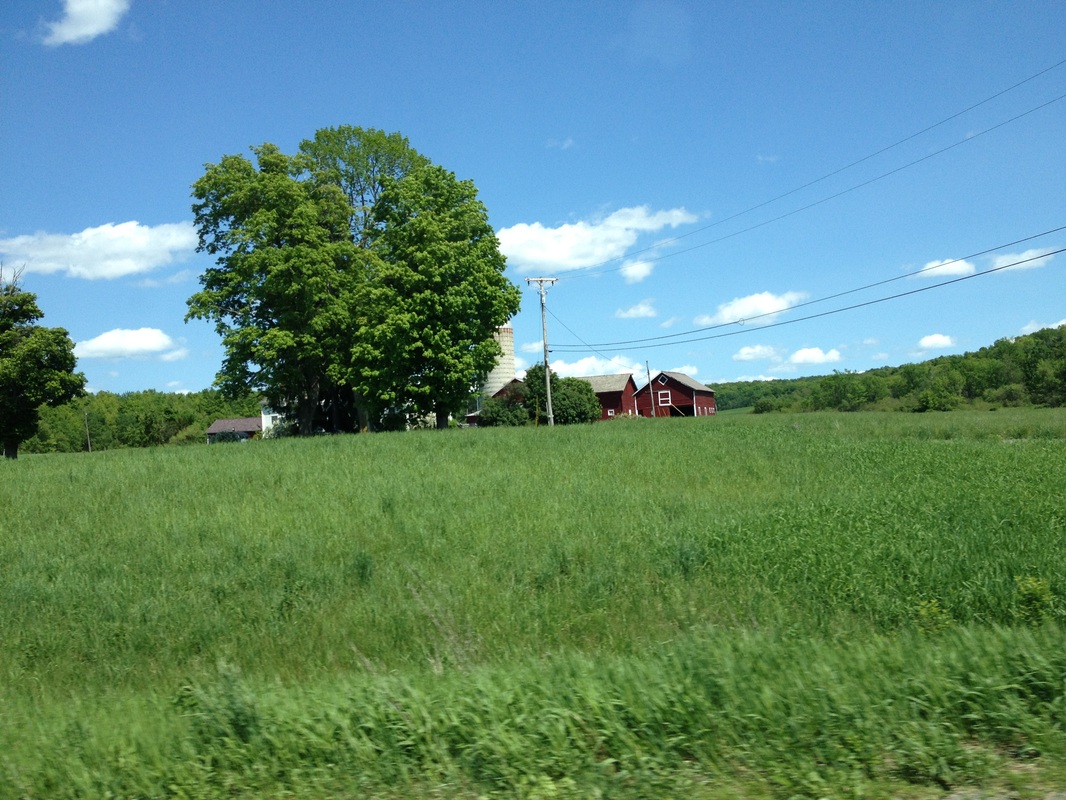
I'll be writing more in a few days; sharing about the excursions before the retreat including our visit to one of Aaron's favorite yarn shops and a fantastic local mill.
Working with Kate, I never know what she's going to come up with next! The most recent surprise was this presentation folder that holds the Kyle William pin-back buttons! I love to give out these little buttons to my friends and students to remind them of the Kyle William website. Fiber enthusiasts love to put them on their knitting bags to show support of the shops, websites, and podcasts they love. Kate went above and beyond and designed this folder which I'll be using when giving out the buttons where I lead workshops. This is my new favorite way to present my button and contact information! 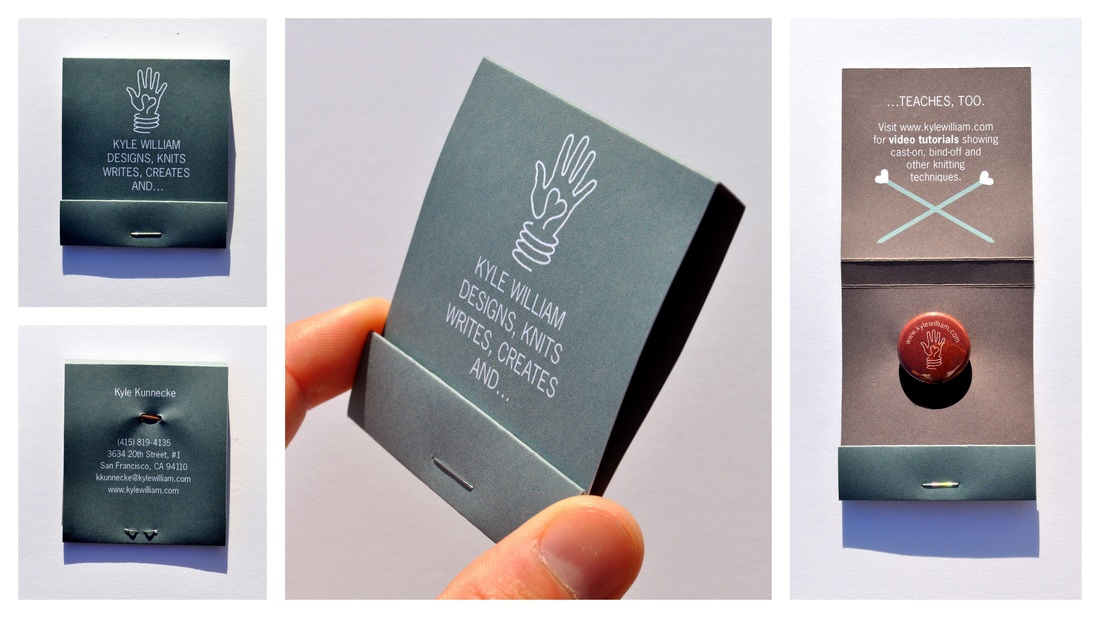 A big "THANK YOU!" to Kate for her tireless creativity. I am excited about presenting the first of these folders to my students today at the San Jose Museum of Quilts and Textiles! I know it's not possible to meet everyone who visits my blog to give them one of these buttons... so, to make sure you get a little something too, here's an online button you can use to put on your blog or website! Copy and insert the HTML code below onto your site and share the love:  <a href="http://kylewilliam.com/" ><img border="0" src="http://www.kylewilliam.com/uploads/7/0/0/7/700708/4094967.jpg?127" /></a> Like what you see? Click the "like" Facebook button or share this post on Twitter with your friends. Thanks!
I'm honored to be a guest on the latest issue of Fiber Beat! Having the opportunity to share my love of knitting with the listeners on Michael's podcast means a lot to me; I hope that the interviews he did with me and Deborah Corsini; the curator at the San Jose Museum of Quilts and Textiles will pique your interest to learn more about knitting as art and, if you're in the San Jose area, visit the exhibits and, if interested, take one of the workshops I'm offering. To hear the podcast, click on the image: 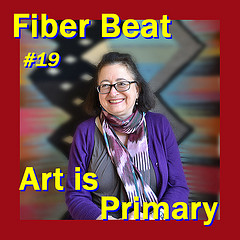 Be sure to subscribe to Fiber Beat; you never know who will be interviewed next! The podcast is professionally produced, concise, entertaining, informative and inspiring! Fiber Beat has interviewed such fiber celebrities as Kaffe Fassett, Anna Zilboorg, and Franklin Habit, among others! If you have yet to discover this great program, my suggestion would be to listen to each and every episode!  Like what you're reading? Click the "like" button for twitter or facebook below to share this post with your friends! Have a question for me? Please send an EMAIL.
What fun this project is! With a few simple household ingredients, you can dye yarn a beautiful color! The first time I heard of this technique was scribbled in the margines of an old natural dyeing book another artist had left in one of my classrooms. Intrigued, I jotted down the notes and went hunting and gathering in my neighborhood for the required materials. Download a complete tutorial on the process by clicking the link at the bottom of this post. You'll notice that it doesn't take much to do this experiment! It also doesn't require fancy yarn... any 100% wool yarn should work quite well. The first part of the project is to gather the materials necessary to make the solution. 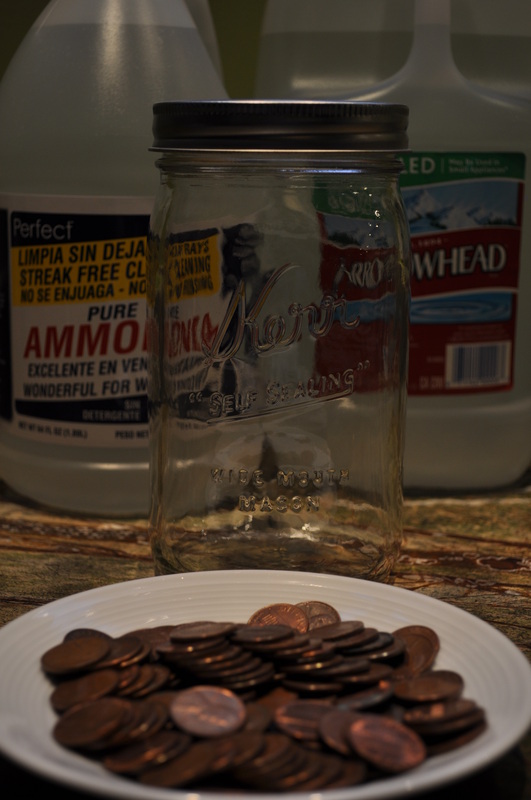 Why pre-1981 copper pennies? It has to do with the copper content. According to Wickipedia, (which is always accurate, right??) the copper content of pennies before 1981 is around 5%, and from the varous websites I researched for the recipe, they all specify pre-1982 or pre-1981 pennies. Years Material 1793–1857 100% copper 1857–1864 88% copper, 12% nickel (also known as NS-12) 1864–1942 bronze (95% copper, 5% tin and zinc) 1946–1962 bronze (95% copper, 5% tin and zinc) 1943 zinc-coated steel (also known as steel penny) 1944–1946 brass (95% copper, 5% zinc) 1962–1981 brass (95% copper, 5% zinc) 1974 Experimental aluminum variety (test strikes only, not circulated) 1982–present* 97.5% zinc core, 2.5% copper plating Where do you get 100 pre-1981 pennies? The bank, of course! (First I went through my change piles and sorted the pennies... I found almost enough for the experiment there.) I visited the teller at my local bank and got $4 worth of rolled pennies. in the first 2 rolls I found a total of 11 pre-1981 pennies which was enough to complete my first experiment, and after opening the other 2 rolls (and finding a few additional ones lying around) I have 51 more pennies saved up for the next time I want to try this!  Of course, after all the preparation, I got a bit ahead of myself in the experiment and used tap water instead of the distilled water that my recipe calls for. Tap water includes iron which might change the way the solution develops. The metals and minerals in tap water affects dyeing, so if an attempt at controlling the color is desired, then distilled water is the way to go. I'm going to proceed anyway with this version (I could pour out the liquid and re-start it since it was such an immediate realization) to see how it looks. I'll then repeat the experiment with distilled water to see how that compares. 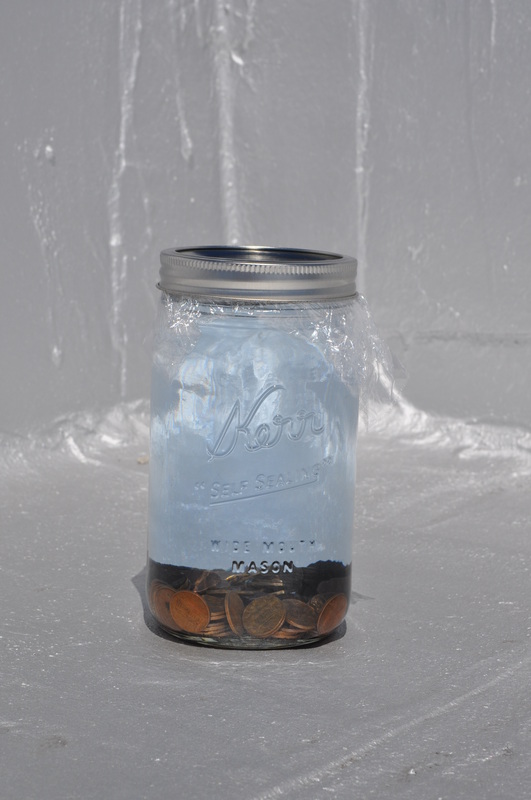 I put the sealed jar on the roof of my building with a note, letting the other tenants know what wacky experiment I was doing, and then followed it up with a quick email to let them all know, just to be sure everyone is aware. It was mixed around 11:30am on Monday, May 9, 2011. The liquid almost immediately started to change color. Even on the silver paint of my rooftop it is noticeable! 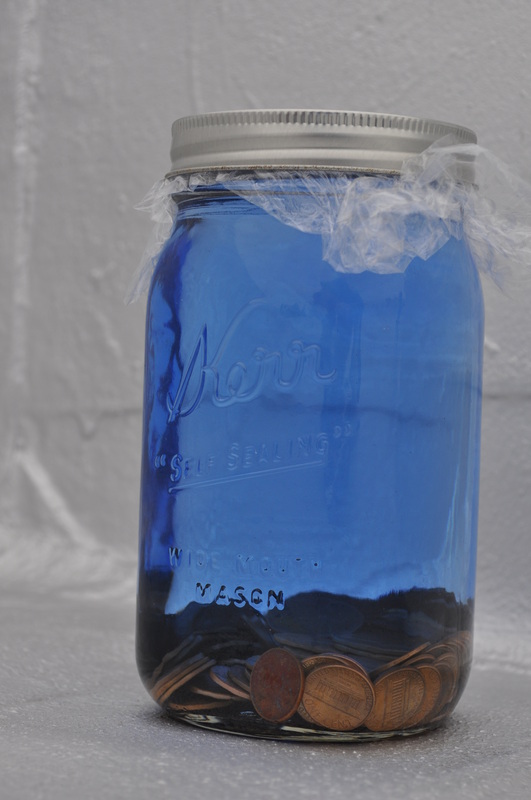 The above photo was taken after 48 hours, and the liquid is even more blue. (The sky was very cloudy when I took this photo; the blue is actually more brilliant than it looks). I am checking the liquid daily to see how it looks, and I shake up the jar each time to mix around the pennies. 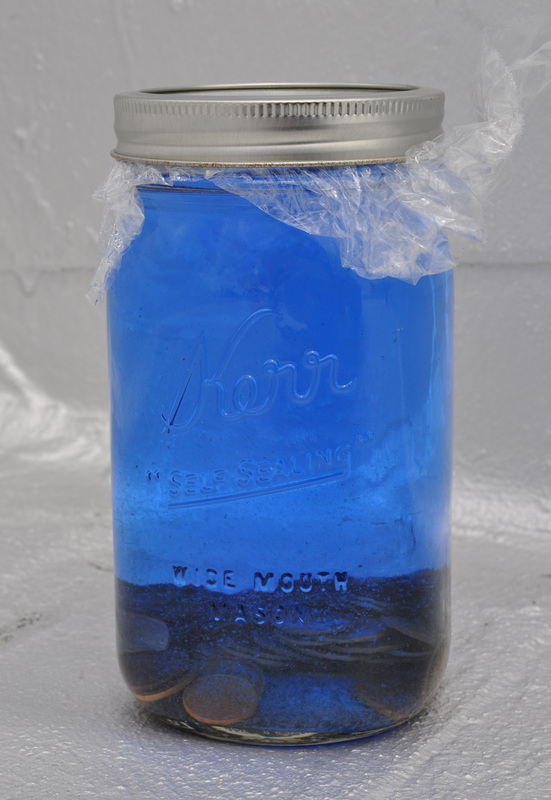 ...and here it is one week later - in brighter light... it doesn't seem that much more intense when I compare the photos. (It actually seems lighter/brighter). That being said, my guess is the solution is probably not harmed by leaving the copper in for longer than recommended. The next step is to soak your wool. I used Patons Classic Wool (100% wool) in the color "Aran" for this experiment. It comes in skeins that weigh approximately 3.5 ounces. I wound 2.25 ounces onto my niddy noddy, and loosely tied the skein using scrap bits of yarn in a "figure 8" through the yarn to keep it secure in 4 different places. Here's my skein of yarn bundled up for a "before" photo: 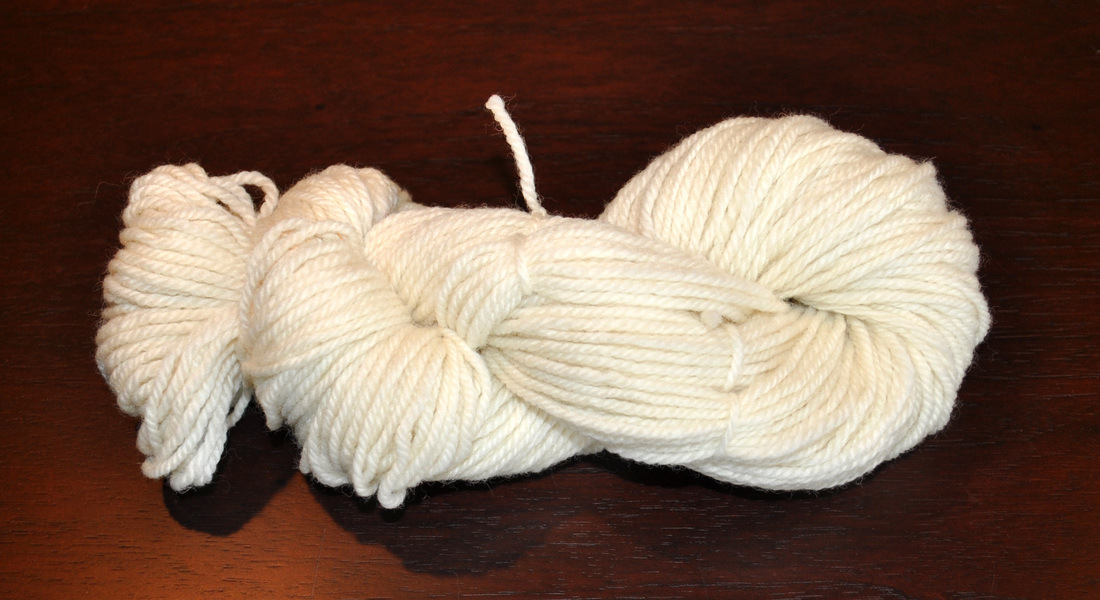 Then, fill a large bowl or pan with cool water. Open up the skein and submerse the yarn so that it's all able to soak up water: 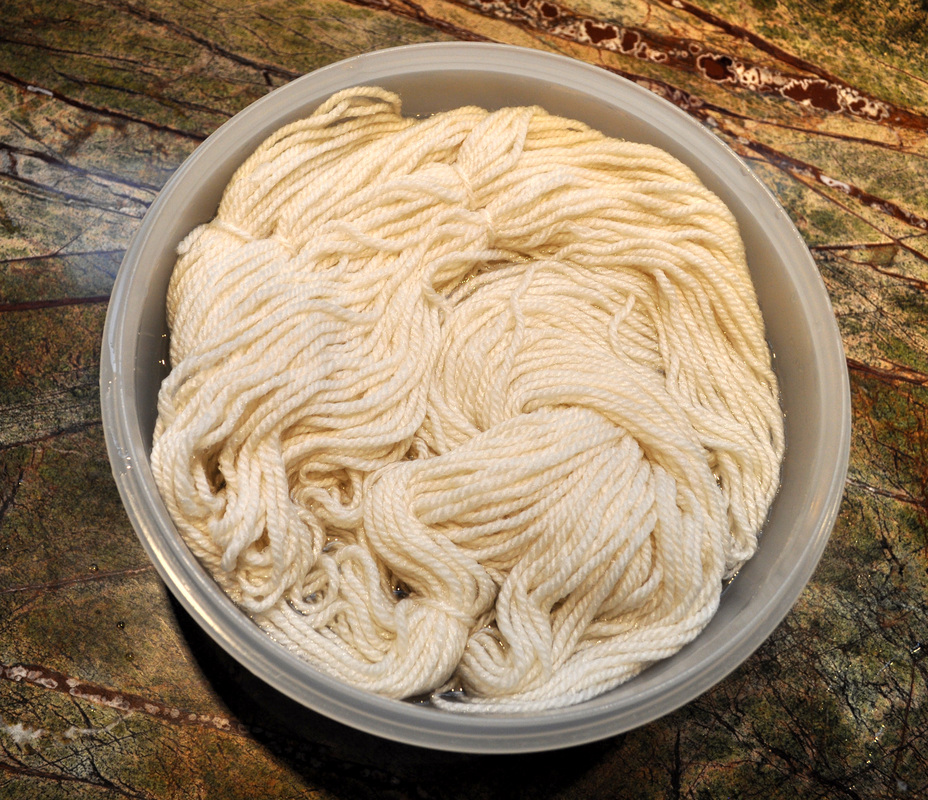 Some of the yarn sits on the top of the water and is exposed to the air... it's not getting wet! In order to fix this, I put a plate on top of the yarn and allowed the water to submerge the plate: 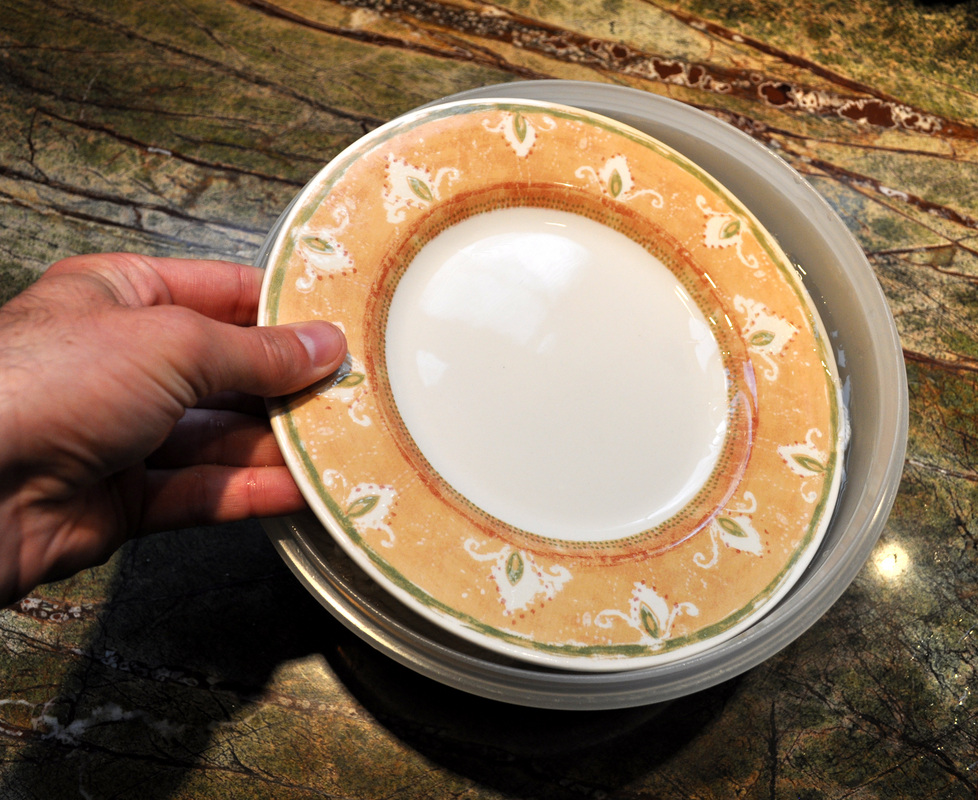 Let the yarn soak for about an hour in the water so that it is fully wet. Next, take the pennies out of your blue solution, being careful not to breathe in the vapors. Rinse the pennies in water. I don't know for sure if you would want to re-use the pennies for dyeing again or not (anyone have thoughts?)... The next steps require a few additional items: rubber gloves, a strainer of some sort to easily drain the liquid and keep the pennies in the jar, and a container of some sort in which to soak the yarn. Hooray for the dollar store; $3.00 plus tax for these additional items! Note: even though we are using simple household ingredients, I really suggest not using food preparation items that might come into contact with the blue ammonia solution. It's best to have dedicated supplies and materials for your dyeing and experimenting. When in doubt, don't use something that you use for food preparation. 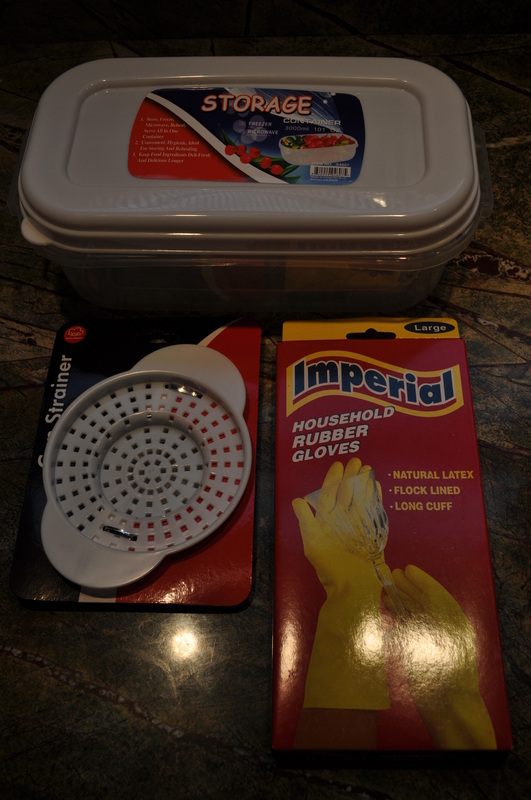 Carefully wring out the yarn from the bowl of water, and put the wetted yarn into the blue solution. BE CAREFUL not to get the solution on you. (If you do get it on your skin, wash immediately with soap and water.) When I did this, the yarn turned a strange beige-gray color. I put the plastic wrap on top of the yarn to try to be sure that the liquid was in contact with all of the yarn. After 30-45 minutes, there was no more blue in the solution. 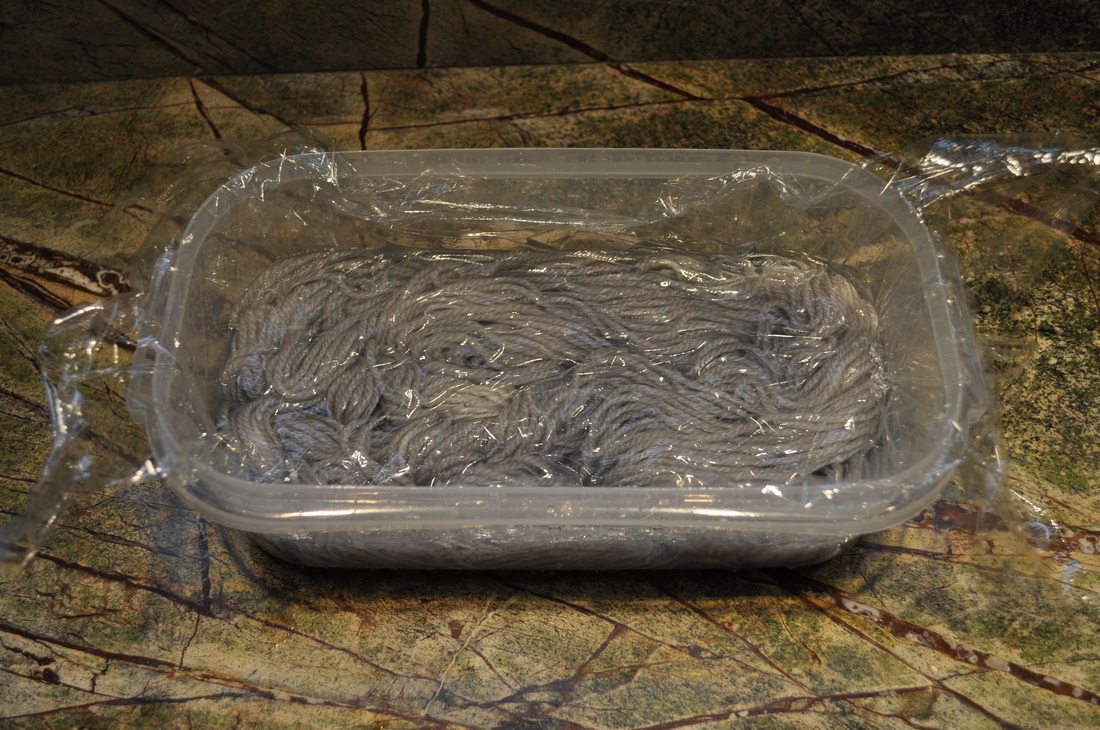 Once this happens, remove the yarn and rinse in a soution of vinegar to set the color. Note that this color is considered fugitive, meaning the color might/will fade over time. Be aware of this when you do the technique, knowing that if you combine it with other colors that this one may fade. 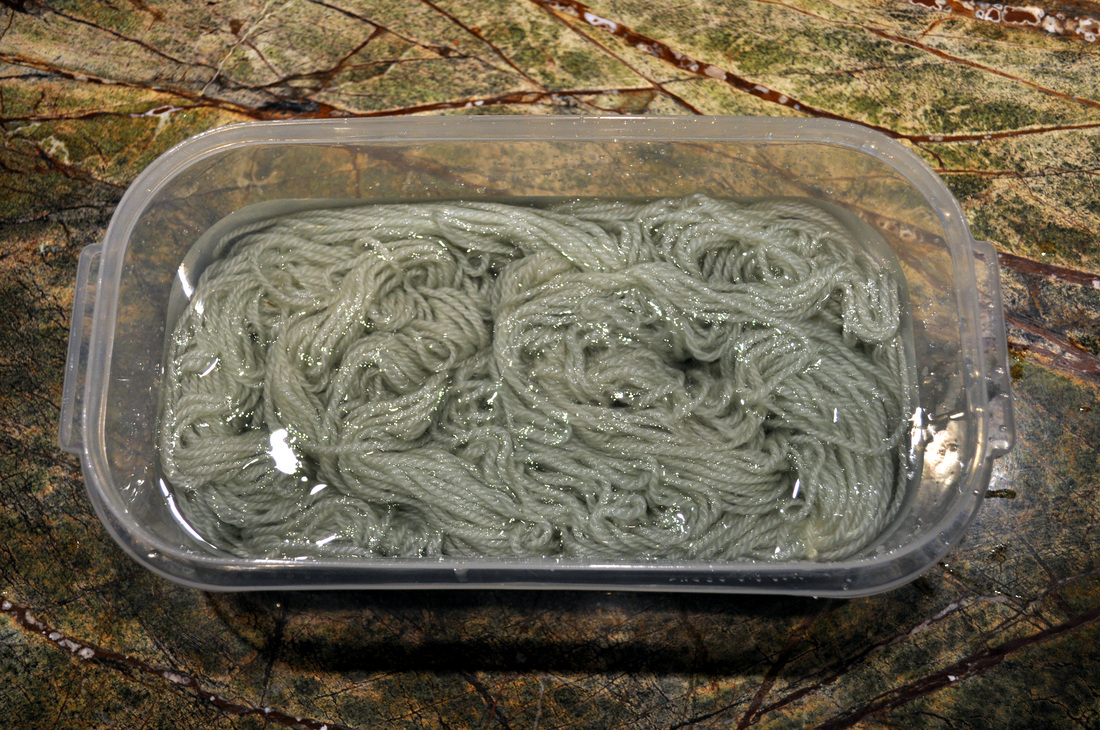 The photo above was taken after the yarn had been rinsed and vinegar was added to the rinse bath. There's a distinct but subtle change of color when the yarn is put in this "afterbath" - it got lighter and more green. The photo below shows an attempt at illustrating this difference. Click on the photo to enlarge. 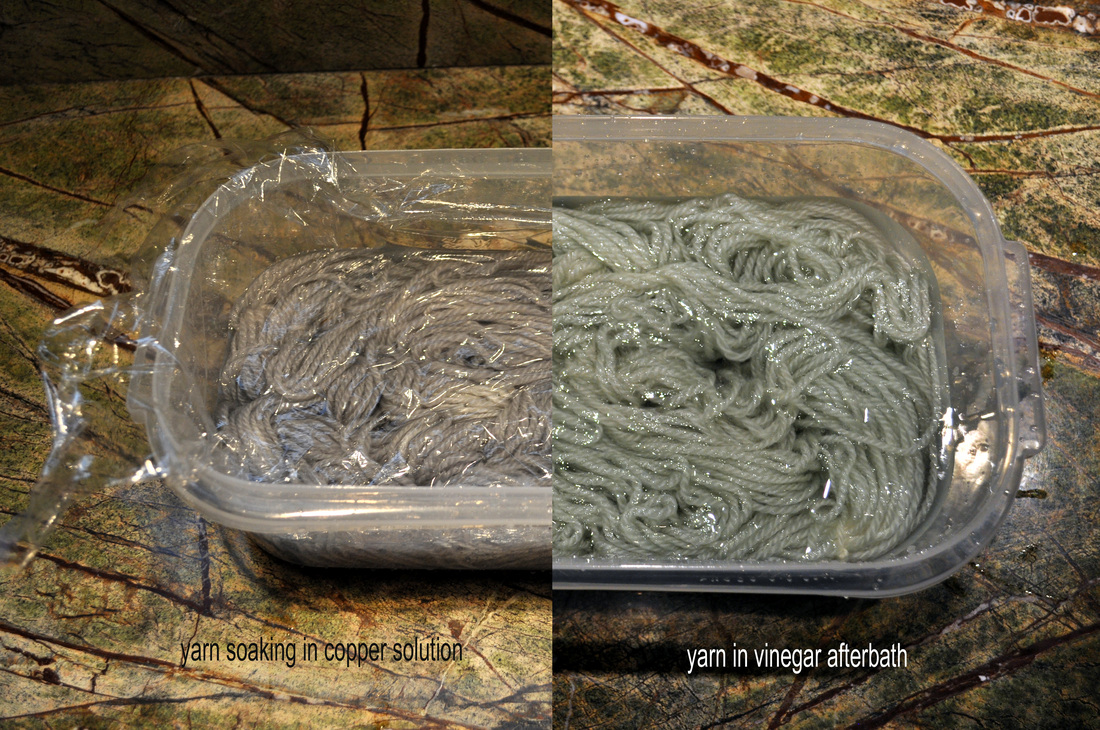 At this point, there's not much more to do. Rinse the yarn well, remove the excess water, and hang it to dry. In the end, I ended up with a green/gray yarn that I'm pleased with. Note that this dye is fugitive, meaning the color will fade over time, much like many other dyes. It's worth noting, however, and keeping in mind when pairing with other yarns. 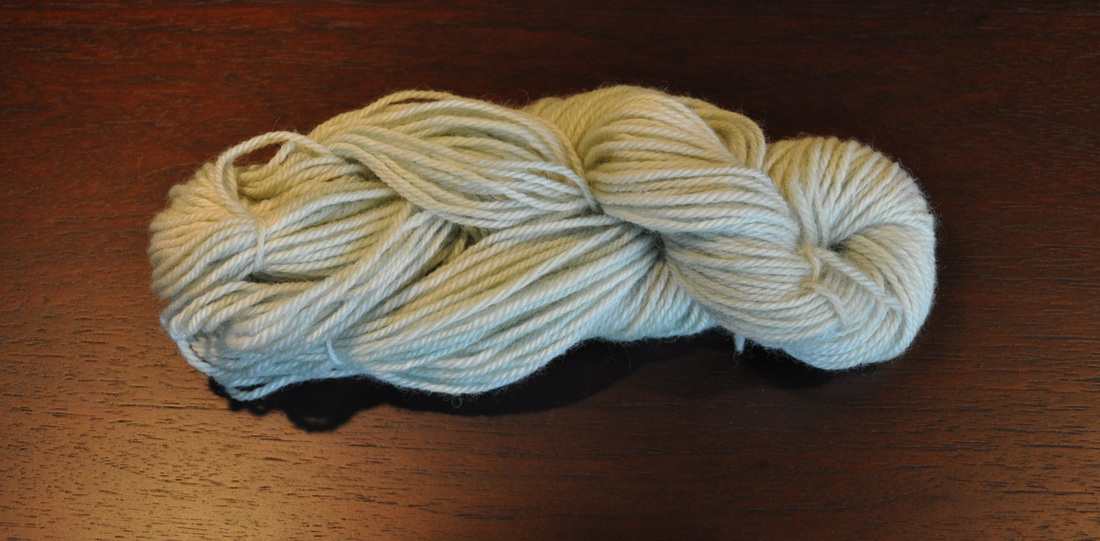 One more photo to compare the colors. If you do try out this fun technique, be sure to send me a note to let me know how it goes! Ready to try? Click the link below to download the tutorial for copper yarn dyeing! 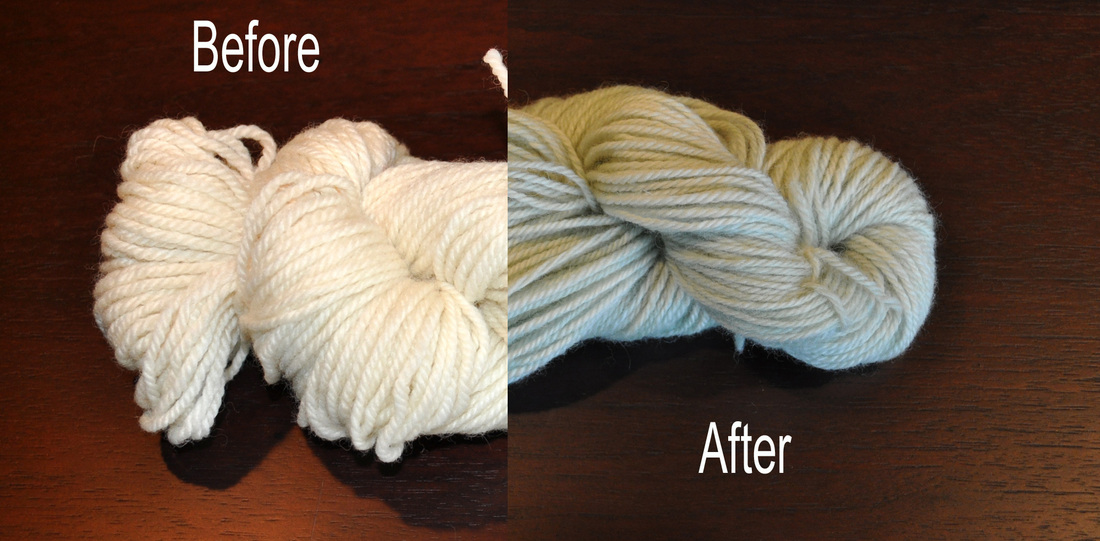
Like what you're reading? Click the "like" button for twitter or facebook below to share this post with your friends!
Save the Date: June 26, 2011!! In addition to other fun projects soon to be announced, I will be teaching two workshops at the San Jose Museum of Quilts & Textiles. First, a basic "Learn to Knit" class that will introduce anyone who has an interest in knitting but has never learned, and second, a more advanced "Banded Hats" workshop that will teach knitting in the round, fair isle and "jogless" stripes while creating a Navajo-inspired hat using Churro wool made by the Black Mesa Weavers for Life and Land. If you live in the San Jose or San Francisco areas, and are interested in taking a class, visit the museum's website and register. Following are the details of the workshops and the corresponding exhibits. For my knitting friends, Primary Structures will certainly be a wonderful opportunity to see firsthand knitting as art. Click the link below for the exhibit postcard:
San Jose Museum of Quilts & Textiles |
|||||||||||||||||||||||||||||||||||||


| primarystructures_release_april11.pdf |
Primary Structures
May 17 - August 7, 2011
Exhibit Co-sponsors: Lion Brand Yarn, The Indian Store, San Diego North Coast Knitters Guild, Stitch Diva Studios, The Knitting Room with in-kind donations from Skacel Collection, Inc., Crystal Palace Yarns
Southwestern Banded Blankets: Three Cultures, One Horizon
from the collection of Jean and Roger Moss
May 17 - August 7, 2011
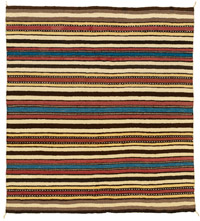
Collector Roger Moss said, “When my wife Jean and I started collecting banded blankets it was because we admired this marriage of utility and beauty and because their virtues had been long overlooked.” Curator Deborah Corsini added, “The understated simplicity of the stripes is a powerful contrast to the visual graphic intensity that resonates with kinetic movement.” Southwestern Banded Blankets provides a special opportunity to examine the austere beauty and subtle variations of three traditions of these rare, well used textiles. A catalog of the exhibition will be available.
Supported by a grant from the Christensen Fund.
 RSS Feed
Archives
July 2023
April 2023
March 2023
November 2016
August 2016
May 2016
February 2016
January 2016
December 2015
November 2015
October 2015
September 2015
August 2015
June 2015
May 2015
April 2015
March 2015
February 2015
January 2015
December 2014
November 2014
October 2014
September 2014
August 2014
July 2014
June 2014
May 2014
April 2014
March 2014
January 2014
December 2013
November 2013
October 2013
September 2013
August 2013
July 2013
June 2013
May 2013
April 2013
March 2013
February 2013
January 2013
December 2012
November 2012
October 2012
August 2012
June 2012
May 2012
April 2012
March 2012
February 2012
January 2012
December 2011
November 2011
October 2011
September 2011
August 2011
July 2011
June 2011
May 2011
April 2011
March 2011
February 2011
January 2011
November 2010
October 2010
August 2010
July 2010
May 2010
April 2010
March 2010
February 2010
January 2010
December 2009
October 2009
August 2009
July 2009
June 2009
May 2009
April 2009
March 2009
February 2009
January 2009
December 2008
November 2008
October 2008
September 2008
August 2008
July 2008
June 2008
May 2008
Categories
All
100 Strangers
Adventures
Animals
Book Review
Ceramics
Charity
Clay
Contest
Cyc
Diary
Dyeing
Etsy
Fiber
Fiberguys
Field Trip
Finished Object
Knitting
Life
Marathon
Master Hand Knitting Program
Media
Mens Knitting Retreat
Museum
News
Paint
Patterns
Product Review
San Francisco
School
Self Imposed Sock Club
Shop
Spinning
Stash
Tkga
Tools
Travel
Travels
Tutorials
Weaving
Workshop
Yarn Bowl
Yarn Shops