
|
(To set the mood for this post, click "play" on this song - "Home on the Range" by Billy Vaughn, 1962.) I'm happy to announce another fun finished project! As you may have guessed by the music playing (feel free to hit "pause" if it bothers you), I finished the "Buffalo" cardigan [#434] from Mary Maxim, circa 1955. A few modifications were needed; the recipient was sized differently than the standard pattern... So, after doing a gauge swatch, I added stitches to the pattern, removed rows to shorten it, and knitted, ripped, re-knitted, re-ripped, and knitted again. This project wasn't difficult - but it had the same blocking issues as the seahorse cardigan. When blocking pieces knit out of 100% wool, it's possible to "shrink" the pieces into shape. (Actually, it's almost easier than stretching them to shape!) - once completed, the sweater fit like a glove, and the recipient was pleased, and so am I! The horns on the buffalo were done using swiss darning or "duplicate stitch" - a video on this technique has been added to the video page. I also added it to this post for convenience. 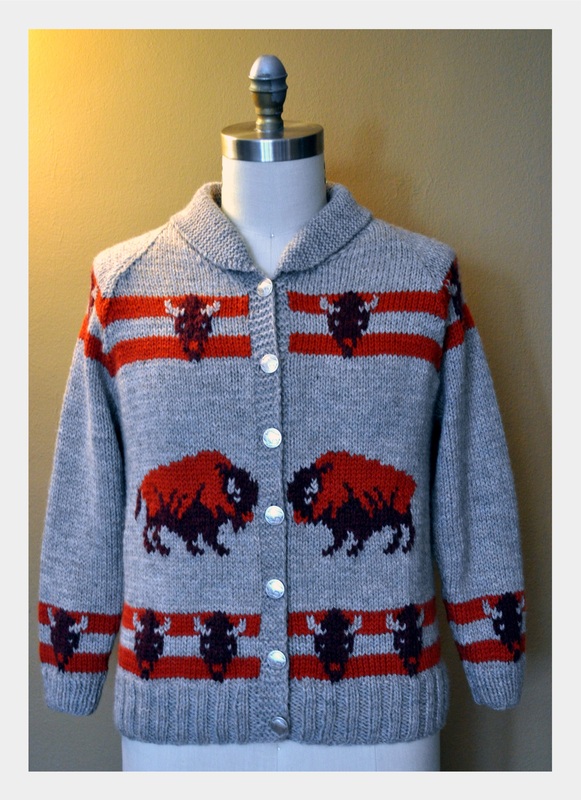 Yarn: Patons Classic Wool Merino (100% Wool) Colors: Natural (main), Paprika (stripes), Cognac Heather (buffalo heads) Needles: US5 (3.75mm) Size: Small (38) with modifications. All the effort in sizing the cardigan paid off; it fits the recipient PERFECTLY! And the buttons... You ask, where did I get the buttons? Why from ETSY, of course! When I first started to consider what buttons I wanted to use on this cardigan, I thought first that I should go to one of the amazing button shops in San Francisco then, realized that it's an opportunity to take advantage of the wide offerings on ETSY.... so, I did a search and scored wonderful buttons from Wicked Wool Gathering. Visit their shop by clicking their banner:  The buttons arrived QUICK and are perfect for this project! I would recommend checking out this Etsy seller the next time you're in the need for cool buttons - she's speedy, friendly, and her shipping costs are down-right reasonable! I ended up having one extra button so, while making the shawl collar, I added a button hole in the back center to make use of that last lonely button. I didn't want it to be all alone without its brothers and sisters... This touch helps hold the collar down, keeps things nice and tidy, and if the wearer wants to pop the collar up it's as simple as unbuttoning the button. If you'd like to see more about this project or "favorite" it on ravelry, you may do so by clicking HERE. 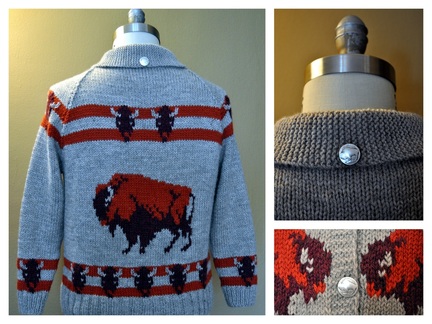 Hints for making sweaters such as this: 1. Use 100% wool. (as mentioned before, it makes blocking easier!) 2. Swatch! (seriously). Now swatch again. 3. Rip (if it's not the right size). It's only knitting. You did it once, you can do it again. 4. Block before seaming. Of course, these suggestions are valid for lots of projects... paying attention to what we're doing... recognizing when something seems to be going awry, and taking action are some of the best rules to live by as we create! Here's the video showing how to do Swiss Darning (also known as Duplicate Stitch): Like what you see? Click the "like" Facebook button or share this post on Twitter with your friends. Thanks!
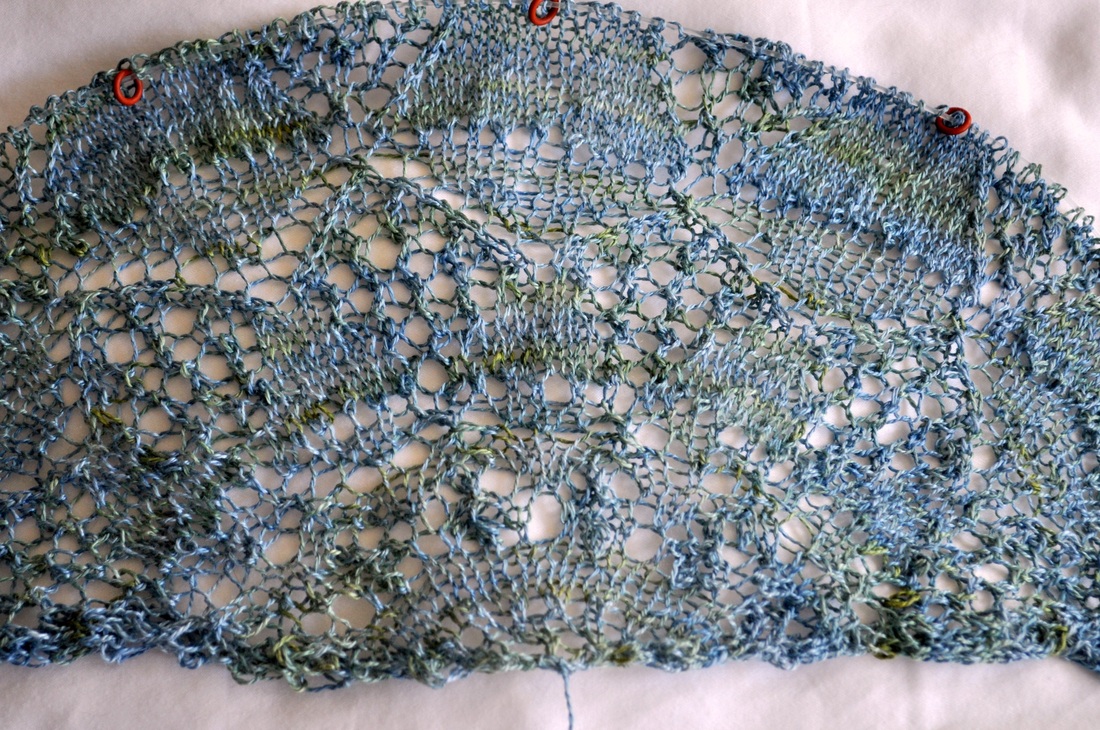 I got a BEAUTIFUL hank of Shimmering from A Verb for Keeping Warm about a year ago (even before I moved to San Francisco!) and was planning on knitting some lace with it as a knit-a-long with my buddies. It's 100% silk lace weight (3.5oz) in a generous 1093 yards, hand dyed in a color they call Azure. We all attempted the lace but, for one reason or another, decided that knitting lace wasn't for us at that time. The yarn taunted me though. It bugged me that this really gorgeous hand dyed yarn was sitting all wound up in a yarn cake, nestled in a handmade project bag (also from AVFKW) and stored away with the intended lace pattern... and that's where it sat and hibernated - for a year! I just finished a project (a pair of socks that have been on the needles for a while; more about those as soon as they're blocked and photographed) and I needed a new project. Although I feel ready to tackle more socks (and soon) I just felt like a change of pace would do me some good. After remembering this lonely skein of yarn and the Mystic Star Shawl by Anna Dalvi, I decided to cast on and make the semi-circular version. This, people, is my very first piece of lace. The first time (ok, times) I attempted this pattern last year, I was trying the circular version and getting frustrated in the fiddle beginnings of knitting 1.) lace, 2.) in the round, 3.) on DPNs 4.) for the first time. My decision to do the semi-circular shawl seems to be working; after a number of false starts, I am able to concentrate on the pattern row, count carefully between my markers, and do the "rest" row back. Yes, it's lots of purling but maybe I'm strange; I don't mind purling. Actually, when I'm in the "knitting zone" I have to examine my work to even realize what stitch I'm making! My semi-circular shawl can be seen on Ravelry HERE. So far, I have learned that lace isn't difficult as long as you don't mess up! I'm well on the way through chart C now and feeling optimistic about this project.  In other news, Willow spent the earlier hours of the morning struggling to get into the sunbeam. She struggled and struggled, at times even laying half off the edge of the chair arm to get her little head and ears in the warm light. (Don't worry; I moved the chair so she could sunbathe right after I took this photo).
Wink asked that she not have her photo taken; she hasn't had her hair done in weeks and said she feels a wreck! 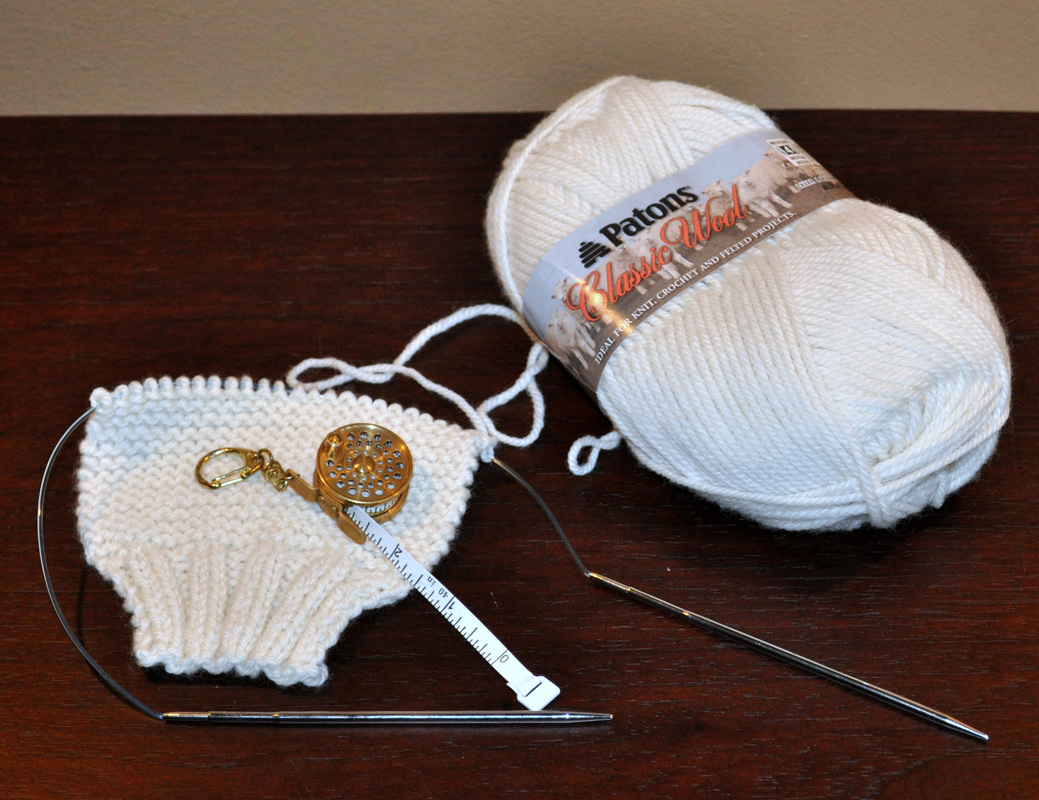 I announced back in April, 2010 in THIS post that I was tackling the Master Hand Knitting Program again. I started by doing swatch #3 a few times until it was acceptable, then, I put the entire project aside. By "aside" I don't mean in a closet somewhere, or stored away out of sight... what I mean is the project materials sit right next to my desk where I do my knitting, internet surfing, blogging and working. The materials stare at me and taunt me that I haven't been acting on this project at ALL.
Since I'm discovering places to add knitting in my life even with a heavy professional work load, I am revisiting the idea of progressing on the Master Hand Knitting Program Level I. The other day I picked it back up and reviewed swatch #1 that had been napping on my needles. With only about 2" of garter stitch left to do on this swatch (which looked really good) it made sense to at the very least complete it! After about 1" of knitting I came upon the knitter's flat tire; a manufacturer's knot in the yarn (ugh!) and decided that instead of weaving in ends on my swatch for a program such as this that I should just start the swatch over. (After all, the submitted materials are supposed to represent my "best" work!) What I didn't do was re-wind the entire skein of yarn to be sure that there were no other knots present. It's a bit like knitting Russian Roulette, but I feel as though the chances are low that there would be more knots (and if there ARE more knots, making a swatch isn't THAT difficult)! So this morning I'm finishing up swatch #1 and making notes about the references for the techniques used in it's fabrication. The program requires not only knitting the swatches but also providing references for the cast on, ribbing, increase, bind off, etc. used. It feels good to make progress even if I'm not promising myself a certain quantity of swatches a day, or week, or month. I know this process is going to take a while and instead of focusing on the daunting tasks ahead I'm going to see how it feels to just focus on one swatch. It's like knitting a major project; if we focus on the few stitches in front of us and do a little at a time, we will soon be able to look back over our progress and see how far we have come! Like what you see? Click the "like" Facebook button or share this post on Twitter with your friends. Thanks! The holidays are coming and will be here before we know it! In preparation for the impending gift-giving season, I created a tutorial for maing homemade vanilla extract! Despite the fact that this spoils the surprise for those who are going to get vanilla extract from me as a gift this year, I decided I wanted to share it with you! 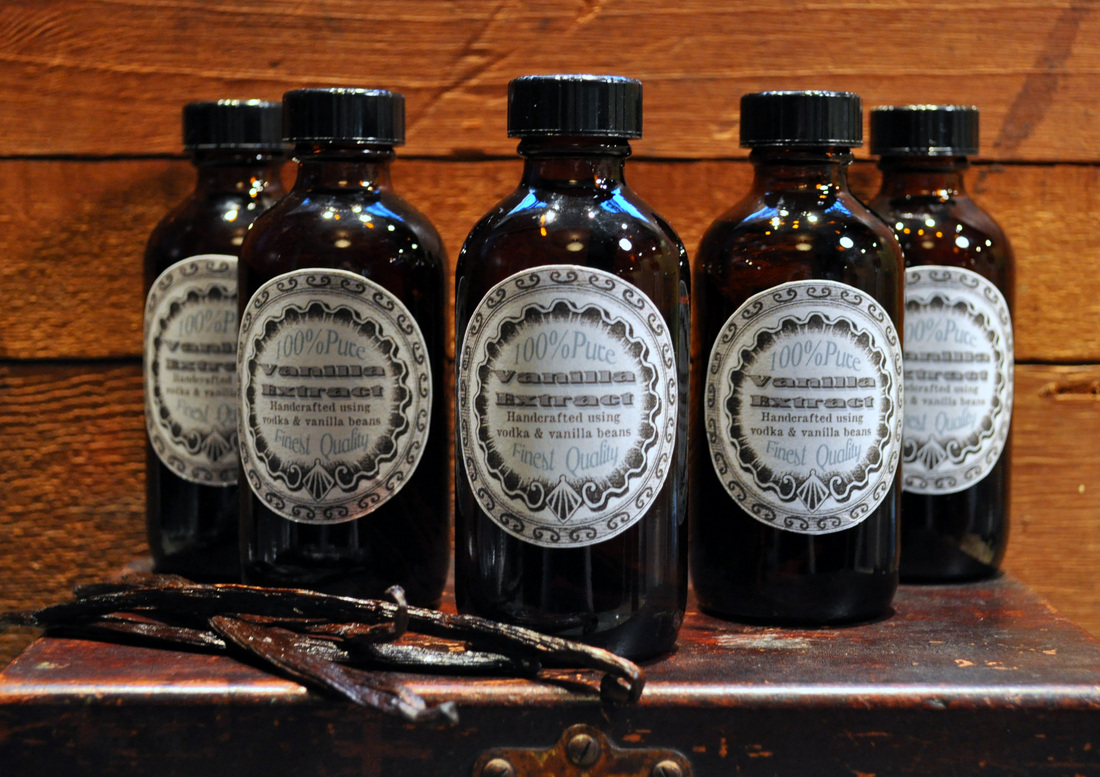 Where does one go to get the vanilla beans? The bottles? Keep reading... We have a fantastic ice cream shop just down the street - Xanath - well known in the area for having some of the best vanilla ice cream in town as well as other incredible flavors, including saffron, saffron ginger and dry cherry to name a few! Each time we visit this shop they offer us a single vanilla bean (it's sort of their calling card) - to remind us that they sell restaraunt quality beans and saffron in addition to their yummy yummy ice cream! I got the vanilla beans for my extract from Xanath, and recommend that's where get your beans too. Did you know that vanilla beans come from orchids that are hand pollinated? The seed pods that develop are hand picked and the curing process takes months. Knowing this helps me understand why it's the second most expensive spice! Another interesting fact: the FDA regulates vanilla extract by bean weight, not bean quality, so you never know what you are getting when purchasing mass produced extract. Making your own vanilla extract ensures that it will be free of the artificial colors and the corn sweeteners found in even high-quality vanilla extracts. 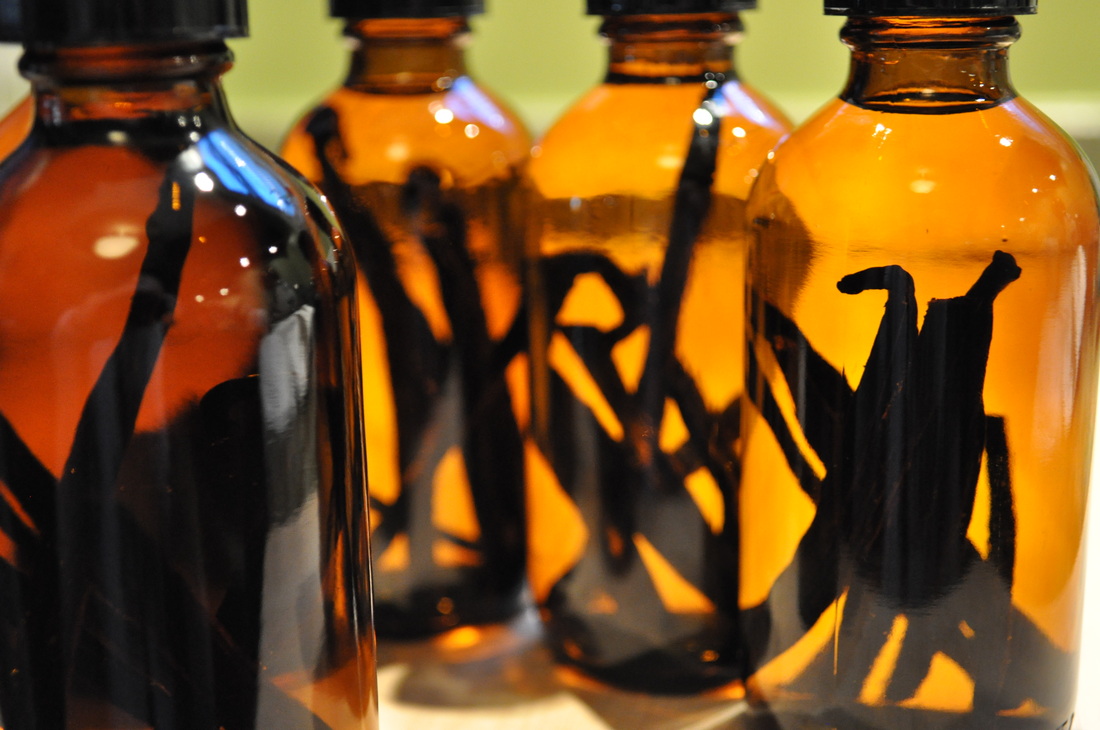 So... here's my tutorial - just download the link for all the directions. Keep reading to learn about my resources and inspirations.
Resources: Click on the links to order these supplies online: Vanilla Beans Glass Bottles The labels I designed were created with ephemera inspirations offered through my friend Karen at www.graphicsfairy.blogspot.com. She has an amazing collection of old pharmacy labels, clip art and all kinds of neat images that can spruce up any project! In the San Francisco area? Be sure to go Xanath and get some ice cream; I highly recommend the saffron ginger shake! They're in the heart of the Mission district on Valencia St. Xanath Ice Cream 951 Valencia St. San Francisco, CA 94110  Like what you see? Click the "like" Facebook button or share this post on Twitter with your friends. Thanks!
|
Archives
July 2023
Categories
All
|
||
 RSS Feed

|
ExploreFor Fun
|
Support |
Connect |
© 2006-2023 Kyle William. All Rights Reserved.