
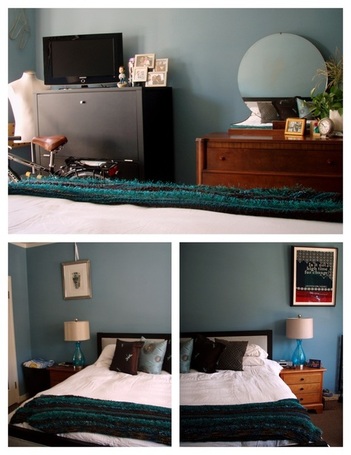
I suggested each of the clients select their very own nightstand, keeping in mind the color scheme we had established. They each chose something different and beautiful, and they compliment the space perfectly, hinting at their individual styles but still remaining cohesive with the space. The highlight of this project was painting one of the walls to look like wallpaper! After
Hours and hours of work went into hand painting the wall in this San Francisco bedroom.
Painted Wallpaper TutorialInspired by this painted wallpaper, I decided this is the perfect way to create a focal point without hanging art on the wall, since most people don't like having art over their beds in San Francisco (earthquakes!) This paint treatment offers a bit of pattern in this room while allowing the occupants to sleep soundly. The process is easy, requires only a few tools, a somewhat steady hand, and time. Following is the tutorial for this project which includes the stencil template as well as general directions for how to go about transforming any wall into a showpiece!
Let's Begin:Once you have selected your colors and painted the room with the base color, it's time to start the process of painting the design. Begin by printing the template out (above). Lay a piece of clear acetate over the stencil and carefully trace it out using the Sharpie permanent marker. Be sure to include the little horizontal bits that hold the center square in the stencil! 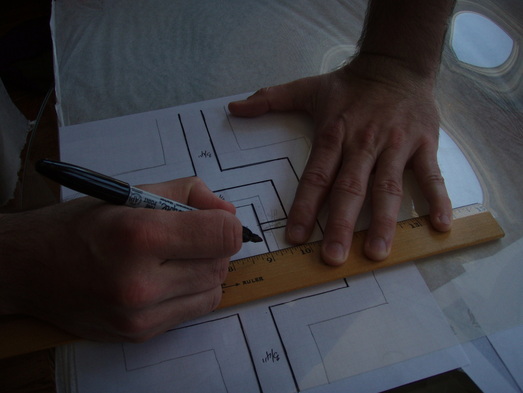
Cut the stencil out using the Exacto knife, paying careful attention to the corners. Again, remember not to cut those little supports that are holding the center square. Once that's done, find the center of your wall and mark a vertical line using a pencil. Lightly trace around the stencil, being sure to add the "additional filler" between each motif. Once a few squares are drawn in, place the stencil between two motifs to the right or left of the line, and, making sure it's vertical, draw it in. Repeat on the other side, then measure and use that spacing to draw the rest of the vertical lines on the wall. Work your way along, taking frequent breaks. The process takes quite a while. once you're done drawing, mix some accent paint and Floetrol in a container. (Floetrol extends the drying time of the latex paint.) Using your small artists brush, begin to fill in the design, doing your best to keep each line straight. I worked in sections, painting different sections at the same time so that I was never touching a spot that was wet. Take your time; making sure you're painting the right place. Make a mistake? Just wash it off with a wet rag, let that spot dry, and try again. As I worked, I would feather out the ends of my painting so that there were no hard lines showing where I stopped and started. 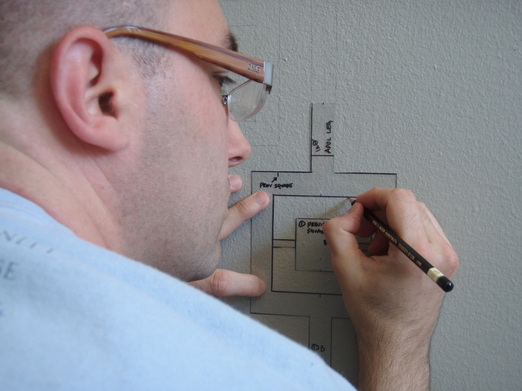
Painting the wall took a LONG time. It's a beautiful result, though, and for those who might not be interested in devoting hour upon hour to the project, as well as those brave enough to tackle the project, I offer a virtual gift: Desktop Wallpaper! Once the wall was completed, I took a photo of the large expanse of pattern and formatted it to fit most standard computer monitors. 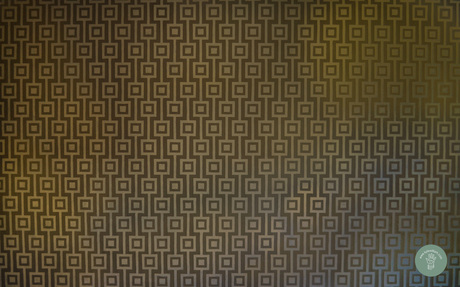 Kyle William Desktop Wallpaper Select the appropriate size and download the file with my thanks for taking time to visit the website and read the blog. Like what you see? Click the "like" Facebook button or share this post on Twitter with your friends. Thanks!
|
Archives
July 2023
Categories
All
|

 RSS Feed

|
ExploreFor Fun
|
Support |
Connect |
© 2006-2023 Kyle William. All Rights Reserved.