
|
Last Friday, we did some natural dyeing using yellow onion skins and madder root. The processes were all similar, and while I didn't take as many images as I'd like, I thought it might be fun to share some photos of parts of the process. There are a few things I want to note, most importantly, DO NOT use your cooking or canning pots to dye fiber! It is probably not safe and might make you sick! Visit a thrift store or buy inexpensive pots to do this. Consult a book on dyeing for more information, and by all means, don't take my measurements/calculations to be "correct"... it's all an experiment, and, in my opinion, as long as the yarn turns out pretty, it's successful!  The first step is to prepare the fibers. We used only wool in our process. The yarn needs to be tied into a skein, which can be done on a warping board (as above) or between two chairs or two hands of a patient person. The yarn needs to be secured in 3 places by tying a yarn around the fibers. Look at a commercial skein of yarn that hasn't been opened and chances are you'll see how this string is to be knotted. It helps to keep the yarn from tangling on itself. Do not knot the string tight or you'll create a "stripe"! 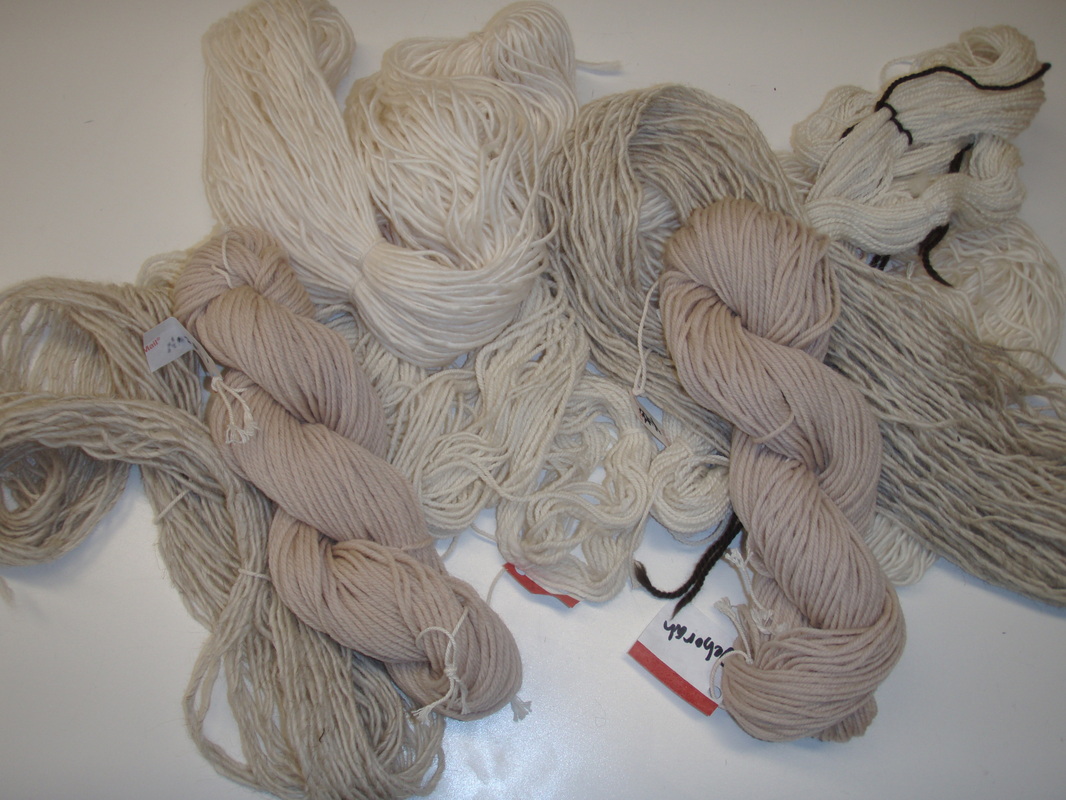 If you want to label your yarns, get a tyvek envelope (the FedEx or UPS or Priority mail envelopes that feel like a mix between plastic and paper) and cut it into little squares. This is a great opportunity to reuse! Cut a small hole in the tag or use a hole punch, then string it through one of the strings you knot around the skein. Use a Sharpie marker and make a note about the yarn - your name, the fiber type; how you intend to mordant or dye the yarn - whatever you think is important. If you are dyeing a bunch of different ways or different yarns, these notes are helpful. Also, the tag can stay with the skein after you're done... and it'll remind you what you did so you can explain it to anyone interested! Any animal based (protein) fiber should accept the natural dye easily. Plant fibers are less successful. If the fiber is synthetic (nylon, acrylic,) you'd want to use acid dyes. Also, you can overdye yarns... if you don't like the color of a yarn, try overdyeing it! If the fiber starts off a bit darker, then the color will be darker when dyed. Onion SkinsThe skin of the yellow (or red) onion dyes fiber beautifully. I went to the local chain supermarket and asked the produce clerk if I could clean out the onion bin. After quickly explaining what I was doing, he was more than happy to have my do this; it made his produce look better, his job easier, and the skins that would otherwise have been garbage are put to use. NOTE: He did mention that in a month or two that the onions will begin to arrive with less of a skin, so for those interested in dyeing using onion skins, I suggest gathering materials sooner rather than later, or you might be waiting until the Autumn. Having never dyed with onion skins before, I did a search online and found some sources that hinted at soaking the skins for 24 hours prior to using them. I took 2 plastic jars and filled them with skins (which I first weighed so that we had an idea of the weight of the skins we used), then poured boiling water on them and let them soak for a few hours the morning of the class. I figured it can't hurt, and while it wasn't the way our instructor generally did the dyeing, we used the liquid and skins.  We put the dry skins and the ones that were soaked in sacks after weighing the materials (we had 5.6oz of onion skins). Putting the skins in some sort of mesh sack helps keep the dyestuff from tangling in the fibers. Old stockings work really well for this, and these mesh bags worked well for onion skins. In our case, we had about 9oz of yarn which we soaked in cold water for about half an hour. Then, we put the wet fibers in a pot of hot water with about 2oz of mordant (we used Alum) and let it soak in the hot water (which was cooking on a little hotplate) for about an hour. We don't want the water to boil, but the hot water and mordant helps to make the fibers recieve the dye better. There's LOTS to know about natural dyeing, and a wonderful resource is the local library. Check out some books and give it a try! 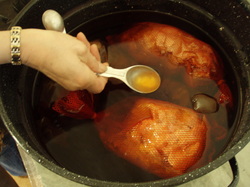 The liquid from the soaked onion skins went in the hot pot of water and the mesh sacks went in as well. Immediately, the color of the water was golden! After they were in the pot for a while, we added the mordanted yarn 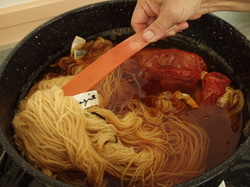 We let the yarn simmer for about an hour, keeping an eye on it to be sure it doesn't boil, and stirring the pot to keep the fibers mixed around the skins. After we were happy with the color, we poured the mixture in the sink (which you shouldn't do with acid dyes!) and squeezed out the yarn. At that point, it needs to be rinsed (I like to rinse it till the water is clear, then put some vinegar in the water to set the color), and hung to dry. 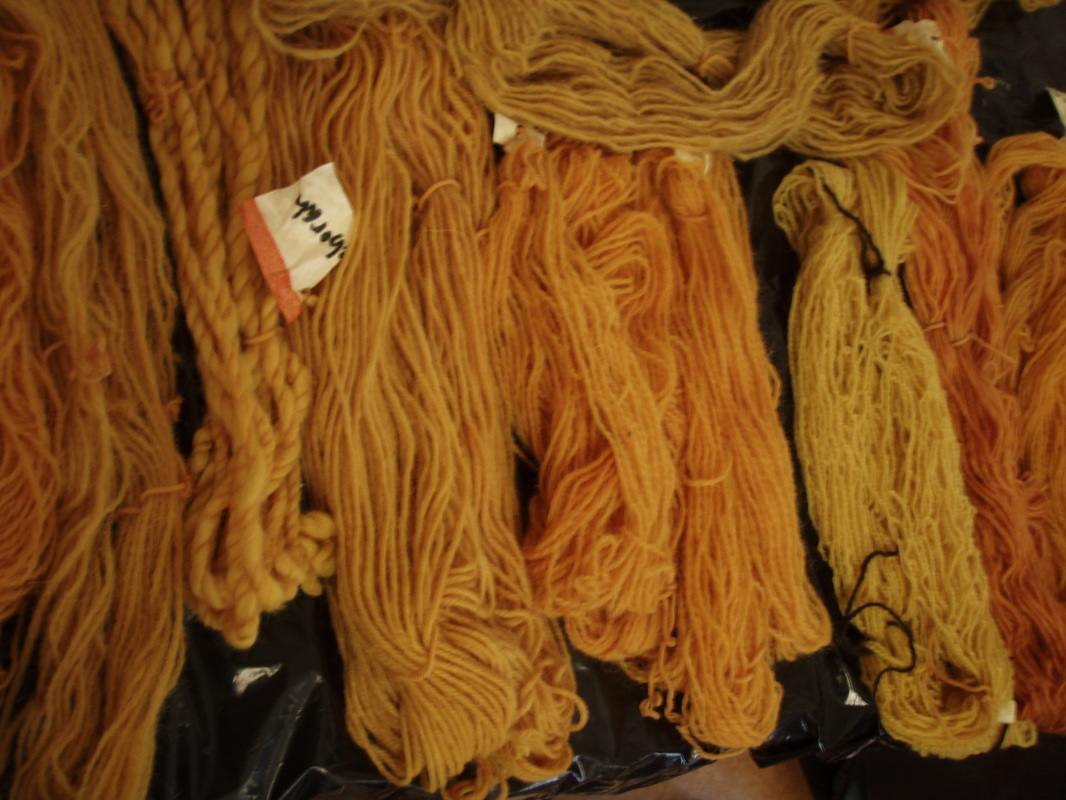 Onion skins make an amazing range of golds and yellows. The fiber on the far right of this photo was "overdipped" in the madder dyepot which is why it gets a bit more orange at the bottom of the skein. Madder RootThe process for dyeing with madder is pretty much the same. The root we used had been harvested around 15 years ago so this was a bit of an experiment. The root bits could have been smashed up a bit more, but other than that, here's what we did...  Madder roots in the mesh bag sitting in the dyepot cooking out their delicious color! We let this cook just like we did the onion skins. These sticks came out during the process; it would have probably been good to use the leg of a ladie's stocking for these bits... Again, we had 9oz of yarn, soaked in cold water then put it in a pot with the alum (again about 2oz) and soaked for 1 hour. We had 8oz of madder root which was soaked overnight in a big glass jar. The liquid went into the pot and the root bits went into the mesh bag.  When we were done with the process, the fibers turned out this gorgeous orange/peach/rust color! After soaking them and hanging them to dry (remember to put them somewhere that if they happen to drip that if it happens to still have dye in it it won't be a problem) - I hang my skeins in a tree in the backyard - the water drips on the grass below... and it doesn't stain anything. 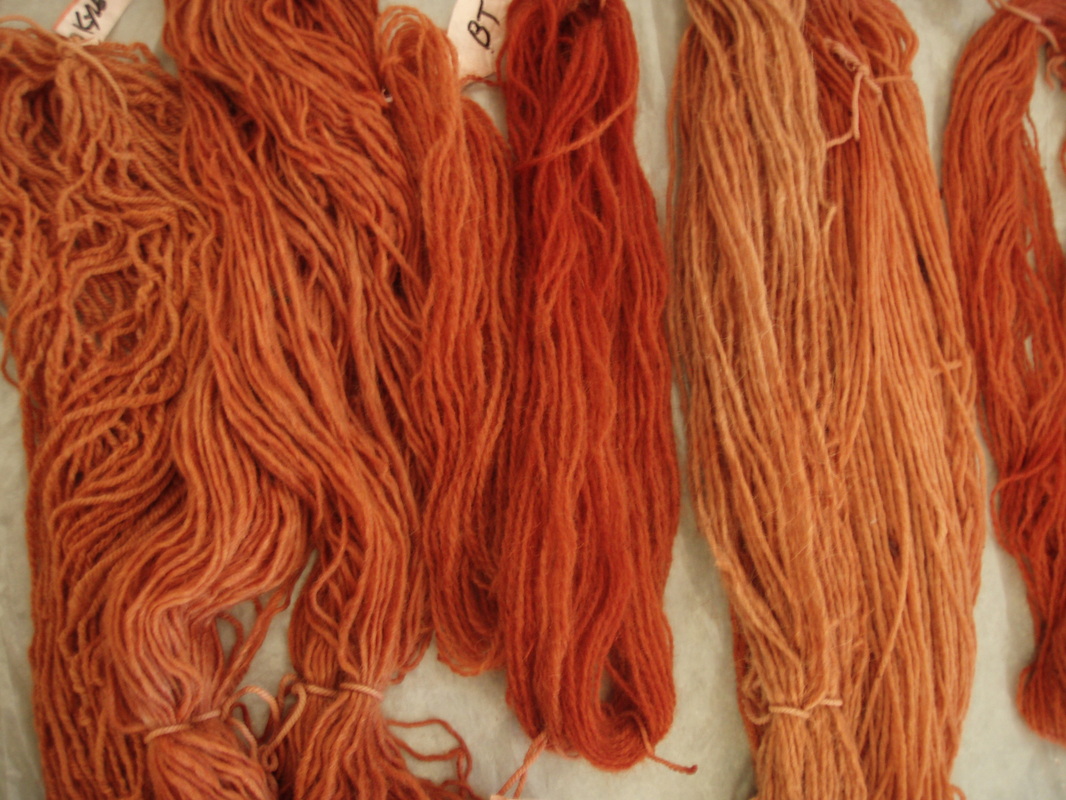 BrazilwoodThe week before we dyed with Brazilwood; an endangered wood! One of the participants got Brazilwood shavings from a woodworker who makes violin bows! The wood is old, and is part of his collection of materials. Instead of the shavings being thrown out, he allowed us to do some dyeing with it! The color we got is a gorgeous pink/orange! You'll also notice that there is some purple colors in here... After the dyeing, we added baking soda to the dyepot which made the purple/fuschia color, and added vinegar to a different "afterbath" and that made the brighter coral color. 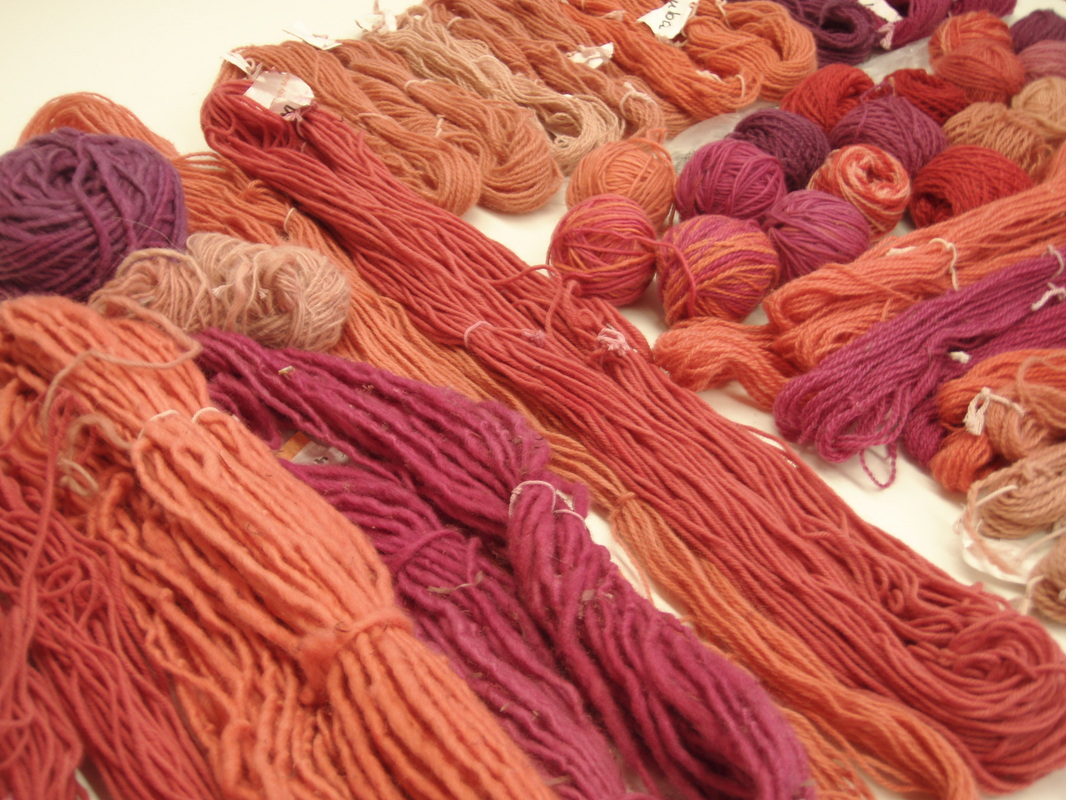 The sort of red ball in the middle of the last image is one that a student overdyed. It's just dyed with the same brazilwood 2 weeks in a row. Gorgeous! 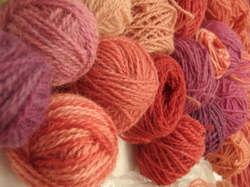 So there you go... natural dyeing, a few different ingredients, and unpredictable (but beautiful) results! Go get a book from the library or your local book shop, do a google search for a natural dyeing workshop in your area, and get to it! There's a world of color out there for you to discover!
Here's a helpful online link: Dharma Trading offers natural dyes and mordants for purchase (as well as a LOT of other things) - if you can't find materials locally, you can always order from them! |
Archives
July 2023
Categories
All
|
 RSS Feed

|
ExploreFor Fun
|
Support |
Connect |
© 2006-2023 Kyle William. All Rights Reserved.