
|
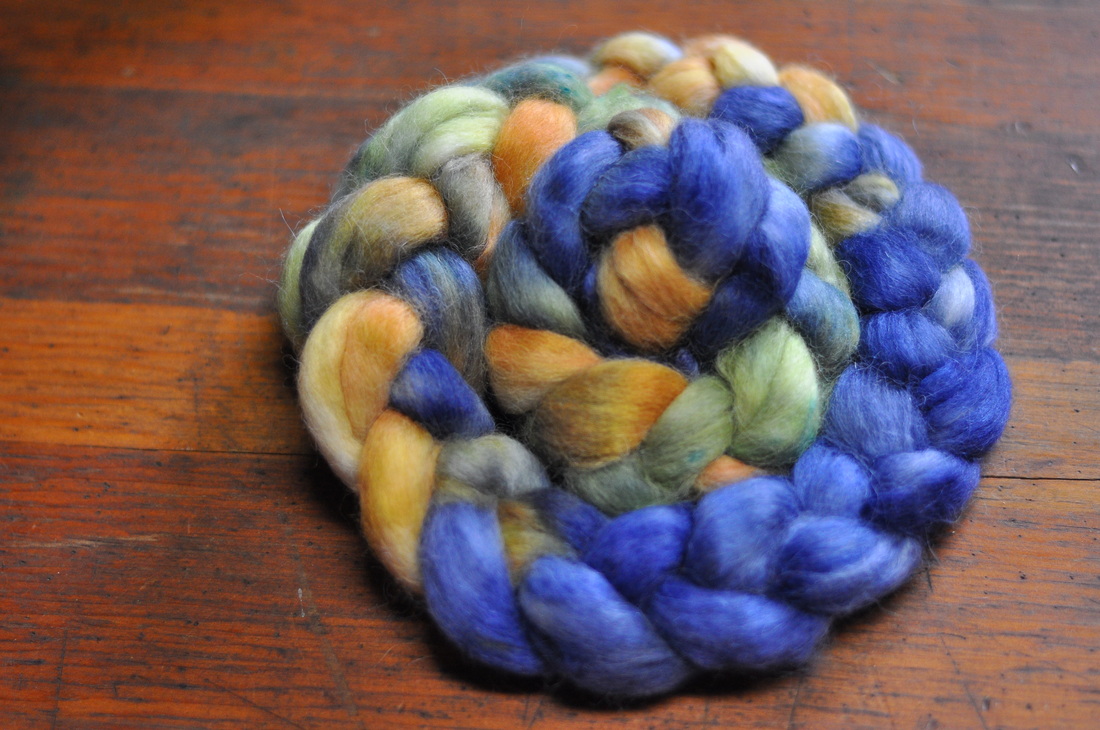
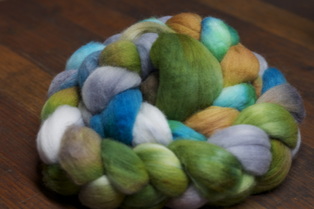
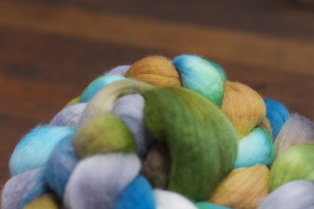
Over on the Facebook page, I ran a little giveaway. Once the page reached 250 "likes", I would randomly select someone to receive their choice of fiber in their choice of colors. Once the goal was reached, I used a random number generator and Lynette was the winner! Lynette asked for Alpaca in greens, golds, and blues. I delivered to her 4oz of fiber rich with color and ready to be crafted into something beautiful. I love working on Dye Lab (one of a kind colorways) because they're unpredictable!
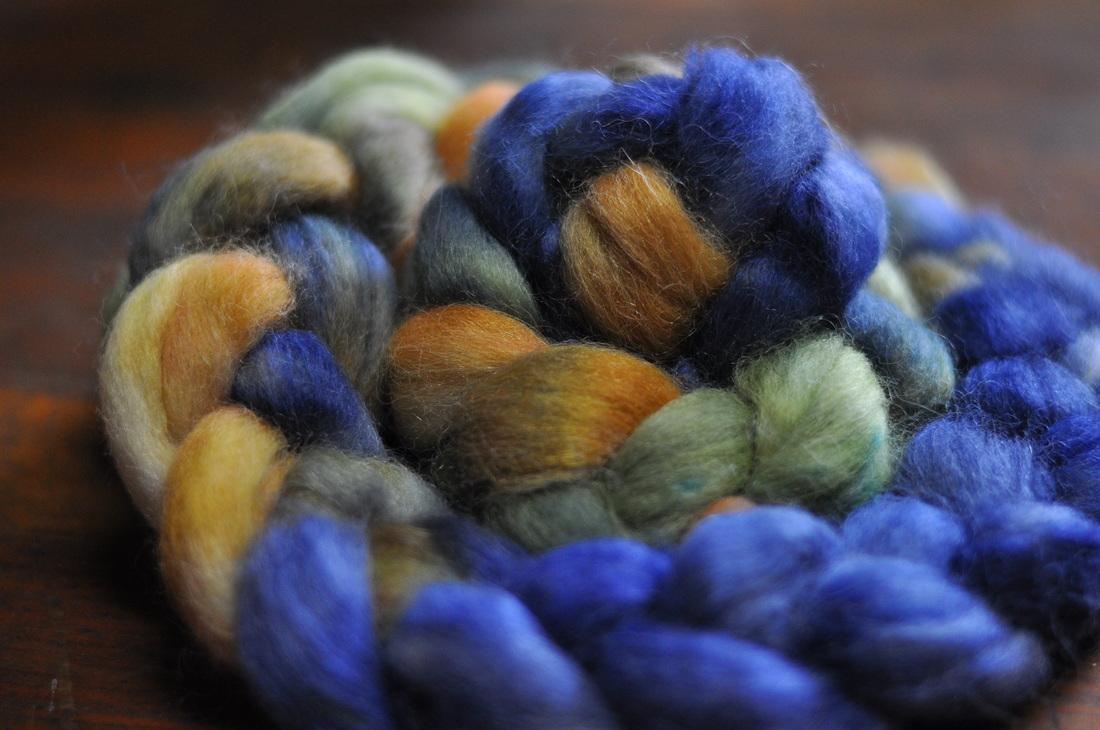
Of course, giving one prize is fun.... but the fun didn't stop there. Lynette selected ANOTHER person to win fiber, and she chose Gilda. Gilda asked for Merino so I gave her 4oz of it in a new colorway which has yet to be named!
So... here's one more way to win. Help me name this fiber! - First, visit the Kyle William Facebook page and "LIKE" it.
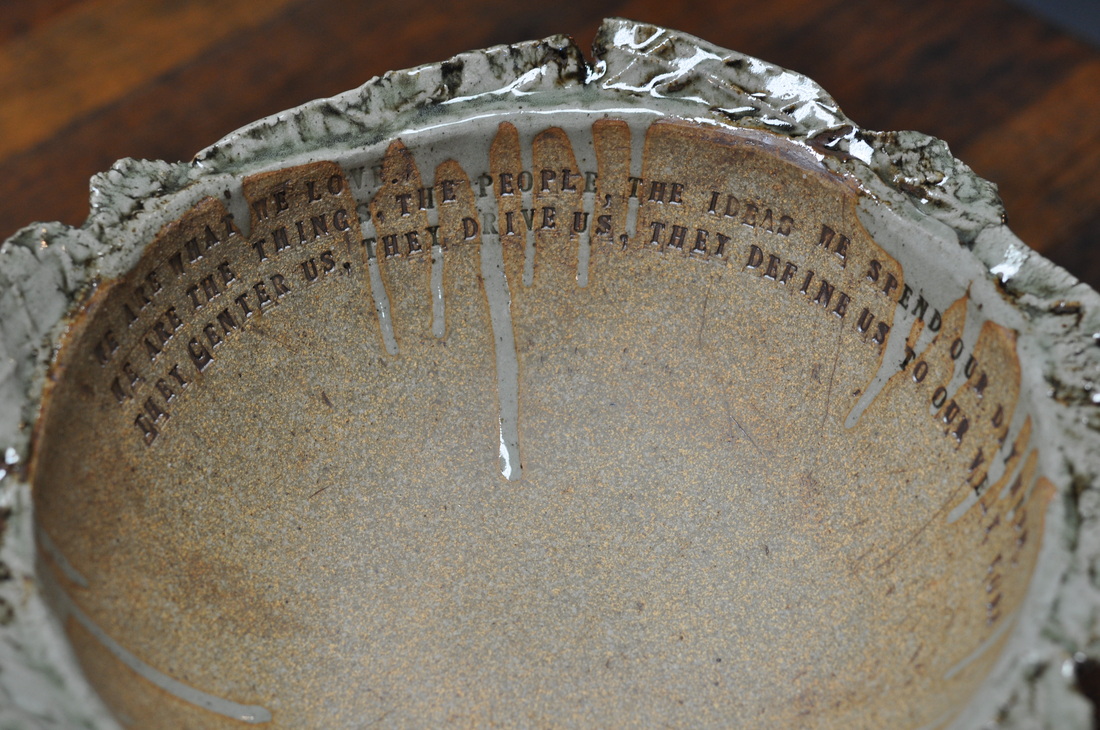
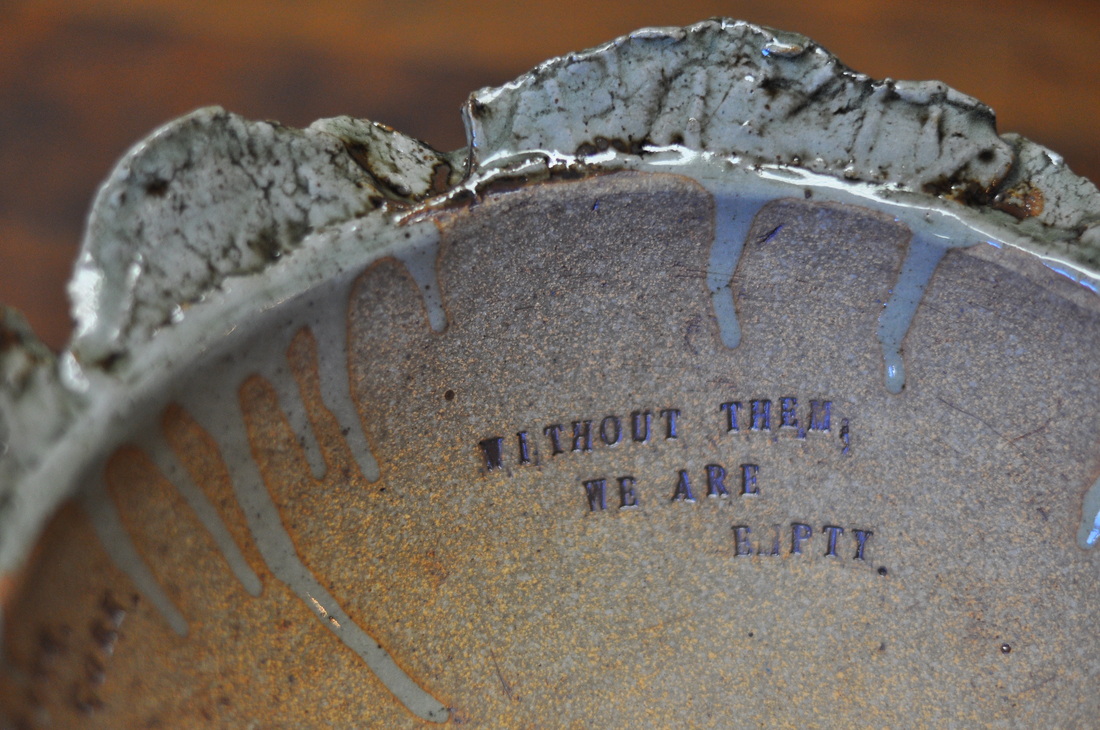
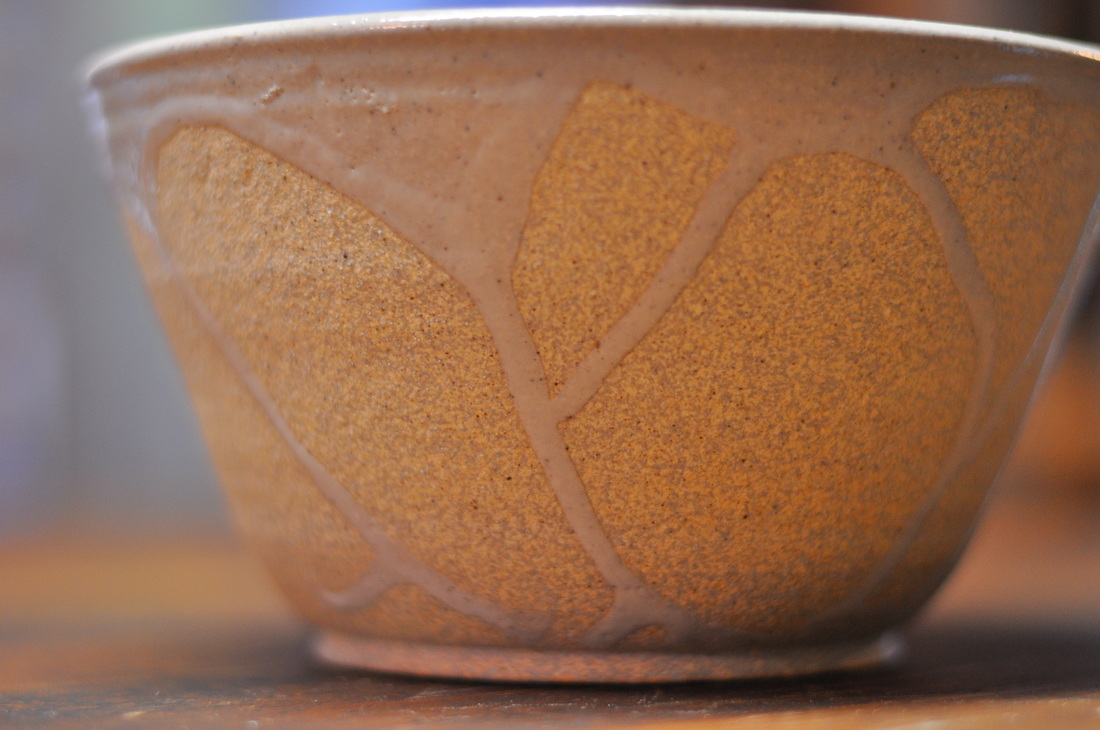
Then, come back here and leave your name suggestion for this colorway in the comments here on the webpage. On August 1st I'll choose a winning name, and the person who coined it will get their choice of fiber from the Kyle William Shop! Feel free to enter as many times as you like and HAVE FUN! :) My ceramics class finished for the year a few weeks ago. I wanted to share some of the finished pieces with you! I had a good time spending the start of 2013 getting up really early and making the trek across the city to say good morning to the Golden Gate Bridge and to get my hands dirty in clay. I love it because it's so different from knitting and the other fiber arts... A key lesson in ceramics is when making something, you make 2 or 3 (or 10!) of the same thing, and with each one, you learn more. Working in multiples also allows for the inevitable problems that happen in ceramics... like firing mistakes, glaze issues, and cracks. 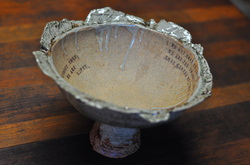 11.5"W x 11.5D x 7.25"H 11.5"W x 11.5D x 7.25"H During this class, I focused on making footed pedestal bowls with these "torn" edges. This one is my favorite (and was also the last one finished. There were (I think) 5 or 6 by the time I finished the course. One was a big failure [lesson?] because there was a glaze problem and it stuck to the kiln shelf. Another turned out wonderfully but there was something in the clay that melted and burned a funny drippy hole in the bowl. (In this program students are provided, and required to use, recycled clay. That means there's often foreign objects in the clay and, from time to time, they make their way into a finished piece.) As you probably know, I'm drawn to text on art. In paintings. On knitwear. And in ceramics. This quote from Daisy Whitney resonated with me and something about it reminded me that I do the things I do (and surround myself with the things I love) because I love them. It's sort of an artsy twist on "you are what you eat." We are what we love. We are the things, the people, the ideas we spend our days with. They center us, they drive us, they define us to our very core. Without them, we are empty.
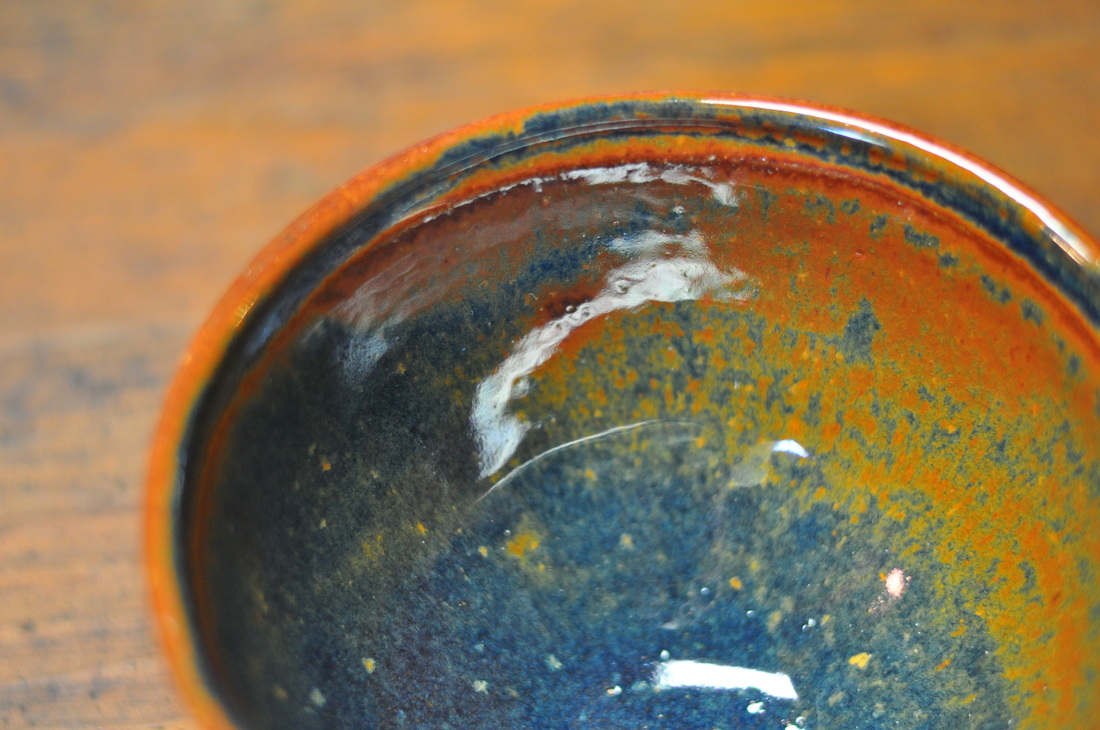
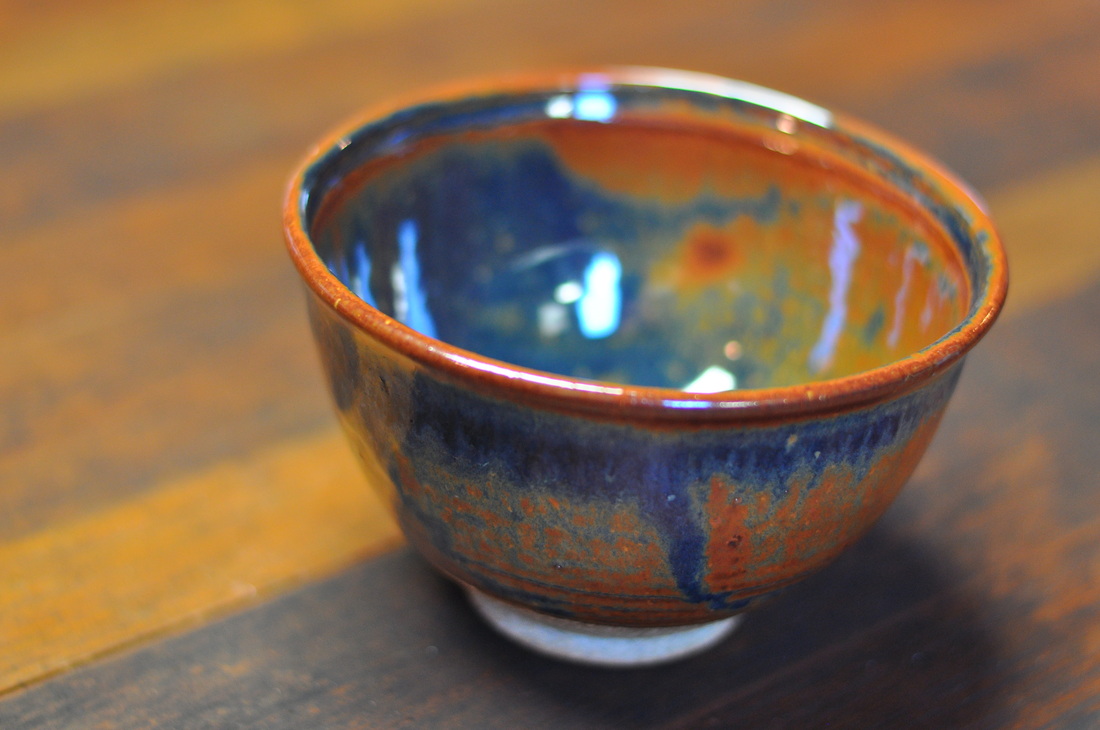
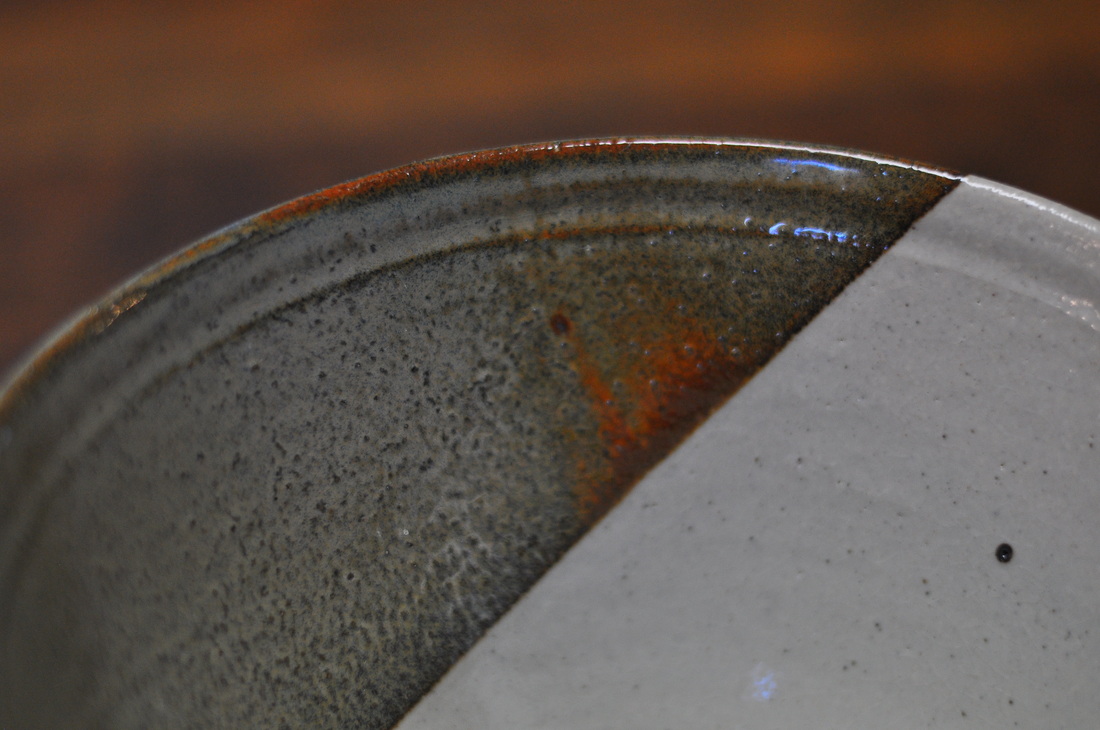
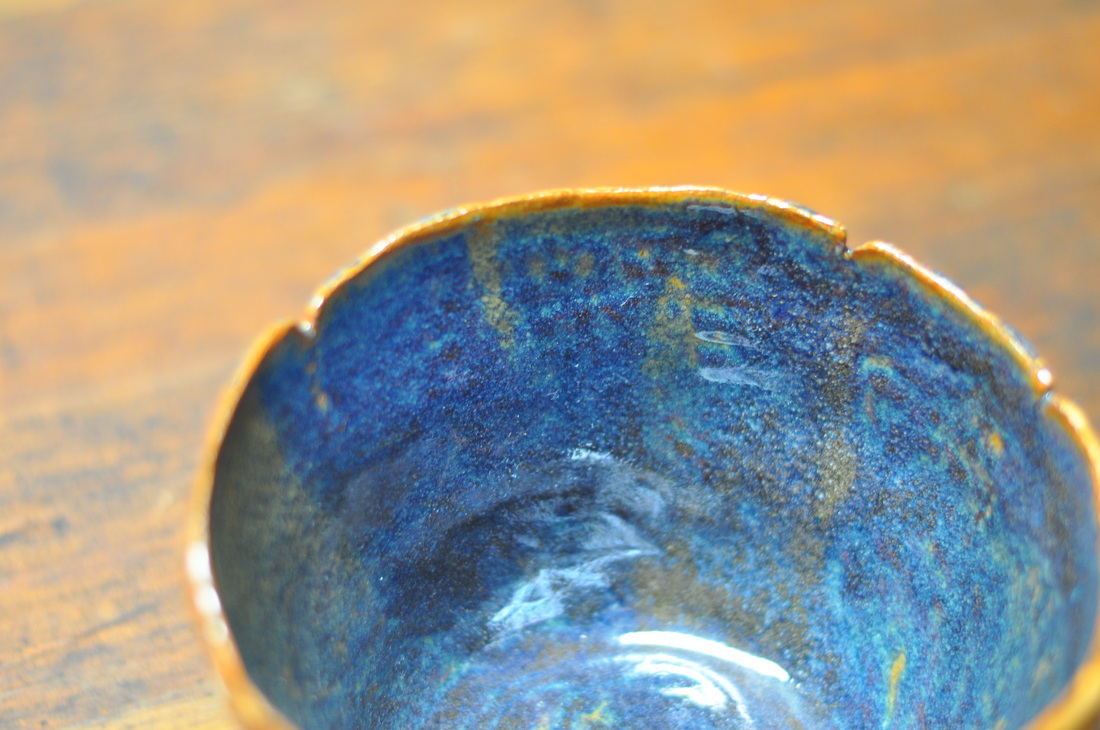
Another goal in the class was to make proper cereal/ice cream bowls. There's nothing like eating out of a handmade bowl. Among my favorites was this one - blue and rust and organic looking glaze over a simple bowl. I am enamored with the wheel, and if I had time and was able to focus, I could spend weeks making hundreds of bowls. This one has yet to be used!
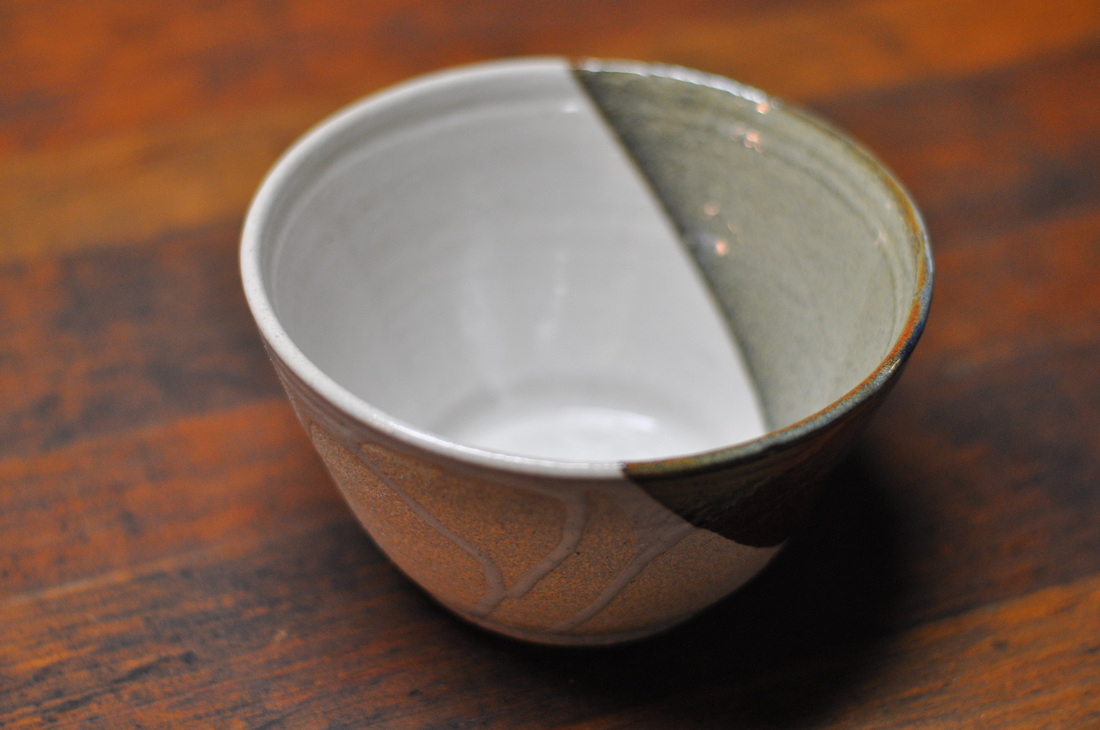 7"W x 7"D x 4"H 7"W x 7"D x 4"H ...and then, there's this bowl. I was in a mood experimenting with pouring glazes and leaving the outside of the bowl raw. I wanted to show that clay that was making me so frustrated. The interior is smoothe and glazed but outside it's full of drips. One side dipped in a different color allowed for interesting contrast. Mixing glaze on glaze like this makes for unique results. Taking notes and trying combinations over and over gives an idea of what might happen but in the end, the final result is up to the "kiln gods"... I think this bowl might end up living in the studio and holding yarn. It's a nice sturdy bowl with a wide brim and I like how it looks on my old wood table.
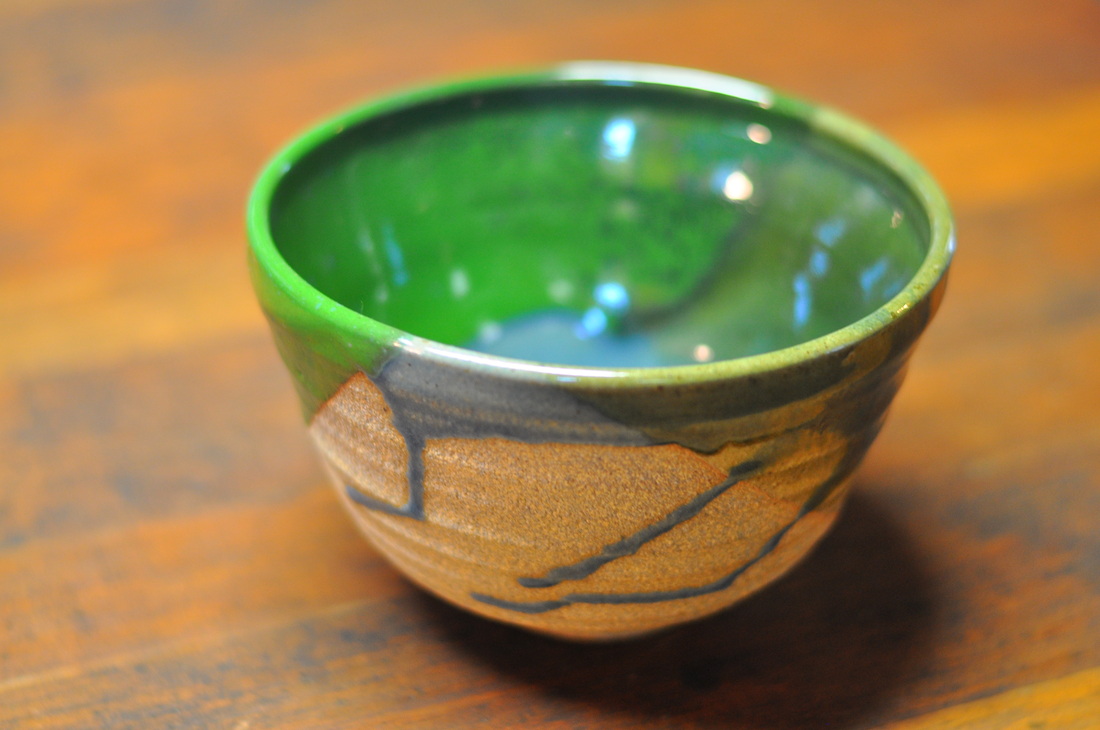
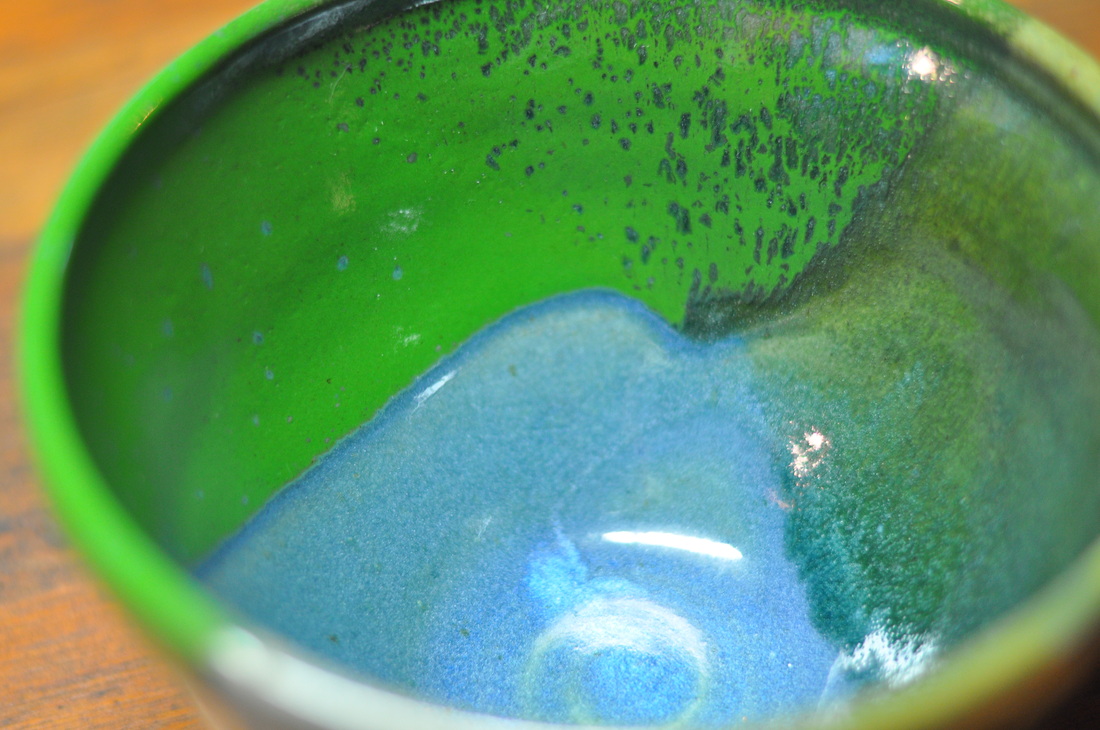
I talked about this bowl on Facebook. 3 colors of glaze poured and dipped on this bowl. the one green got super duper green! - outside it's raw clay again (and I know now it's a bit more rough to the hand that I prefer) but I like the bowl still. Another candidate for ice cream or cereal.
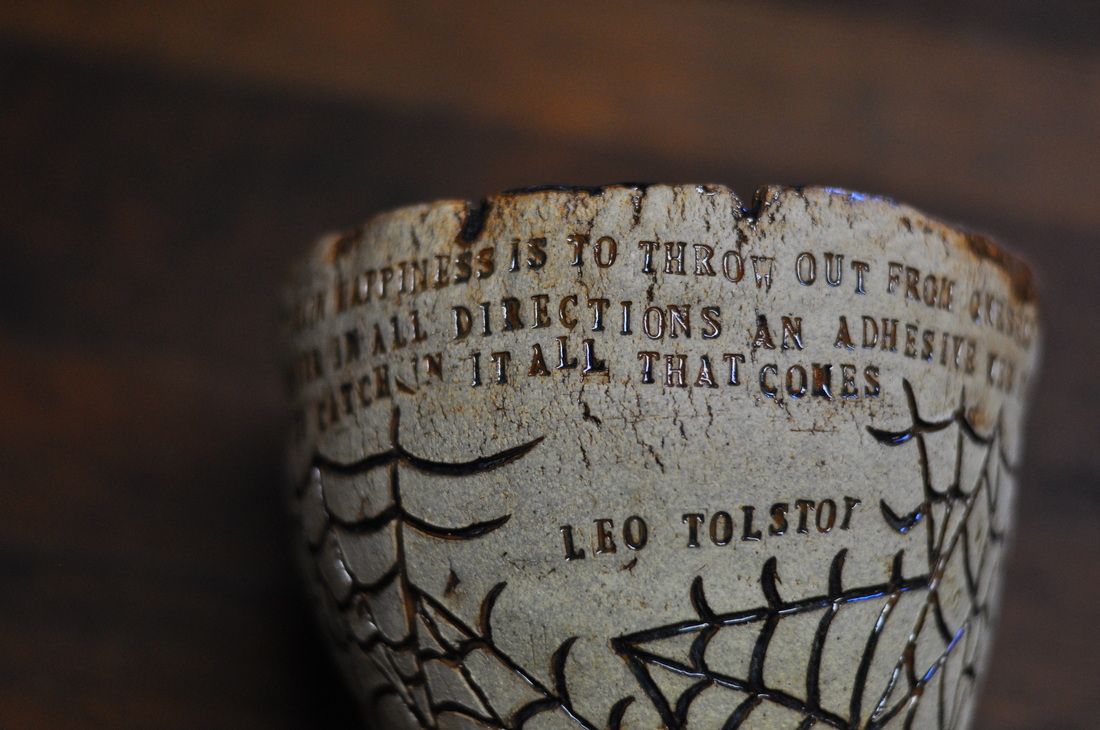
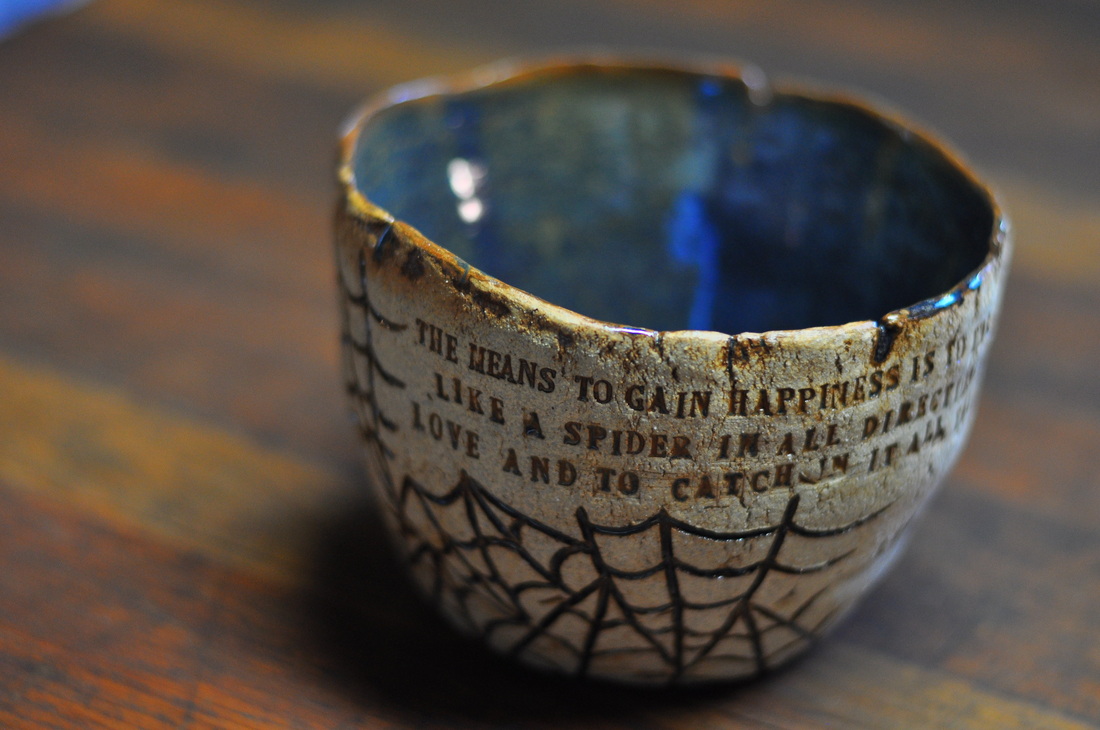 6"W x 6.25"D x 4"H 6"W x 6.25"D x 4"H Going back to the very start of the class, this was one of the first pieces I made. It's also one of my favorites as far as the way the glazing turned out. I carved spider webs into some pieces during this course, much like I did a few years ago when I was doing ceramics in Los Angeles. Then, I used my little letter stamps to impress another beautiful quote, this time from Tolstoy. After it was bisque fired, I dipped the entire piece in glaze, then, after it dried, wiped most of the glaze off of the exterior. A final "kiss" of clear glaze on the rim finished this piece. It feel organic and free. This one might also live in the studio - but I suppose not everything can live in the studio, right?! - perhaps some of these should become gifts.... The means to gain happiness is to throw out from oneself like a spider in all directions an adhesive web of love, and to catch in it all that comes.
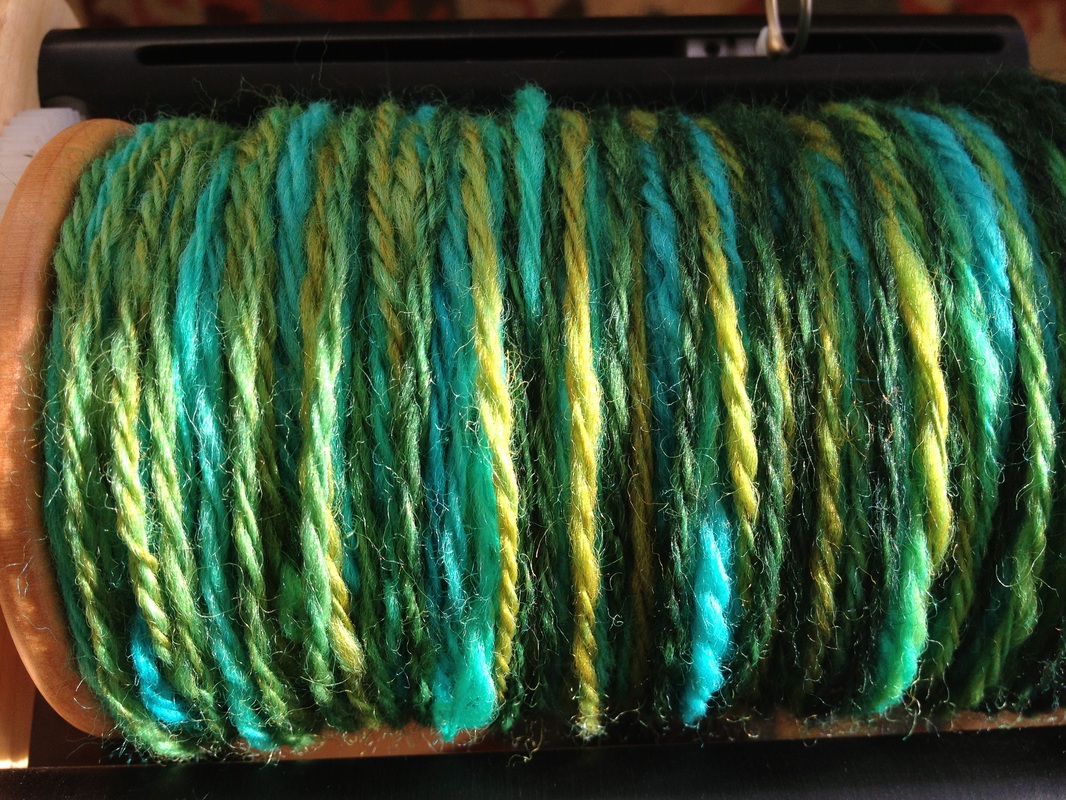
So that's some of the ceramic work I did this year. There's lots more, of course... but these were among my favorites. Class is done, so my tools are all packed away, along with my ceramics notebook; waiting for the next adventure in clay. Shop UpdateToday I listed a few more hand dyed tops - I have grand plans to spend a day or two in the dye lab. Here's hoping for a larger update soon! It's so fun to turn on the music, mix up the dye and spend a day creating color. Perhaps this weekend will bring more time for that! 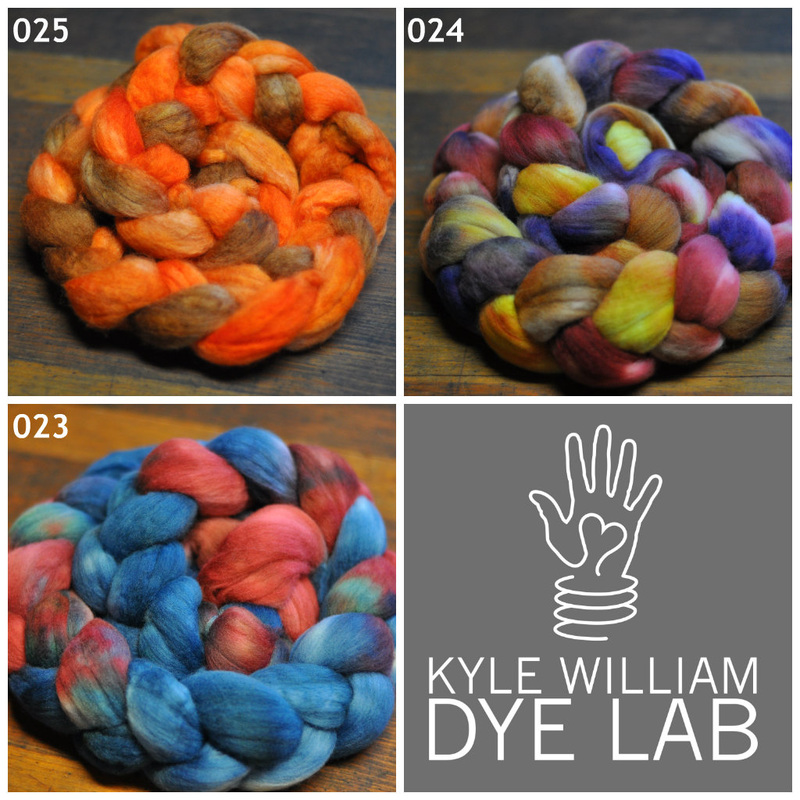 Current SpinningI've spun up one of these 4oz braids made by Lisa Merian of Spinners Hill that are from Trumpet Hill in Albany, NY - I split it in half lengthwise, then spun it and finished by Navajo plying it - making a nice 3-ply yarn. Hank #1 has 102 yards and hank #2 has around 120 yards... I have another braid to spin up and can't decide if I want to do it now or save it for another time....
Current Knitting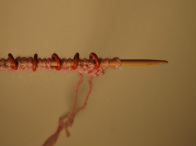 The knitting I've been working on recently isn't very exciting. yet. I'm busy working on a design that's got me unsure of what it should be. It started as one project (which is complete), then I thought the motif would work better as a different kind of project (which is on the needles)... and now, as I work on that design I think it might need to be something different than THAT... so I'm a bit thrown by that project.
In other knitting news, I've created a few swatches and concepts for proposals and that work takes time away from knitting things I can share. It's work I love to do, though, so it's quite worth it. The only thing I don't like about it is the WAITING to talk about it all! 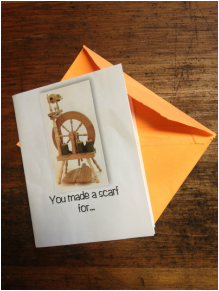 The Fiber to Scarf Exchange began a year ago at the Men's Spring Knitting Retreat. After seeing the fun reveal at last year's event, and having just purchased my first wheel, I signed up, eager to have a project to work on and a way to connect myself to the retreat during the year. The exchange works like this: Folks who are interested sign up and send fiber and a small amount of money to cover postage/etc. to the organizer. Once all the participants have submitted their fiber goodies, they're assigned a number by a person not involved in the exchange. Then, each fiber is shipped off to someone else! I signed up, mailed out fiber I purchased from Briar Rose, one of the generous retreat sponsors, and waited for my assignment. 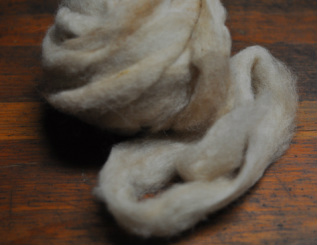 I received a package with a large amount of 70/30 Alpaca/Corriedale blend selected by the mystery guy in early August, 2012, and it got stored away. For a long time. Part of the reason it sat was the fault of (at the time) my unorganized studio. Having recently moved I was still sorting out what I wanted the space to be and that caused me to keep the project on hold. Finally I decided to just dive in. After all, there was a lot of this fiber and certainly enough to mess up if that were to happen.... so I weighed out a bit and tried spinning it. (and it was HEAVEN!) - The fiber was lovely and apart from a bit of vegetable matter, spun right into a light dk weight 2-ply yarn quite easily. The preparation was real, true roving - light, airy strips of fiber. 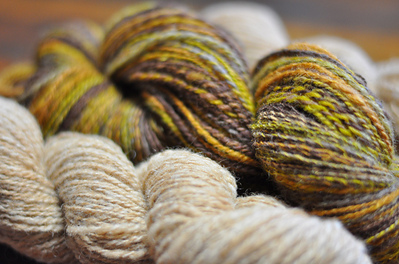 The spinning was the easy part. I had a little sample I was happy with and that lived on my Sidekick and as I spun (worsted short draw) I'd audit my work and check to see if it was about the same thickness. Once I was comfortable and had a bobbin of 2-ply natural yarn completed, I spun up, I realized that I didn't want to make the scarf all this color. This fiber was simply BEGGING to be dyed... so I went to my studio and found a combination of brown, grey, green and caramel that made me smile. I dyed about 4 ounces of this fiber, split into two pieces and held side by side. Those rovings were each spun as singles then plied together.  Once the fiber was all spun up, I hand wound it into balls. There's just something about working with handspun that makes me want to avoid the ball winder. Hand winding it allowed me to inspect the yarn and see how even (or not!) it was through the skein. I did some math to determine how large of a scarf I wanted to make and verified that I had enough of the warp yarn. (I could always spin more weft if needed but it'd be a shame to work so hard to end up with a short scarf!)  Time to warp the loom. Early one bright morning I found myself direct warping, carefully counting off the number of warps needed for the scarf. It takes a while to warp a loom. Getting all the yarns in the right heddles, double (and triple!) checking to make sure nothing is out of place. It's the prep work that makes for a beautiful finish. Once that was done, it was time to weave! 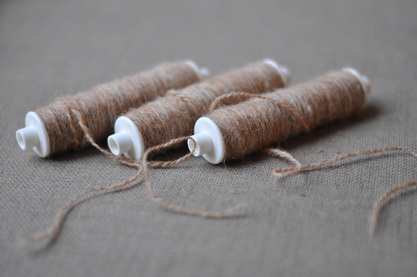 (Almost). The next step is to wind bobbins of weft yarn in preparation for weaving. I do this using an antique bobbin winder that came with my antique sock knitting machine. I began with 3 (but I think I ended up using 5 bobbins before the scarf was complete). The 2/2 twill pattern, by the way, is from the Handweaver's Pattern Directory by Anne Dixon. My warp is 20 WPI and I used a 10 dent heddle. 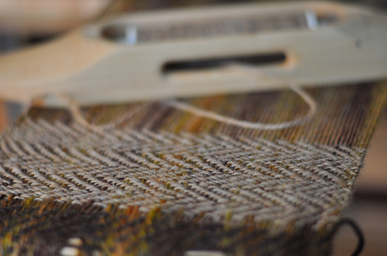 When it was time to weave I started by evening out the spacing on my warp using a waste yarn. Then I begin weaving my pattern, following the pedal sequence in the warping diagram: 1, 2, 3, 4, 1, 2, 3, 4, 2, 1, 4, 3, 2, 1, 4, 3... over and over. (there's lots of pedaling when ya' weave) - and just like knitting, it's VERY important to finish a row (sequence) before you stop. this was a pretty simple pattern... I imagine it takes a while to find your place in a more complex one! 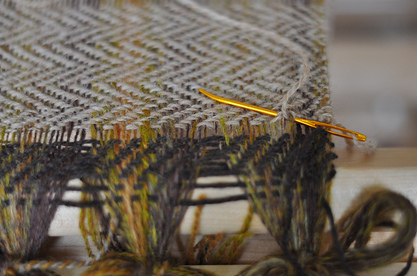 Once a few rows have been completed, it's time to hemstitch. This is a way to secure the fabric at the start and end of the piece and it's a simple technique once you understand the order of movements. The same thing happens at the end of the work. By the way, I LOVE my golden needle. It's one of my favorite knitting tools and anyone who is curious about a good tool for finishing, I highly recommend this type of needle! The actual weaving isn't time consuming... it takes some concentration to keep the edges straight. Since I'm somewhat new to weaving I am certainly still learning. My favorite tip so far is the use of floating selvedges. Basically, these are additional yarn warp threads that are on the ends of your fabric and are used to keep the edges straight. For this project, everything seemed to be going fine until one side started getting wavy. I wasn't sure what was wrong (at first I thought it was just tension problems) and then saw yarns hanging off the side of my weaving and realized that my some of the yarns in my warp had broken! (eeek!!!) 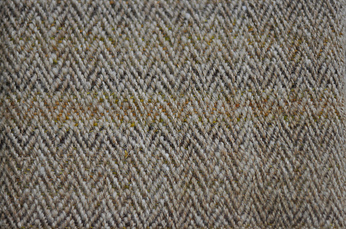 (no photos of the bad broken warps!!) - instead, here's a closeup of the pattern. After a quick meltdown I stopped, loosened my warp a bit, and carefully tied on a new warp to the broken one and re-attached it and tightened it up nice and even. That worked great for a while and I felt a bit proud, then a different one broke. EEEEEK!. No problem. I just fixed it again. The moral to THAT story is this: (and someone correct me if I'm wrong or you have a better solution) - when working with a handspun warp or a fiber that might be a bit more fragile than ideal, the floating selvedges could be made using a stronger thread. 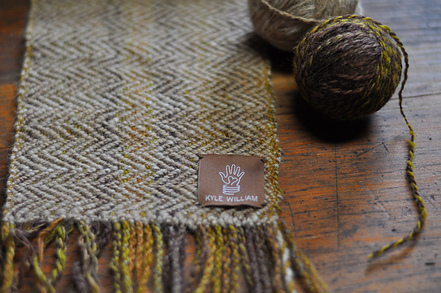 If I was to do this over I'd use some sort of strong thread in the selvedge of the scarf. In the end, though, I think it's a respectable scarf. I cut it off my loom, used my cute little fringe twister to make fringe (which, by the way, took around 2 hours!), then I soaked the entire piece in wool wash, spun it out, and hung it up to dry. Then, it came time to attach my label, fold it up, and pack it away in my suitcase to gift it to whoever it is that I made it for. 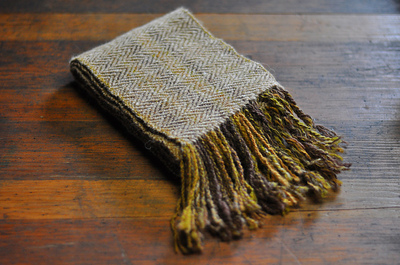 Would I do this again? In a heartbeat. During the retreat we do a show-and-tell where the exchange items are shared with everyone. I didn't take photos of that part, nor did I photograph the scarf on its new owner, but feeling this experience go full circle - starting a year ago when I watched the giving of finished handspun scarves and ending with my presenting my very own creation to another creative guy - was rewarding.
It was a fun project, and I'm pretty happy with the way it turned out, especially since it's the very first time I've spun fiber into yarn for a specific project. It's frustrating to not be specific about what I'm doing from time to time, but keeping projects secret is one cure of being a designer. As you can see, I've been working (off and on!) on this for a year... and I couldn't say a thing! For those on Ravelry, the final project can be viewed (and "loved") with THIS LINK. With that in mind, I decided that I need to work on more projects than just the ones for publication. I'm hoping in the next blog post (which should be more frequent as well!) I'll talk about some of my current knitting. That post will talk more about my first ever trip to New York City and some other highlights about the Men's Spring Knitting Retreat. 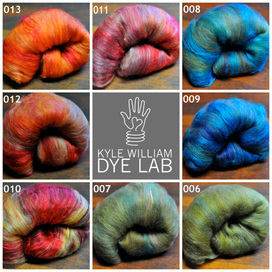 Lots of great things are going on at the Kyle William Studio. First, I'll mention that I have launched the Dye Lab: a collection of hand dyed fibers offered through the shop. This week, I'm releasing 8 art batts - each featuring 2 ounces of beautifully coordinated fibers ready for spinning, felting, or other fun projects. In addition to this, I've been hard at work developing some other colorways that will be part of the line. My goal is to announce shop updates mostly through Facebook and the fan page. "Like" the page at: www.facebook.com/kylewillam. These art batts take some time to create but are really fun and a true joy to spin. As always, I'm happy to talk with people about custom blends or custom colorways. 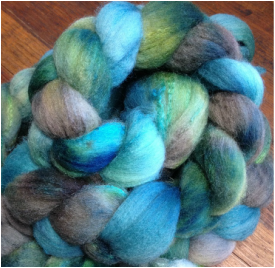 A custom order of Polwarth/Silk top In addition to working to keep the shop full of fiber, I have been doing some custom orders for people interested in larger quantities or special types of top. These projects are fun and I love seeing how people use the fibers. A large shipment of top and yarn just arrived at the studio this week. I'm anxious to dive into the yarns and not only dye some up but also knit with them! They are really quite nice and it will be a lot of fun to share with you in the next few weeks.
In other news, the Caden scarf I designed for Quince & Co. was published with two small errors. At the bottom of my website, you'll find a link to my new errata page which will correct these for you. Last but not least: more good news! The Kyle William patterns offered in my shop are now all available for instant/digital download! So that's the big update from here. Thank you to those who have purchased from the shop and for those who are curious about any of my products, I encourage you to give them a try. Like all small businesses, the success of Kyle William depends on your patronage, and I appreciate each and every order and comment! 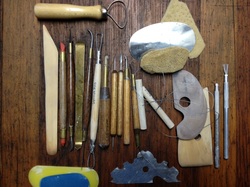 It's time to re-visit my other favorite craft... ceramics! I dusted off my tools the other day in preparation for day 1 of ceramics class in San Francisco. Monday morning I ventured out early, headed off to class and to meet my new instructor. He seems very nice... has been teaching at Fort Mason (in view of the Bay, Golden Gate Bridge, & Alcatraz) for around 20 years, and has been working in clay for over 30. It's a different setup than I had in Los Angeles, but I'm happy that the opportunity exists for me to delve back into clay 2 days a week. I'm prepared to head back tomorrow with my tools at-the-ready, and to remember what it is about ceramics I love so much. (Actually, I remember very clearly - and I'm VERY happy that it's time to get dirty!) 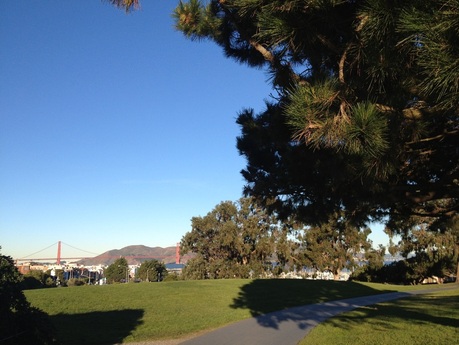 The Golden Gate Bridge says "Good Morning" during the walk across the grounds to campus 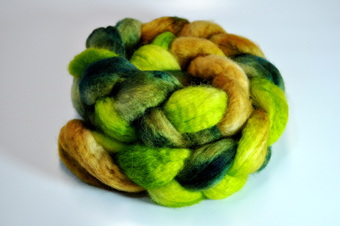 Other news includes releasing a new colorway of hand dyed roving. This time it's on rambouillet and is named "Sherwood". Hand dyeing roving is a fun adventure as well - and believe me it's hard to post and sell the roving instead of spinning it myself. (Confession: I dyed 2 sets of this one but promptly took one to spin as a sample... it's on my wheel right now calling my name). If you're interested in this or other rovings, check out the shop.  Last but not least, I'm really happy to announce custom dyed roving service offered through the shop. With this service, YOU get to select your very own color combination. Want green/purple/orange? OK. Prefer grey/brown/tangerine? Okey-Dokey. NEED purple/lilac/indigo? Whatever your heart's desire, I'll be happy to make it for you. Turnaround should be quick but I specified 5-7 business days.
Click on the "Custom Dyed Roving" image to the left to get started. Have a great week! What fun this project is! With a few simple household ingredients, you can dye yarn a beautiful color! The first time I heard of this technique was scribbled in the margines of an old natural dyeing book another artist had left in one of my classrooms. Intrigued, I jotted down the notes and went hunting and gathering in my neighborhood for the required materials. Download a complete tutorial on the process by clicking the link at the bottom of this post. You'll notice that it doesn't take much to do this experiment! It also doesn't require fancy yarn... any 100% wool yarn should work quite well. The first part of the project is to gather the materials necessary to make the solution. 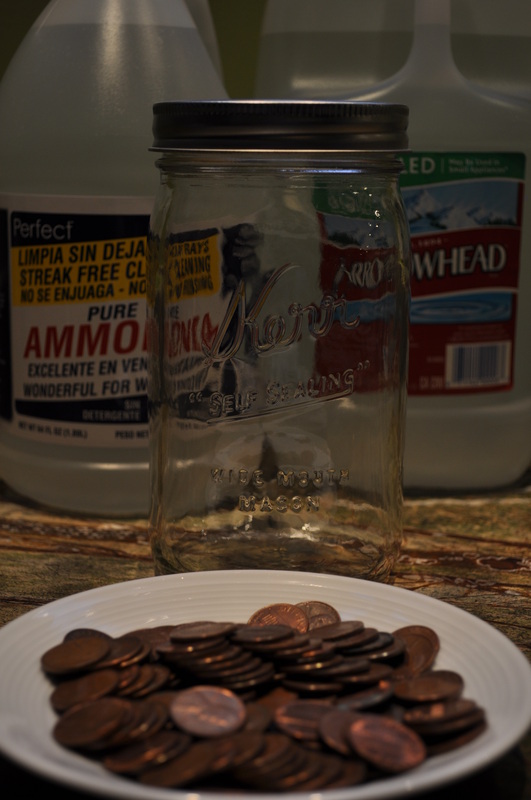 Why pre-1981 copper pennies? It has to do with the copper content. According to Wickipedia, (which is always accurate, right??) the copper content of pennies before 1981 is around 5%, and from the varous websites I researched for the recipe, they all specify pre-1982 or pre-1981 pennies. Years Material 1793–1857 100% copper 1857–1864 88% copper, 12% nickel (also known as NS-12) 1864–1942 bronze (95% copper, 5% tin and zinc) 1946–1962 bronze (95% copper, 5% tin and zinc) 1943 zinc-coated steel (also known as steel penny) 1944–1946 brass (95% copper, 5% zinc) 1962–1981 brass (95% copper, 5% zinc) 1974 Experimental aluminum variety (test strikes only, not circulated) 1982–present* 97.5% zinc core, 2.5% copper plating Where do you get 100 pre-1981 pennies? The bank, of course! (First I went through my change piles and sorted the pennies... I found almost enough for the experiment there.) I visited the teller at my local bank and got $4 worth of rolled pennies. in the first 2 rolls I found a total of 11 pre-1981 pennies which was enough to complete my first experiment, and after opening the other 2 rolls (and finding a few additional ones lying around) I have 51 more pennies saved up for the next time I want to try this!  Of course, after all the preparation, I got a bit ahead of myself in the experiment and used tap water instead of the distilled water that my recipe calls for. Tap water includes iron which might change the way the solution develops. The metals and minerals in tap water affects dyeing, so if an attempt at controlling the color is desired, then distilled water is the way to go. I'm going to proceed anyway with this version (I could pour out the liquid and re-start it since it was such an immediate realization) to see how it looks. I'll then repeat the experiment with distilled water to see how that compares. 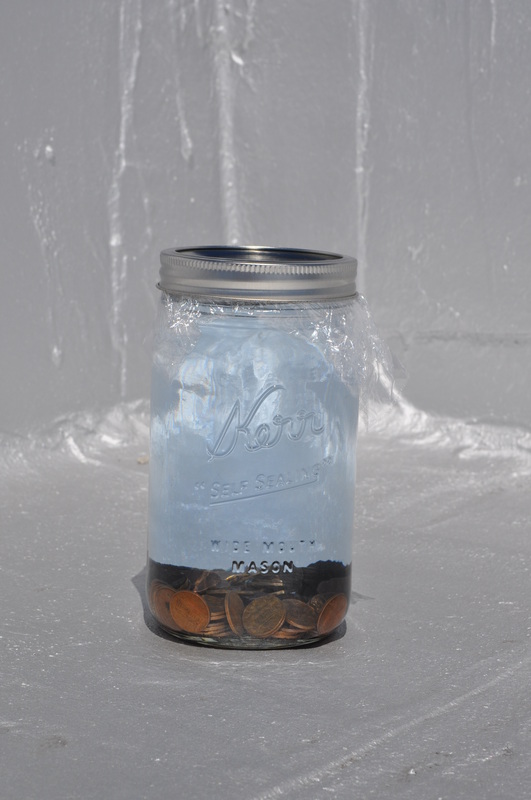 I put the sealed jar on the roof of my building with a note, letting the other tenants know what wacky experiment I was doing, and then followed it up with a quick email to let them all know, just to be sure everyone is aware. It was mixed around 11:30am on Monday, May 9, 2011. The liquid almost immediately started to change color. Even on the silver paint of my rooftop it is noticeable! 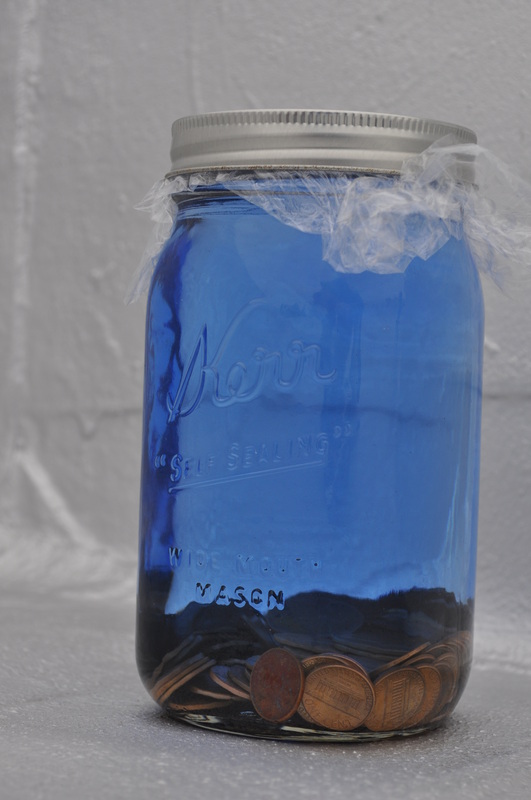 The above photo was taken after 48 hours, and the liquid is even more blue. (The sky was very cloudy when I took this photo; the blue is actually more brilliant than it looks). I am checking the liquid daily to see how it looks, and I shake up the jar each time to mix around the pennies. 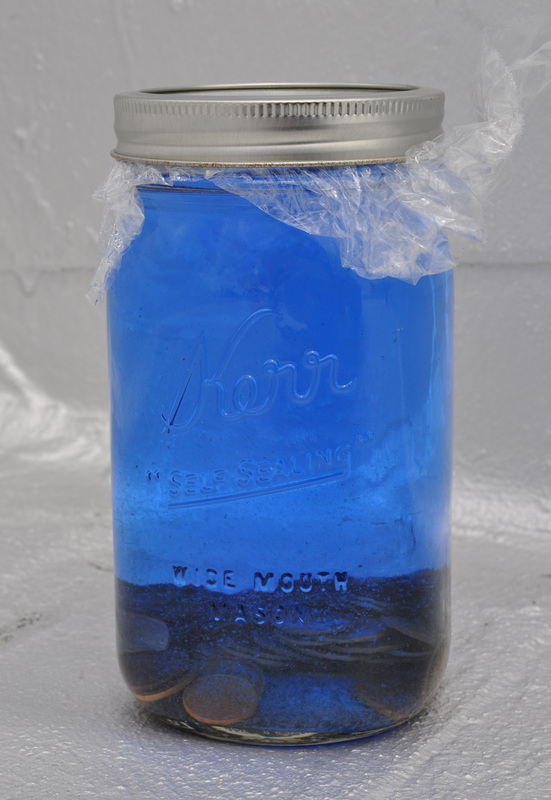 ...and here it is one week later - in brighter light... it doesn't seem that much more intense when I compare the photos. (It actually seems lighter/brighter). That being said, my guess is the solution is probably not harmed by leaving the copper in for longer than recommended. The next step is to soak your wool. I used Patons Classic Wool (100% wool) in the color "Aran" for this experiment. It comes in skeins that weigh approximately 3.5 ounces. I wound 2.25 ounces onto my niddy noddy, and loosely tied the skein using scrap bits of yarn in a "figure 8" through the yarn to keep it secure in 4 different places. Here's my skein of yarn bundled up for a "before" photo: 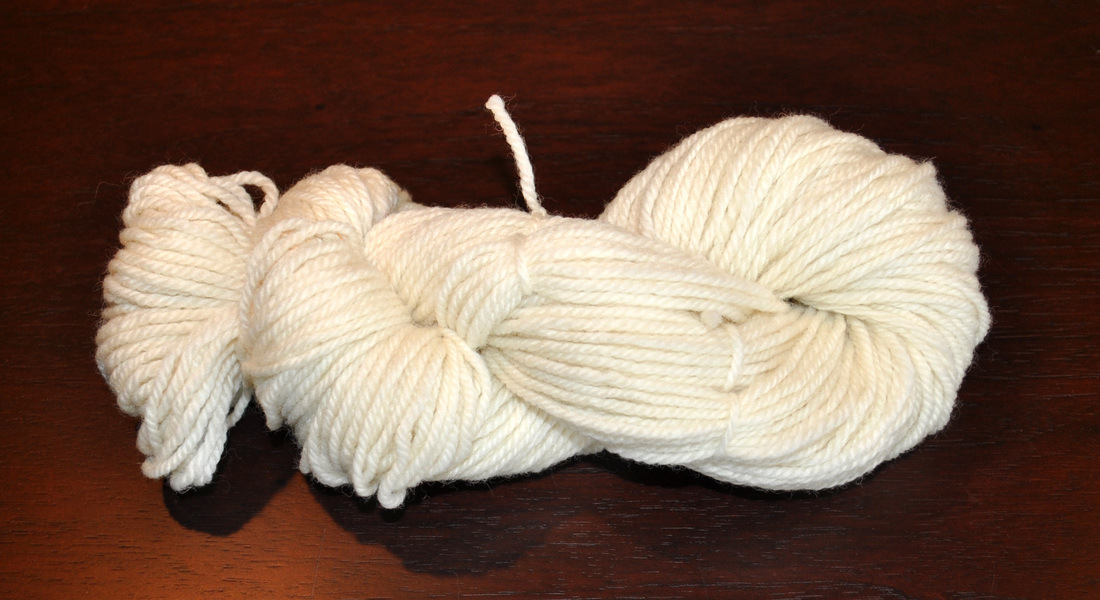 Then, fill a large bowl or pan with cool water. Open up the skein and submerse the yarn so that it's all able to soak up water: 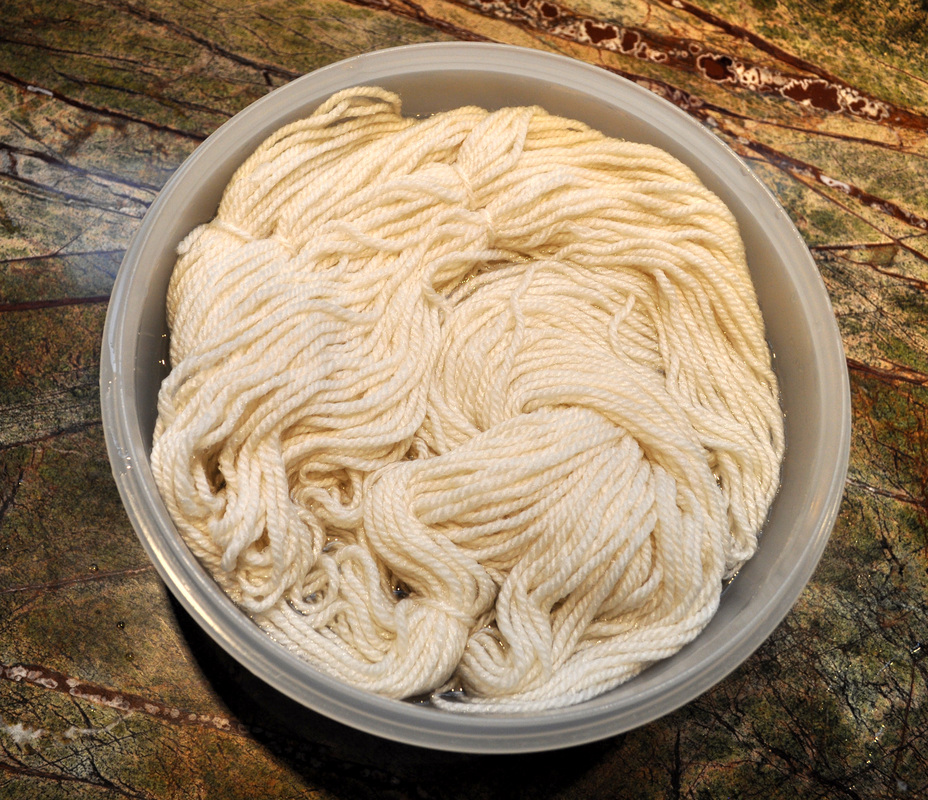 Some of the yarn sits on the top of the water and is exposed to the air... it's not getting wet! In order to fix this, I put a plate on top of the yarn and allowed the water to submerge the plate: 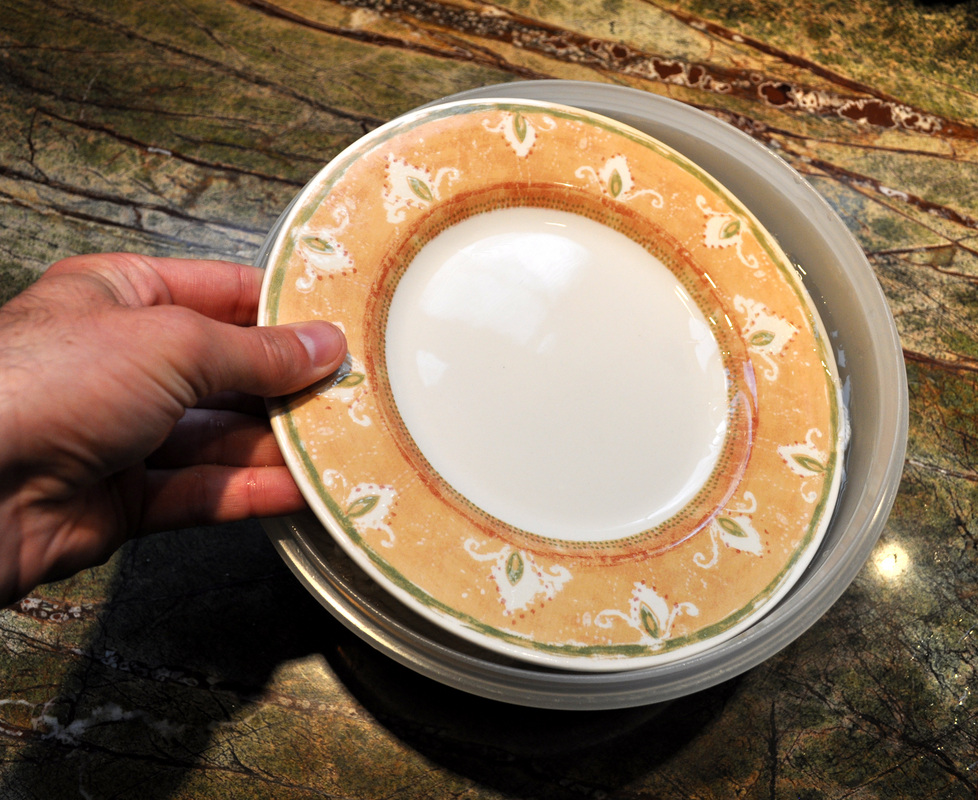 Let the yarn soak for about an hour in the water so that it is fully wet. Next, take the pennies out of your blue solution, being careful not to breathe in the vapors. Rinse the pennies in water. I don't know for sure if you would want to re-use the pennies for dyeing again or not (anyone have thoughts?)... The next steps require a few additional items: rubber gloves, a strainer of some sort to easily drain the liquid and keep the pennies in the jar, and a container of some sort in which to soak the yarn. Hooray for the dollar store; $3.00 plus tax for these additional items! Note: even though we are using simple household ingredients, I really suggest not using food preparation items that might come into contact with the blue ammonia solution. It's best to have dedicated supplies and materials for your dyeing and experimenting. When in doubt, don't use something that you use for food preparation. 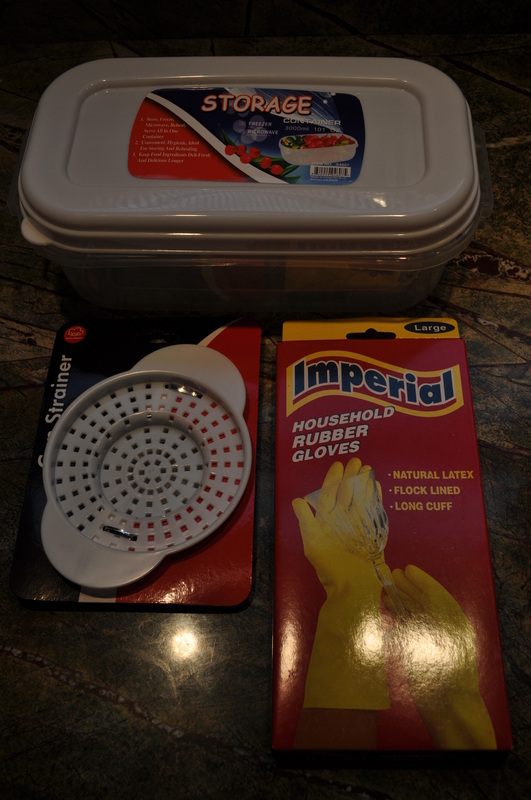 Carefully wring out the yarn from the bowl of water, and put the wetted yarn into the blue solution. BE CAREFUL not to get the solution on you. (If you do get it on your skin, wash immediately with soap and water.) When I did this, the yarn turned a strange beige-gray color. I put the plastic wrap on top of the yarn to try to be sure that the liquid was in contact with all of the yarn. After 30-45 minutes, there was no more blue in the solution. 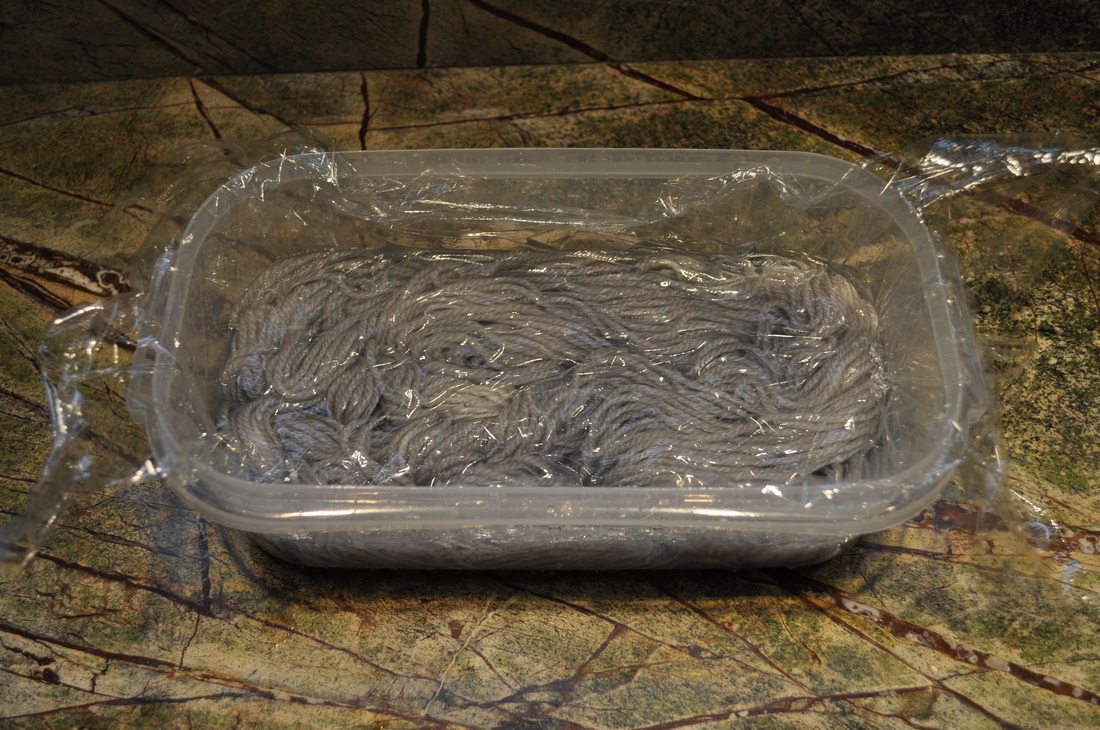 Once this happens, remove the yarn and rinse in a soution of vinegar to set the color. Note that this color is considered fugitive, meaning the color might/will fade over time. Be aware of this when you do the technique, knowing that if you combine it with other colors that this one may fade. 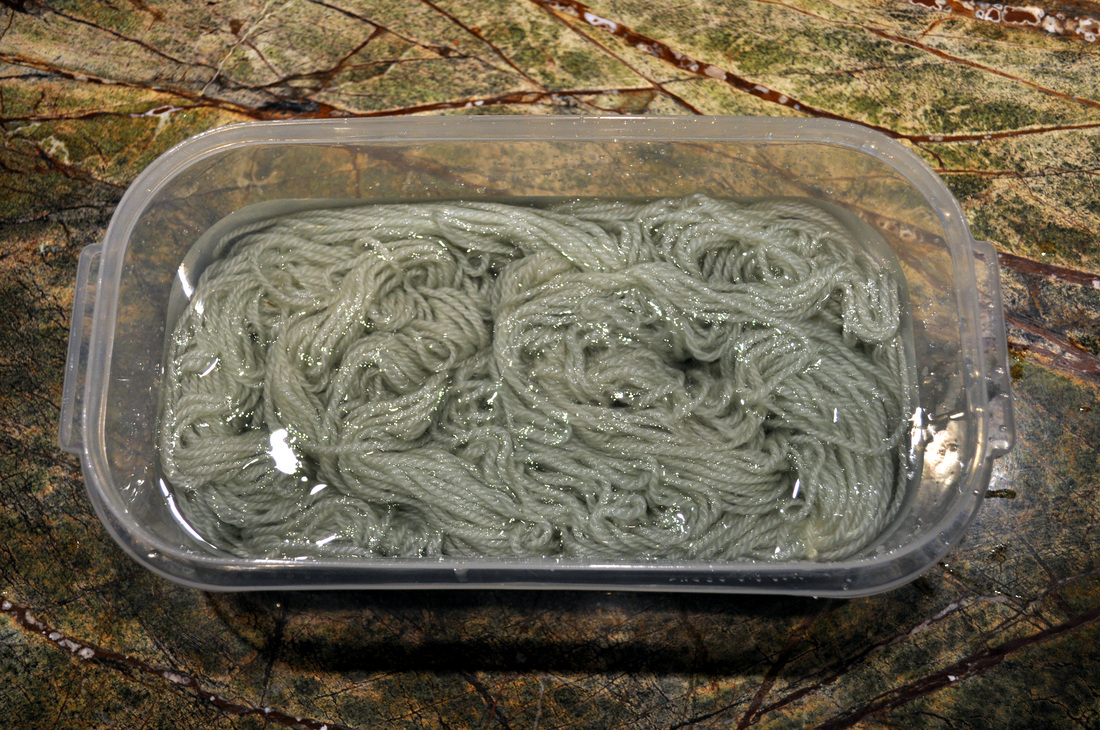 The photo above was taken after the yarn had been rinsed and vinegar was added to the rinse bath. There's a distinct but subtle change of color when the yarn is put in this "afterbath" - it got lighter and more green. The photo below shows an attempt at illustrating this difference. Click on the photo to enlarge. 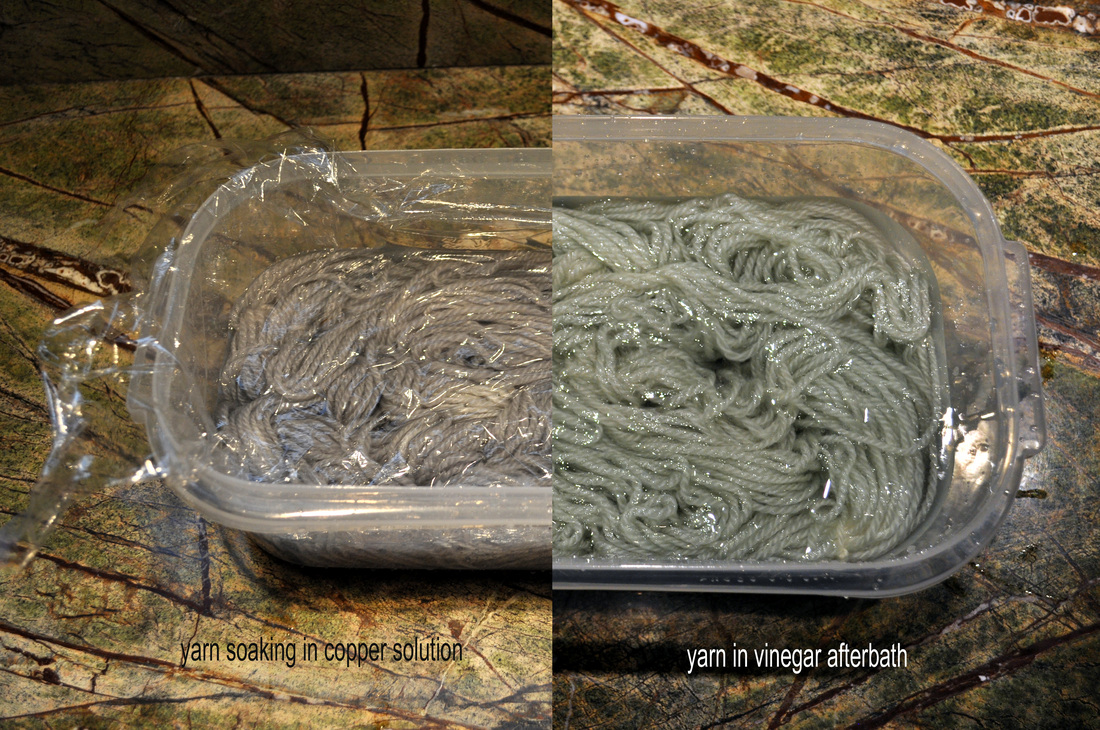 At this point, there's not much more to do. Rinse the yarn well, remove the excess water, and hang it to dry. In the end, I ended up with a green/gray yarn that I'm pleased with. Note that this dye is fugitive, meaning the color will fade over time, much like many other dyes. It's worth noting, however, and keeping in mind when pairing with other yarns. 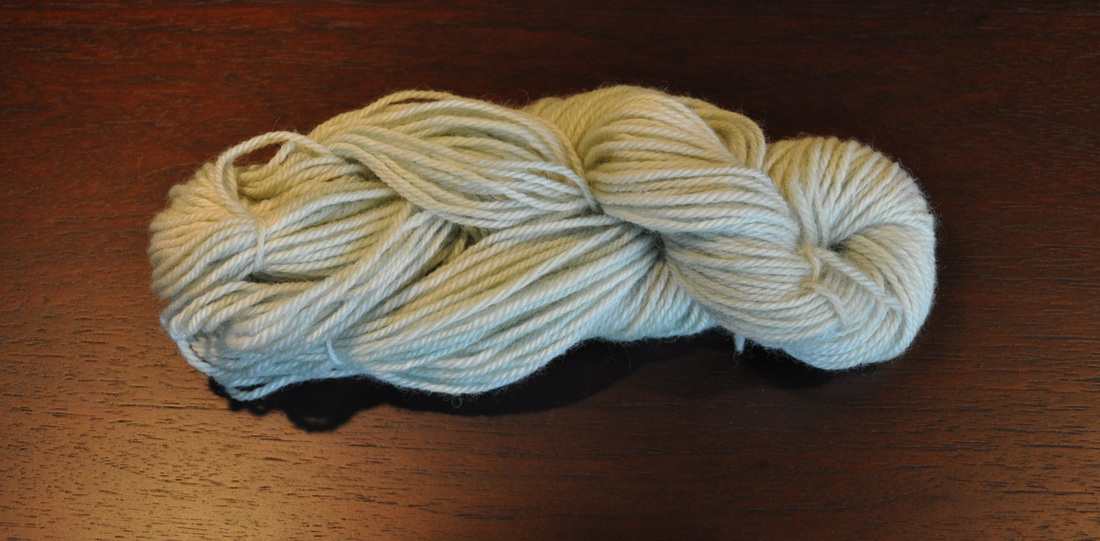 One more photo to compare the colors. If you do try out this fun technique, be sure to send me a note to let me know how it goes! Ready to try? Click the link below to download the tutorial for copper yarn dyeing! 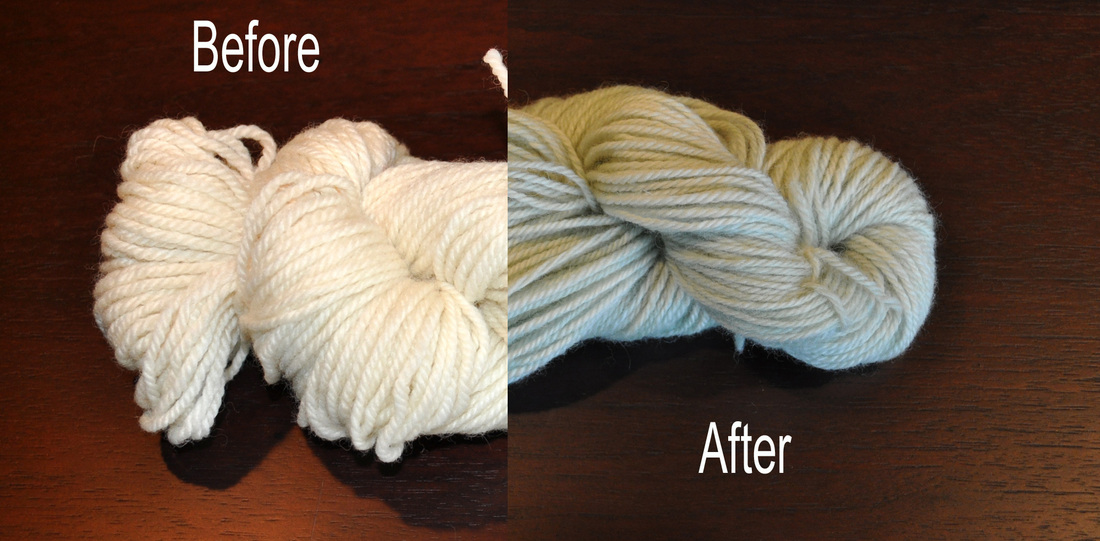
Like what you're reading? Click the "like" button for twitter or facebook below to share this post with your friends!
Last Friday, we did some natural dyeing using yellow onion skins and madder root. The processes were all similar, and while I didn't take as many images as I'd like, I thought it might be fun to share some photos of parts of the process. There are a few things I want to note, most importantly, DO NOT use your cooking or canning pots to dye fiber! It is probably not safe and might make you sick! Visit a thrift store or buy inexpensive pots to do this. Consult a book on dyeing for more information, and by all means, don't take my measurements/calculations to be "correct"... it's all an experiment, and, in my opinion, as long as the yarn turns out pretty, it's successful!  The first step is to prepare the fibers. We used only wool in our process. The yarn needs to be tied into a skein, which can be done on a warping board (as above) or between two chairs or two hands of a patient person. The yarn needs to be secured in 3 places by tying a yarn around the fibers. Look at a commercial skein of yarn that hasn't been opened and chances are you'll see how this string is to be knotted. It helps to keep the yarn from tangling on itself. Do not knot the string tight or you'll create a "stripe"! 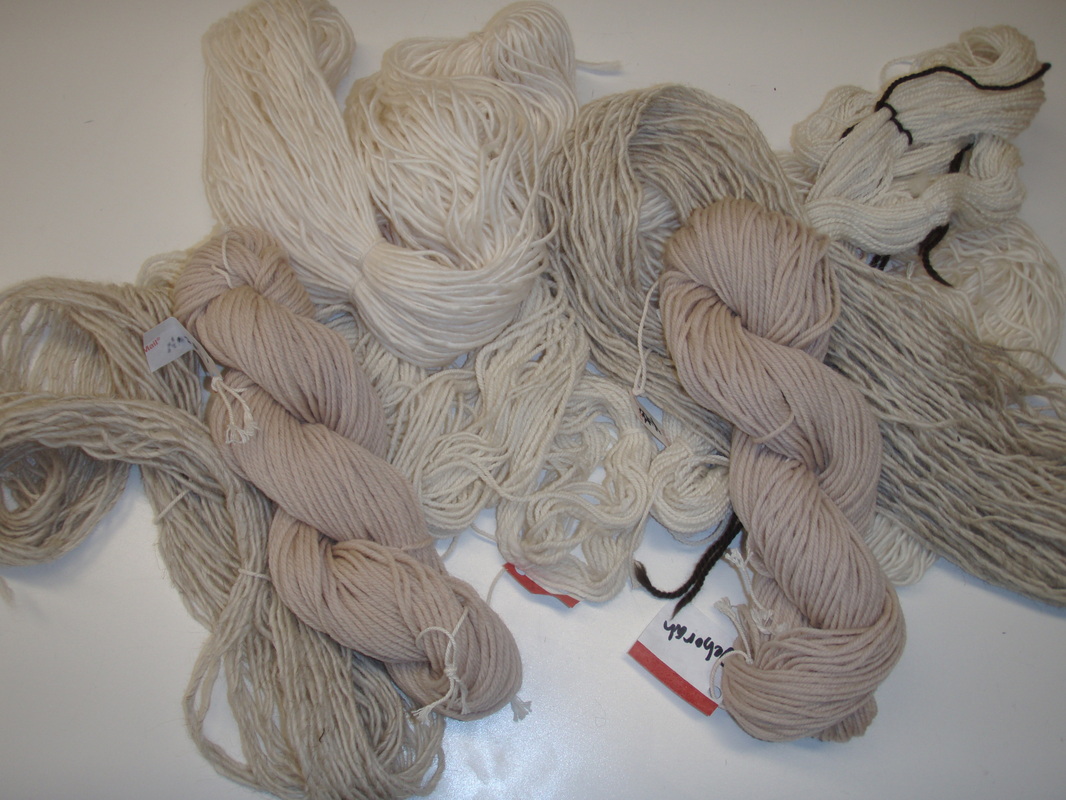 If you want to label your yarns, get a tyvek envelope (the FedEx or UPS or Priority mail envelopes that feel like a mix between plastic and paper) and cut it into little squares. This is a great opportunity to reuse! Cut a small hole in the tag or use a hole punch, then string it through one of the strings you knot around the skein. Use a Sharpie marker and make a note about the yarn - your name, the fiber type; how you intend to mordant or dye the yarn - whatever you think is important. If you are dyeing a bunch of different ways or different yarns, these notes are helpful. Also, the tag can stay with the skein after you're done... and it'll remind you what you did so you can explain it to anyone interested! Any animal based (protein) fiber should accept the natural dye easily. Plant fibers are less successful. If the fiber is synthetic (nylon, acrylic,) you'd want to use acid dyes. Also, you can overdye yarns... if you don't like the color of a yarn, try overdyeing it! If the fiber starts off a bit darker, then the color will be darker when dyed. Onion SkinsThe skin of the yellow (or red) onion dyes fiber beautifully. I went to the local chain supermarket and asked the produce clerk if I could clean out the onion bin. After quickly explaining what I was doing, he was more than happy to have my do this; it made his produce look better, his job easier, and the skins that would otherwise have been garbage are put to use. NOTE: He did mention that in a month or two that the onions will begin to arrive with less of a skin, so for those interested in dyeing using onion skins, I suggest gathering materials sooner rather than later, or you might be waiting until the Autumn. Having never dyed with onion skins before, I did a search online and found some sources that hinted at soaking the skins for 24 hours prior to using them. I took 2 plastic jars and filled them with skins (which I first weighed so that we had an idea of the weight of the skins we used), then poured boiling water on them and let them soak for a few hours the morning of the class. I figured it can't hurt, and while it wasn't the way our instructor generally did the dyeing, we used the liquid and skins.  We put the dry skins and the ones that were soaked in sacks after weighing the materials (we had 5.6oz of onion skins). Putting the skins in some sort of mesh sack helps keep the dyestuff from tangling in the fibers. Old stockings work really well for this, and these mesh bags worked well for onion skins. In our case, we had about 9oz of yarn which we soaked in cold water for about half an hour. Then, we put the wet fibers in a pot of hot water with about 2oz of mordant (we used Alum) and let it soak in the hot water (which was cooking on a little hotplate) for about an hour. We don't want the water to boil, but the hot water and mordant helps to make the fibers recieve the dye better. There's LOTS to know about natural dyeing, and a wonderful resource is the local library. Check out some books and give it a try! 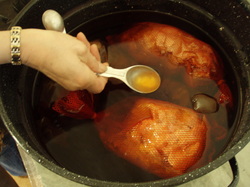 The liquid from the soaked onion skins went in the hot pot of water and the mesh sacks went in as well. Immediately, the color of the water was golden! After they were in the pot for a while, we added the mordanted yarn 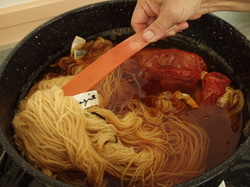 We let the yarn simmer for about an hour, keeping an eye on it to be sure it doesn't boil, and stirring the pot to keep the fibers mixed around the skins. After we were happy with the color, we poured the mixture in the sink (which you shouldn't do with acid dyes!) and squeezed out the yarn. At that point, it needs to be rinsed (I like to rinse it till the water is clear, then put some vinegar in the water to set the color), and hung to dry. 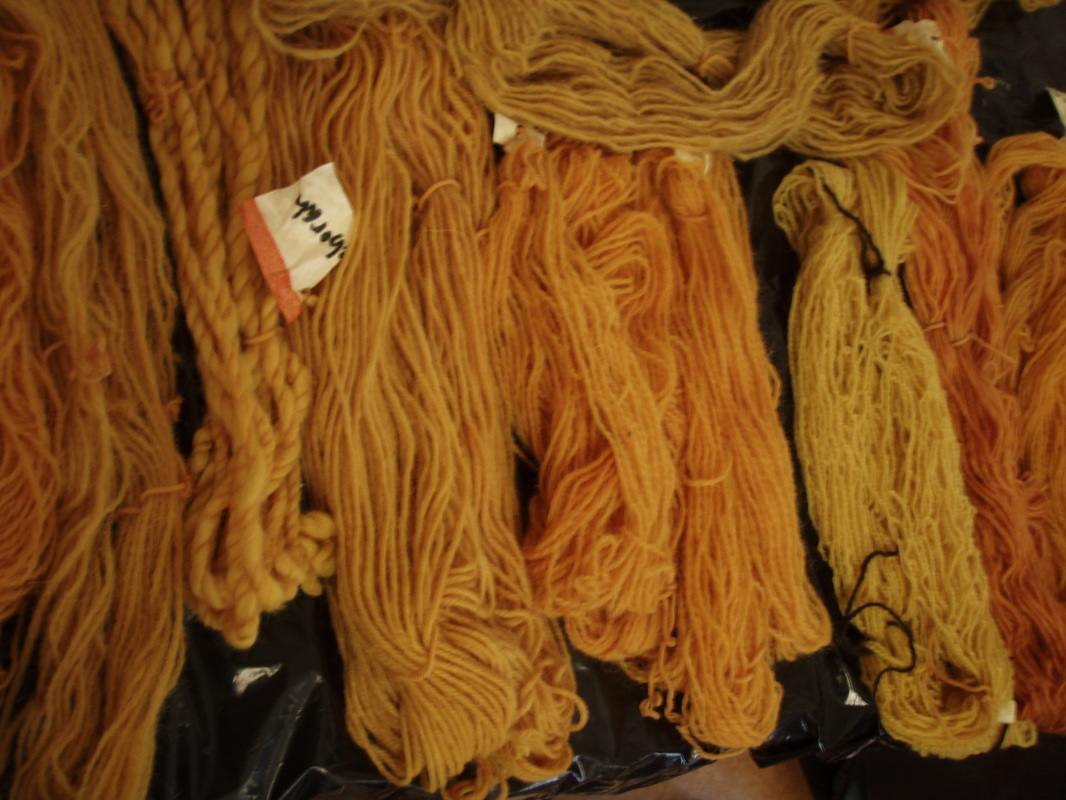 Onion skins make an amazing range of golds and yellows. The fiber on the far right of this photo was "overdipped" in the madder dyepot which is why it gets a bit more orange at the bottom of the skein. Madder RootThe process for dyeing with madder is pretty much the same. The root we used had been harvested around 15 years ago so this was a bit of an experiment. The root bits could have been smashed up a bit more, but other than that, here's what we did...  Madder roots in the mesh bag sitting in the dyepot cooking out their delicious color! We let this cook just like we did the onion skins. These sticks came out during the process; it would have probably been good to use the leg of a ladie's stocking for these bits... Again, we had 9oz of yarn, soaked in cold water then put it in a pot with the alum (again about 2oz) and soaked for 1 hour. We had 8oz of madder root which was soaked overnight in a big glass jar. The liquid went into the pot and the root bits went into the mesh bag.  When we were done with the process, the fibers turned out this gorgeous orange/peach/rust color! After soaking them and hanging them to dry (remember to put them somewhere that if they happen to drip that if it happens to still have dye in it it won't be a problem) - I hang my skeins in a tree in the backyard - the water drips on the grass below... and it doesn't stain anything. 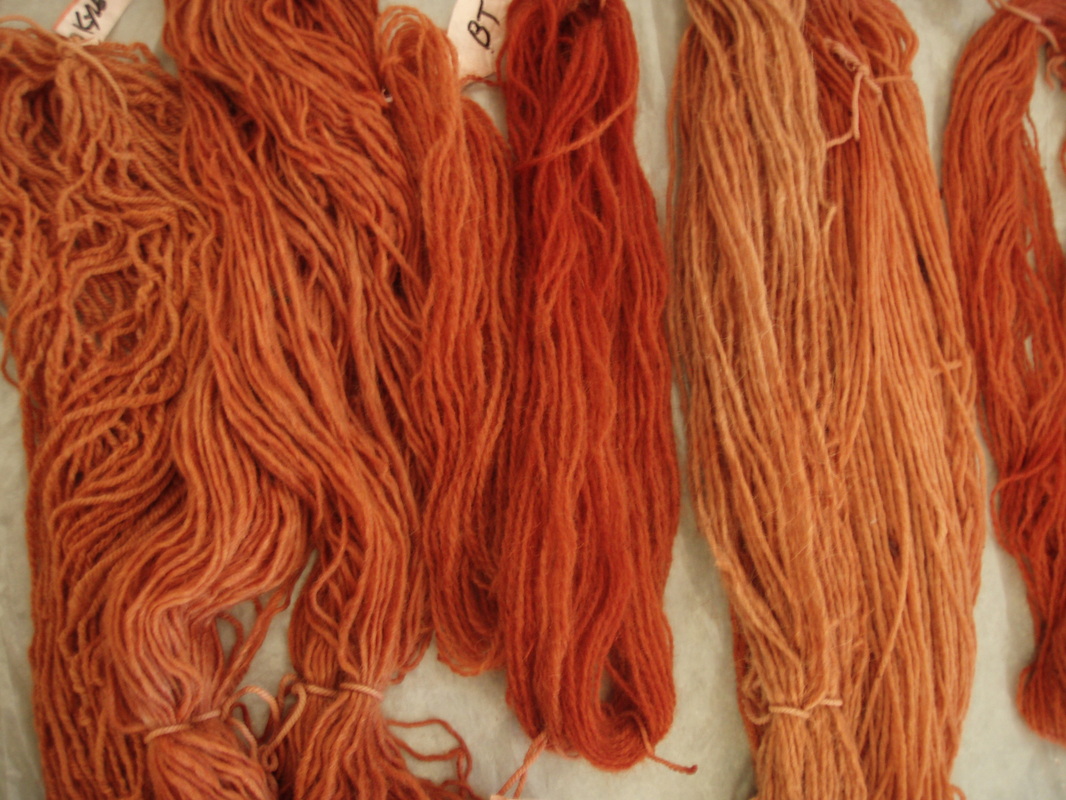 BrazilwoodThe week before we dyed with Brazilwood; an endangered wood! One of the participants got Brazilwood shavings from a woodworker who makes violin bows! The wood is old, and is part of his collection of materials. Instead of the shavings being thrown out, he allowed us to do some dyeing with it! The color we got is a gorgeous pink/orange! You'll also notice that there is some purple colors in here... After the dyeing, we added baking soda to the dyepot which made the purple/fuschia color, and added vinegar to a different "afterbath" and that made the brighter coral color. 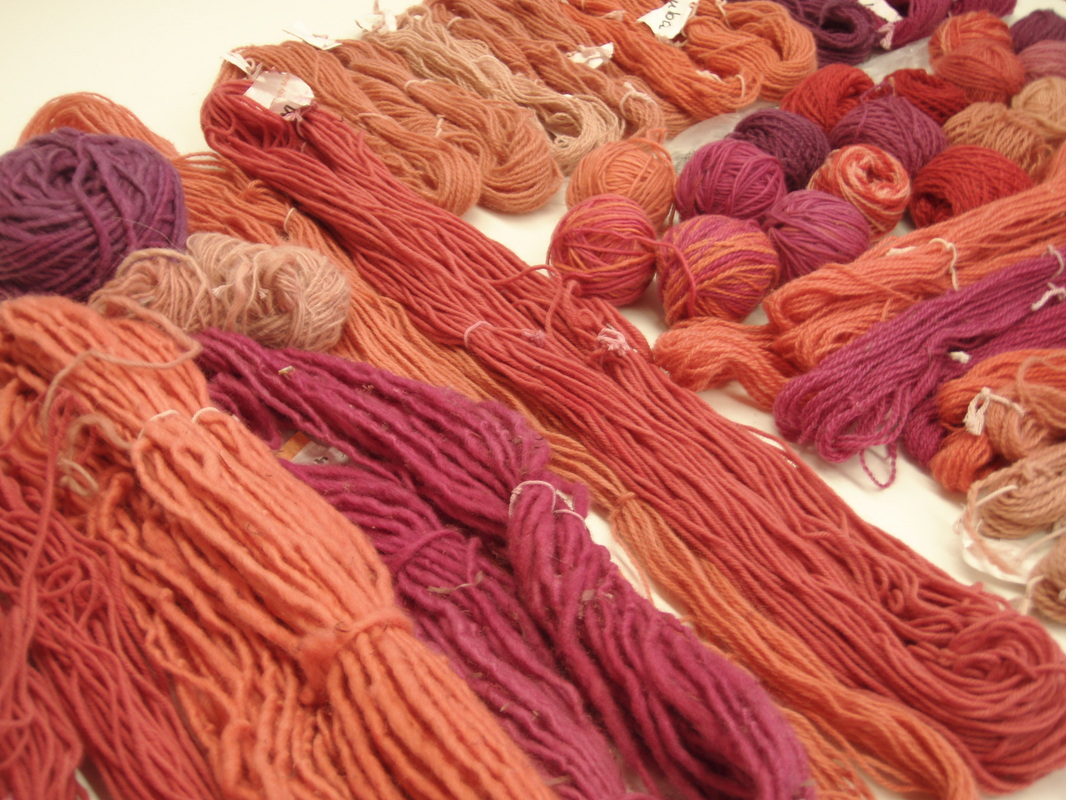 The sort of red ball in the middle of the last image is one that a student overdyed. It's just dyed with the same brazilwood 2 weeks in a row. Gorgeous! 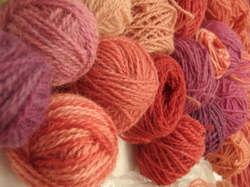 So there you go... natural dyeing, a few different ingredients, and unpredictable (but beautiful) results! Go get a book from the library or your local book shop, do a google search for a natural dyeing workshop in your area, and get to it! There's a world of color out there for you to discover!
Here's a helpful online link: Dharma Trading offers natural dyes and mordants for purchase (as well as a LOT of other things) - if you can't find materials locally, you can always order from them! |
Archives
July 2023
Categories
All
|
|||||||||||||||||||


 RSS Feed

|
ExploreFor Fun
|
Support |
Connect |
© 2006-2023 Kyle William. All Rights Reserved.